


Wagner Paint Sprayer Troubleshooting: Quick Fixes for Common Issues
- Dec 14, 2025
- 16 min read
There's nothing worse than getting into a groove on a project, only to have your paint sprayer quit on you. When your Wagner sprayer acts up, don't immediately assume the worst. Most of the time, the fix is surprisingly simple and boils down to one of three things: your paint is too thick, the pressure is wrong, or the tip is dirty.
Get a handle on these three checks, and you’ll solve the vast majority of sprayer headaches without ever having to break out a wrench.
Diagnosing Problems Before You Start a Full Teardown
When your sprayer stops cooperating, it can bring the whole job to a grinding halt. Before you start taking things apart, just pause for a second. Most issues are minor and can be fixed right there on the spot with a quick adjustment. This "first response" approach will save you a ton of time and get you back to painting much faster.
Think of it like being a detective. You're just looking for the most obvious clues first. Is it sputtering? Is the spray pattern looking weird? Or is nothing coming out at all? Each of these symptoms points to a specific—and usually simple—fix.
The Usual Suspects: Clogs and Pressure
Nine times out of ten, the culprits are partial clogs and incorrect pressure settings. If you look at painter forums and support requests, you’ll find that wonky spray patterns make up nearly 70% of user complaints. That tells you just how common this is.
Over the course of a job, paint can start to dry and build up in and around the spray tip, messing with the paint flow. This is what causes those classic "tails" or stripes in your spray pattern.
This simple decision tree is a great way to visualize the first questions to ask yourself.
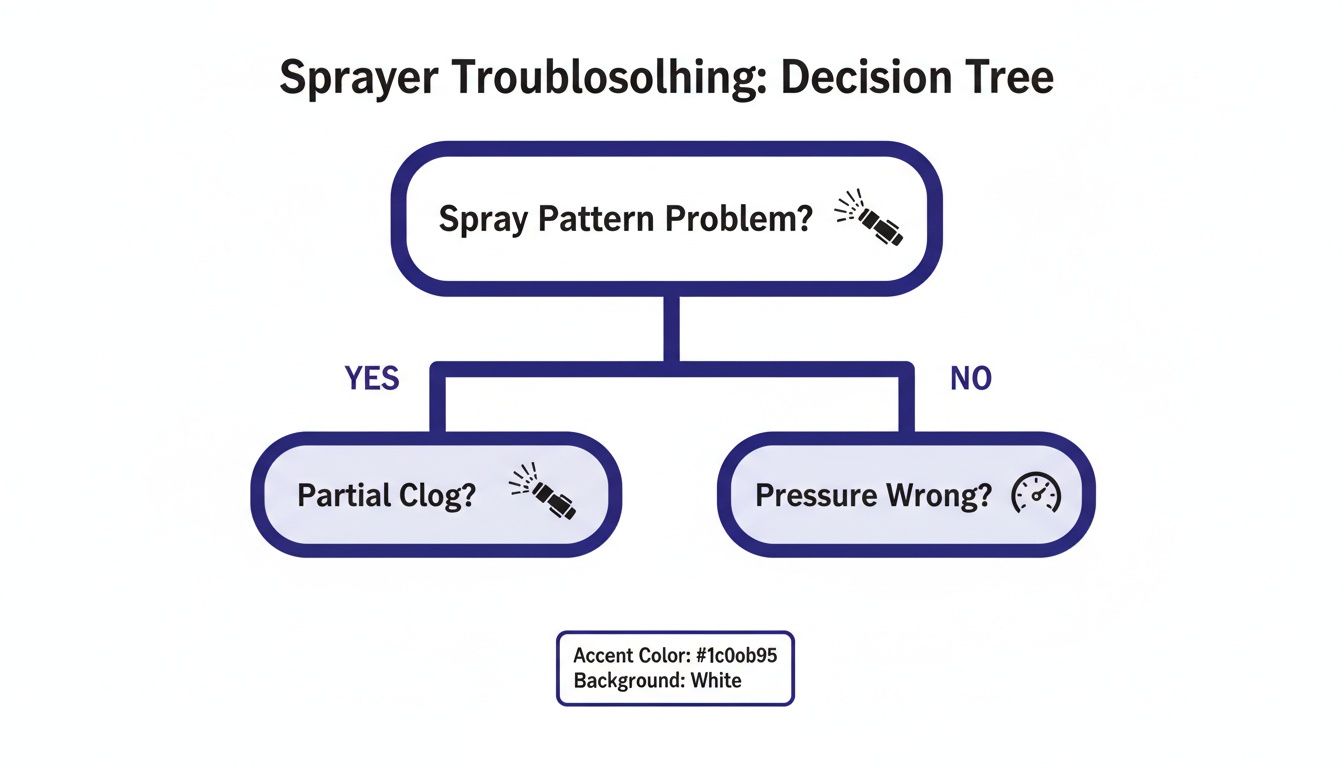
As you can see, the spray pattern is your number one clue. It almost always leads back to checking for a clog or adjusting the pressure, which are the root causes of most problems.
Quick Diagnosis Checklist for Common Sprayer Issues
When your sprayer starts acting up, it's easy to get frustrated and overlook the simple stuff. This quick table helps you match the symptom to the most likely cause so you know exactly where to start.
Symptom | Most Likely Cause | First Action to Take |
|---|---|---|
No paint flow | Empty paint bucket or clog in the suction tube | Check your paint supply; clear any visible clogs in the hose. |
Sputtering spray | Air in the system, low pressure, or thick paint | Prime the sprayer again; increase pressure setting; thin the paint slightly. |
Uneven pattern ("tails") | Worn spray tip or incorrect pressure setting | Increase the pressure first; if that fails, replace the spray tip. |
Excessive overspray | Pressure is set too high for the tip/material | Gradually decrease the pressure until the pattern is even but not misty. |
Leaks at the gun | Loose connections or worn seals/packings | Tighten all fittings; inspect and replace any damaged O-rings or seals. |
Running through these checks before you do anything else will often solve the problem in minutes. These principles of checking for blockages and pressure issues are pretty universal for high-pressure equipment. In fact, if you work with other tools, you might find our guide on troubleshooting pressure washer problems has some familiar diagnostic tips.
Pro Tip: Always, always test your spray pattern on a piece of cardboard before you hit your actual surface. This three-minute check lets you dial in the pressure and flow to get that perfect fan pattern, preventing a mistake you'll have to fix later.
For painters and contractors here in San Luis Obispo county—from Paso Robles and Atascadero to Arroyo Grande and Pismo Beach—knowing these quick fixes is crucial for keeping a job on schedule. If you’ve tried these steps and are still stuck, it might be time to look at a deeper mechanical issue. But trust me, starting here will get you back to work most of the time.
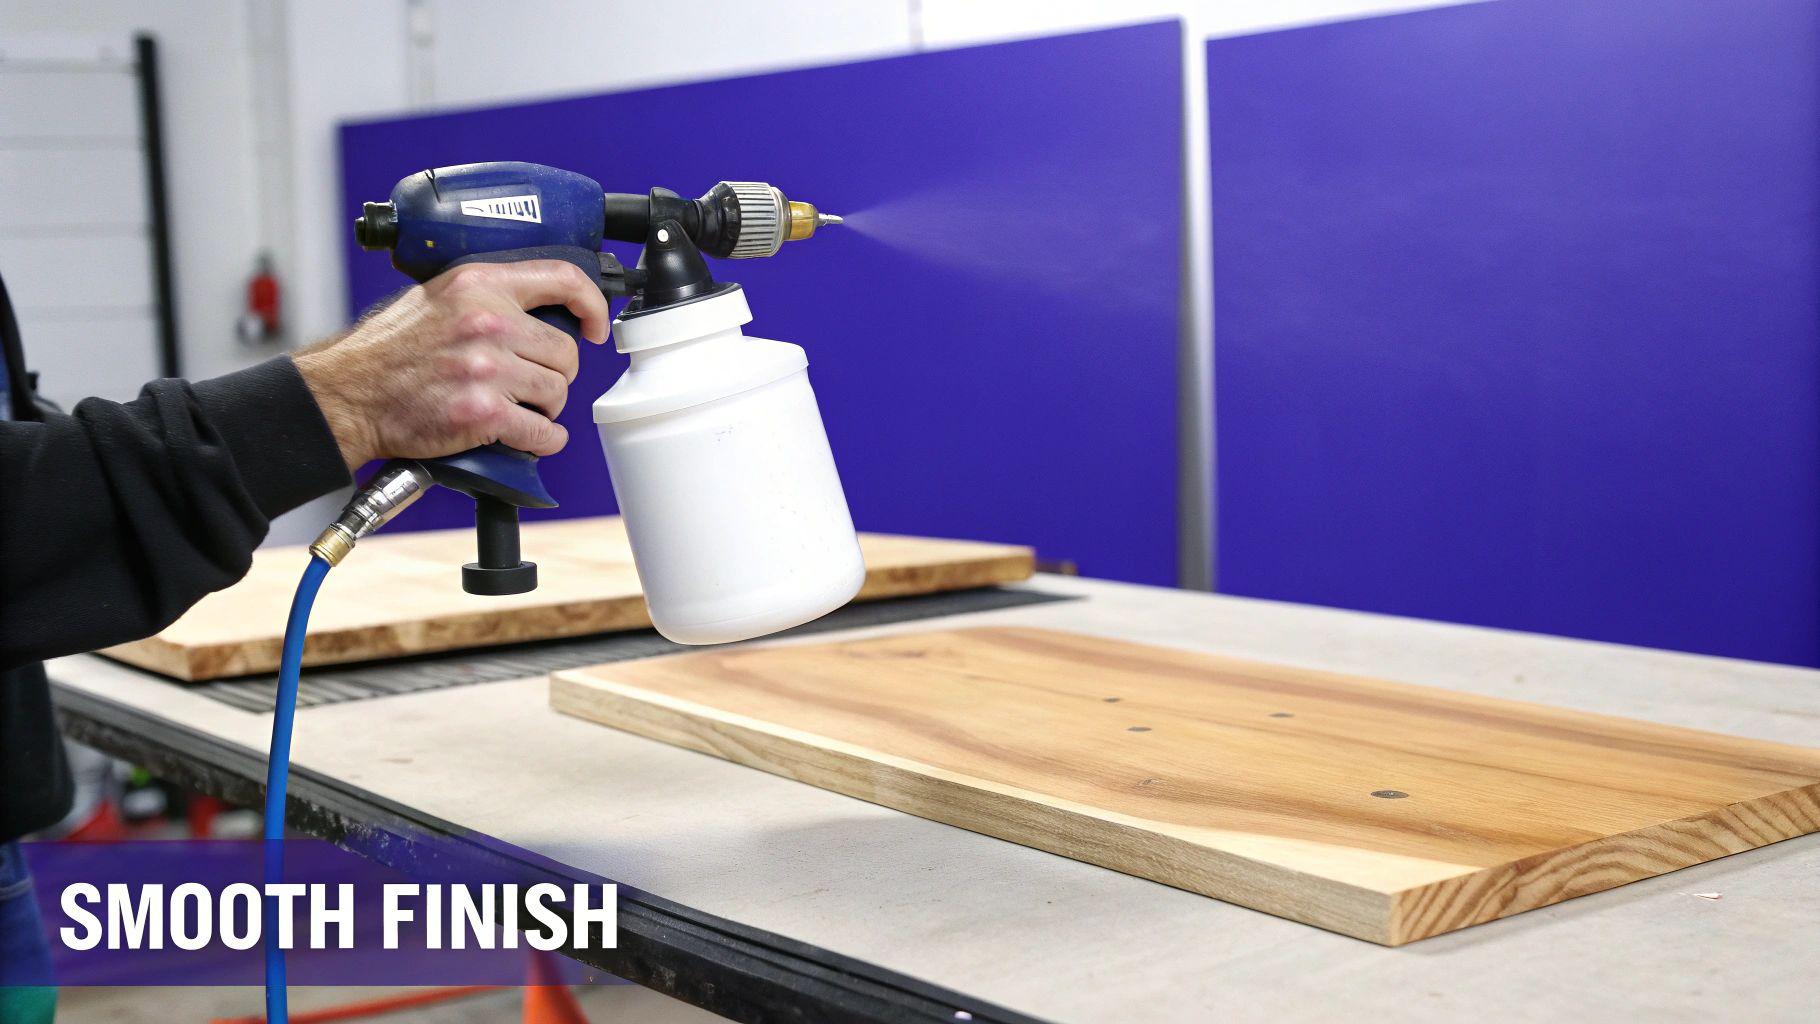
Fixing Sputtering Splatters and Uneven Finishes
There's nothing more frustrating than stepping back to admire your work, only to find the finish is ruined by spitting splatters and a blotchy, uneven texture. When your Wagner sprayer is spitting instead of laying down a smooth, consistent fan, it’s a dead giveaway that something is wrong with the atomization process. This is a super common hiccup, but the good news is, it's almost always an easy fix.
The trail of evidence usually leads back to the paint itself. If the material is too thick, the sprayer just can't break it down into the fine mist you need for that flawless coat. Think of it like trying to push honey through a straw—it’s going to come out in lumpy, inconsistent blobs.
Achieving the Perfect Paint Consistency
Guessing when you thin your paint is a recipe for disaster. Add too much water or solvent, and you’ll destroy the paint's integrity, leading to terrible coverage and a finish that won't last. On the flip side, not thinning it enough is what causes the splattering you’re trying to eliminate in the first place.
Improper paint dilution is one of the top reasons for malfunctions in Wagner HVLP sprayers, causing everything from spitting to clogs. In fact, official support data shows it’s a factor in 50% of user queries. For most latex paints, a 5% to 10% dilution is the sweet spot. This small tweak is often all it takes to turn a thick, stubborn material into a sprayable liquid that flows like single cream. For more tips straight from the source, check out Wagner's recommended dilution techniques on their official channel at youtube.com.
A Painter's Trick for Consistency: Here’s a quick way to check your paint's viscosity without any fancy tools—the "drip test." Dip a stir stick into your thinned paint and lift it out. The paint should run off in a steady, thin stream. If it comes off in thick, lumpy drips, it's still too thick. If it runs off like water, you've gone too far.
Checking for Airflow and Atomization Issues
So, you’ve dialed in your paint consistency, but the sprayer is still sputtering. The next place to look is the sprayer's airflow. Proper atomization hinges on a powerful, uninterrupted stream of air mixing with the paint right at the nozzle.
A few small things can easily throw this critical process off balance:
Dirty Air Filter: A clogged air filter is like trying to run a marathon while breathing through a straw—it starves the turbine of air. This leads to weak atomization and a subpar finish. Pop the filter out, give it a clean, or just replace it if it’s caked with dust and overspray.
Loose Union Nut: That big ring connecting the nozzle assembly to the gun body can sometimes vibrate loose while you're working. Even a tiny gap can let in unwanted air, messing with the spray pattern and causing spitting. Always give it a quick hand-tighten before you start.
Dirty Nozzle and Air Cap: Even tiny, dried paint particles on the nozzle or air cap can obstruct both paint and airflow. Most of the time, a quick wipe with a solvent-soaked rag is all you need to clear the blockage and get that clean spray pattern back.
Solving Pattern Problems on the Central Coast
For the pros working in San Luis Obispo, Paso Robles, Atascadero, or down the coast in Morro Bay and Pismo Beach, a reliable sprayer isn't a luxury—it's essential. A sputtering sprayer means an uneven finish, which means re-sanding and re-coating. That costs you valuable time and money on the job site.
By methodically checking your paint's viscosity, making sure all your connections are snug, and keeping your air filters and nozzles clean, you can knock out the vast majority of sputtering issues. This systematic approach turns a frustrating problem into a quick, routine fix, getting you back to laying down the smooth, professional finish your clients are paying for.
How to Unstick a Trigger and Restore Paint Flow
There's nothing more frustrating than a stuck trigger when you're in the middle of a project. You go to spray, and... nothing. Or maybe the trigger feels gummy and sluggish. This is a classic Wagner sprayer issue, and it almost always comes down to one simple culprit: dried paint.
Over time, tiny bits of paint build up inside the gun’s trigger assembly, gumming up the springs, pins, and all the little moving parts. Eventually, that residue hardens like cement, and your once-smooth trigger is completely locked up. This isn't just a minor headache; it leads to drips, spitting, and eventually, a sprayer that won't work at all.
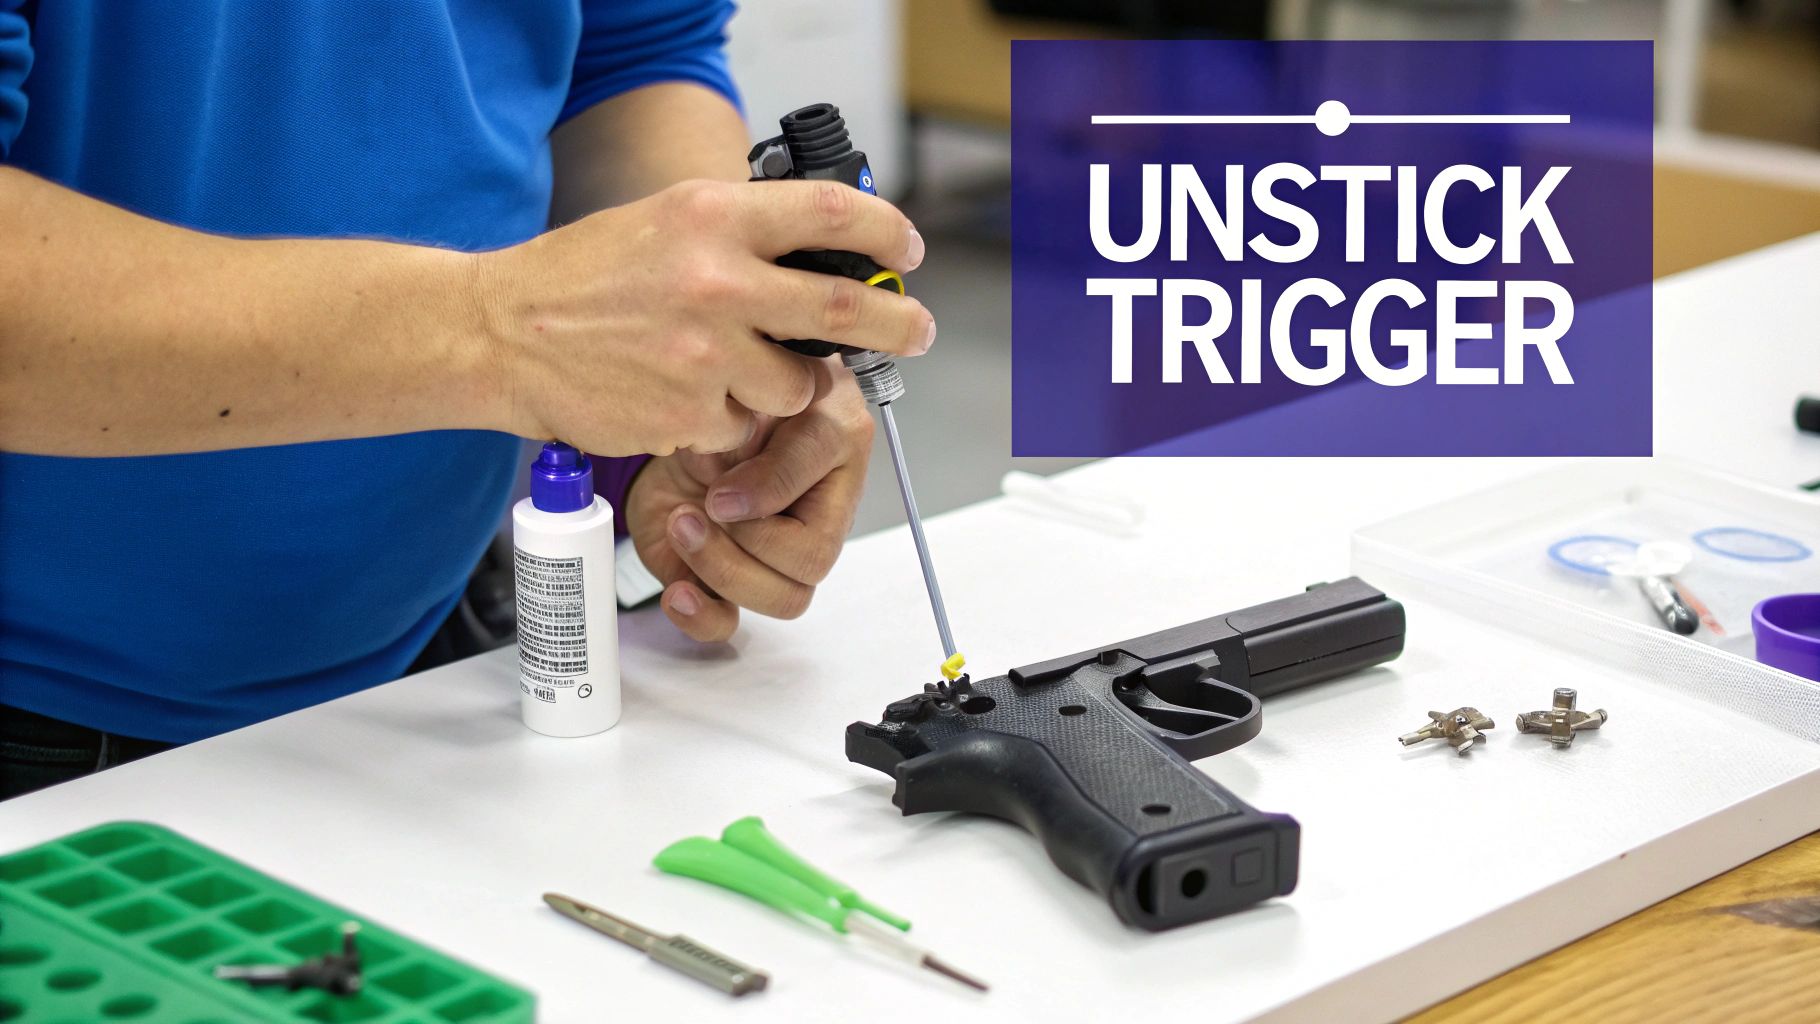
Safely Disassembling the Trigger Housing
First things first, you need to get inside the gun to clean it out. Before you touch a single screw, make absolutely sure the sprayer is unplugged and all pressure has been released from the system. Seriously, never work on a gun that's still under pressure or connected to a power source.
Grab a screwdriver or a hex key, depending on your model. As you remove the screws holding the gun's casing together, pay close attention to how everything fits. Take a quick picture with your phone before you start pulling parts out—it'll be your best friend when it's time to put it all back together.
Cleaning and Lubricating the Components
Once the housing is open, you’ll see the gunk. Your goal is to get every part sparkling clean without causing any damage.
Soak the Metal Parts: Pull out the trigger, pins, and any other metal bits and let them soak in the right solvent. Use mineral spirits for oil-based paints, and warm, soapy water or a cleaner like Tip Clean for latex.
Use a Small Brush: An old toothbrush is perfect for this. Get in there and scrub all the stubborn paint out of the tiny grooves and corners.
Inspect the Spring: While it's all apart, give the trigger return spring a good look. Is it rusty, stretched, or just plain tired? A weak spring can make the trigger feel sluggish, and it's a cheap and easy part to replace.
Lubricate Before Reassembly: After every piece is clean and bone-dry, add a tiny drop of non-petroleum lubricant or sprayer-specific oil to the pivot points. This will keep the action smooth and help prevent gunk from building up again.
This kind of buildup is a massive headache for painters. In fact, paint residue is the cause of 45% of all trigger-related service calls, especially with popular models like the Control Pro series. All that gunk doesn't just jam the trigger; it can lead to uneven spraying that wastes 15-25% of your paint on a single job. You can dig deeper into this common problem with iFixit's excellent guide to fixing a stuck sprayer trigger/162292).
A Critical Reminder: Never use harsh chemicals or anything abrasive on the plastic parts of the gun. You'll risk damaging the housing, which can lead to cracks or a poor seal when you reassemble it. Stick to the right solvents and be gentle.
For any painter in the San Luis Obispo area, from Paso Robles to Arroyo Grande, a working sprayer is non-negotiable. A stuck trigger on a job in Atascadero or Pismo Beach means costly delays. By learning this quick cleaning routine, you can fix the problem on the spot and keep your projects in Morro Bay and Grover Beach running on schedule.
Solving Leaks, Clogs, and Sudden Pressure Loss
Leaks, clogs, and a sudden drop in pressure are more than just messy frustrations—they're your sprayer’s way of telling you something is wrong. These issues can stop a job in its tracks, ruin a perfectly good finish, and, if you ignore them, lead to permanent pump damage. The key is to tackle them systematically, starting with the simplest checks and working your way to the internal parts.
A tiny drip can quickly become a major leak, wasting paint and creating a nasty slip hazard. Similarly, what seems like a minor clog at the tip might actually signal a bigger blockage somewhere else in the system. And when you lose all pressure out of nowhere? That's a clear sign a critical component has likely failed.
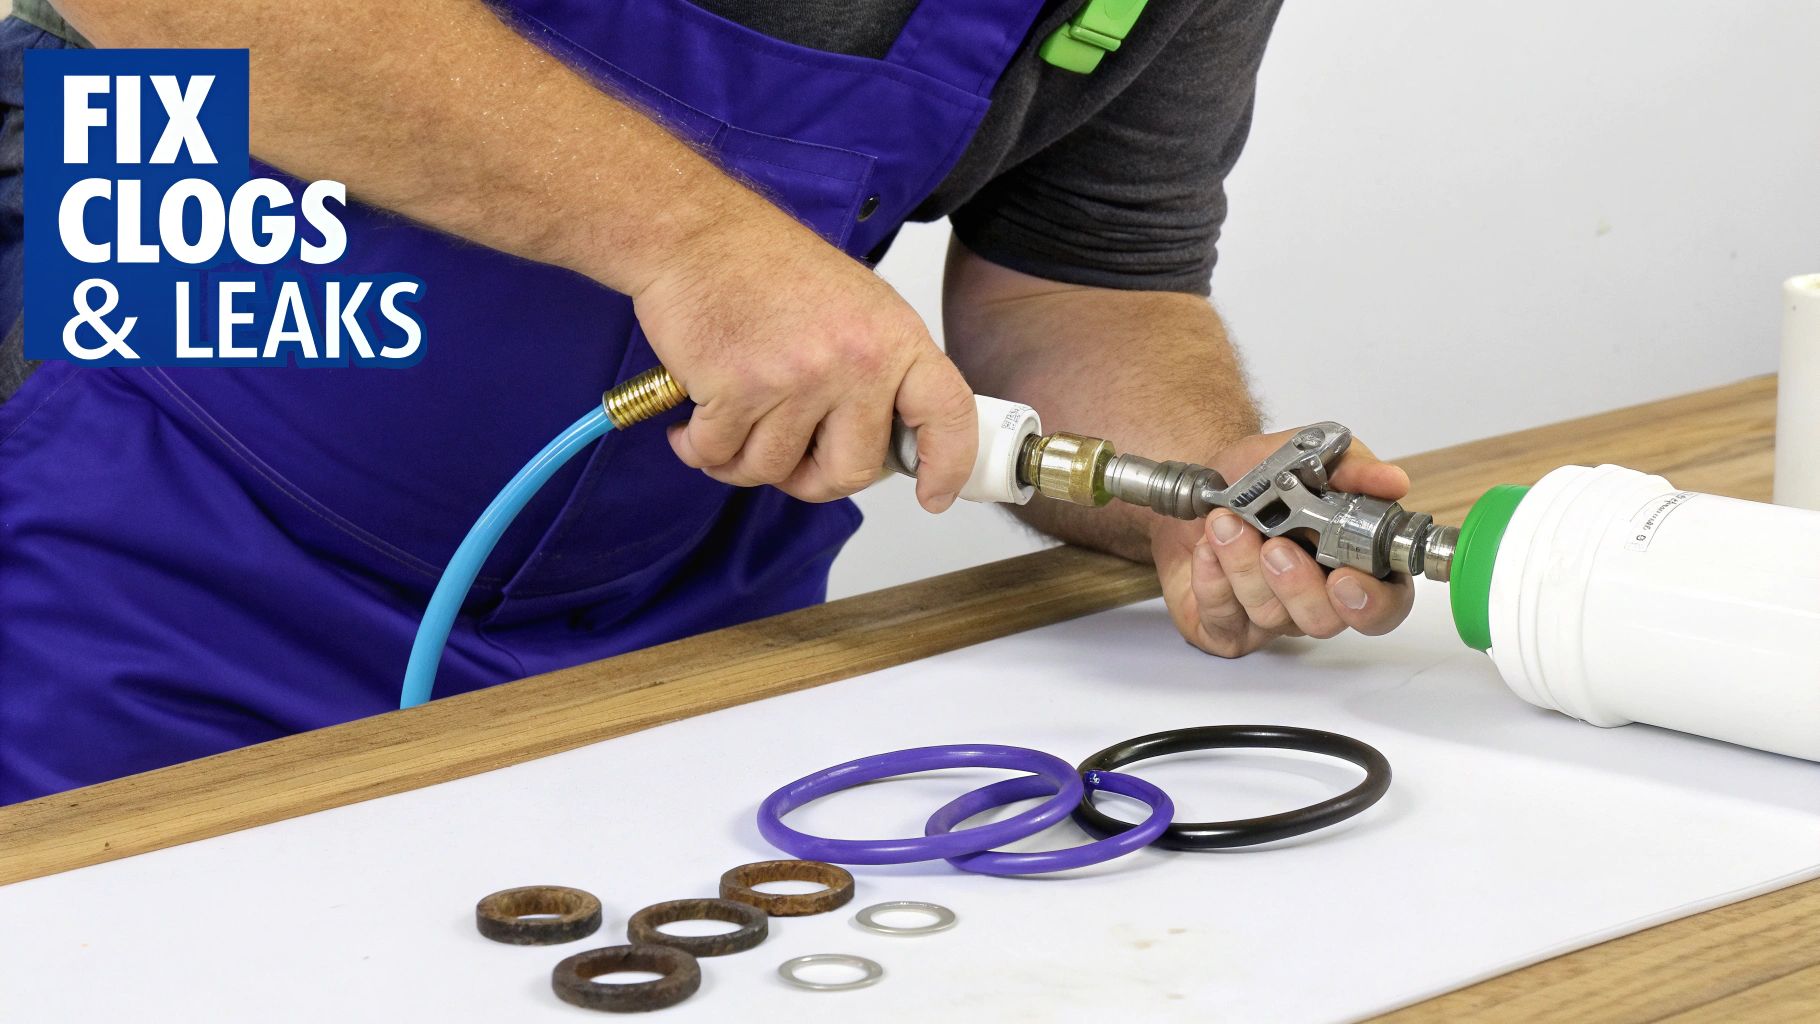
Pinpointing and Fixing Pesky Leaks
A leak is usually easy to spot, but tracing it back to the source can sometimes be a pain. Nine times out of ten, the culprits are either loose fittings or worn-out seals. Before you touch a single thing, depressurize the system completely. Seriously, don't skip this step. Once it's safe, start your hunt at the gun and work your way back toward the pump.
Give these key connection points a good look:
Spray Gun and Hose: Make sure the gun is threaded on tight.
Hose and Pump Outlet: A vibrating pump can easily work this connection loose over time, so check that it's snug.
Suction Tube and Inlet: Confirm the suction tube is firmly seated on the pump's inlet fitting.
If every connection is rock solid but you're still seeing drips, a worn seal is almost certainly the problem. O-rings and packings are wear-and-tear items; they aren't meant to last forever. Look for any visible seals that appear cracked, brittle, or flattened. Swapping out a $2 O-ring is a whole lot cheaper than replacing a pump assembly it could have saved.
Tackling Clogs Beyond the Spray Tip
Every painter knows to check the spray tip for clogs—that’s day-one stuff. But that's just the first place a blockage can happen. Your Wagner sprayer has several filters designed to keep junk out of the pump, and any one of them can get clogged up.
Start with the inlet filter (or strainer) on the end of your suction tube. It’s the first line of defense and a magnet for dried paint flakes and gunk from the bottom of the paint can. If that's clear, check the gun filter, which is usually tucked inside the handle of your spray gun. This one catches finer particles that sneak past the inlet strainer. A clog here will kill your flow right at the gun, causing that frustrating sputtering or stopping you cold.
For contractors and painters working in places like San Luis Obispo or Paso Robles, a surprise clog can derail an entire day's schedule. It's a best practice to have spare filters on hand. A quick swap on-site in Arroyo Grande is much faster than driving back to the shop.
Diagnosing Sudden and Complete Pressure Loss
Losing pressure all at once is alarming and almost always points to an internal pump issue. The sprayer might still run, but it just won't build enough pressure to atomize the paint. When this happens, you need to investigate the components responsible for creating and holding that pressure.
A stuck or dirty check valve is one of the most common culprits. The pump's inlet and outlet valves rely on small ball bearings to control paint flow. If a stray piece of debris or dried paint gets in there and stops one of those balls from seating properly, the pump simply can't build pressure.
Another frequent failure point is worn pump packings. These are the seals that create a tight chamber around the piston rod. As they wear down, they can't maintain pressure, leading to a significant drop in performance. The idea of maintaining these seals isn't unique to sprayers; you can see similar principles at play in our guide to mastering pressure washer pump maintenance and learn how preventive care saves equipment.
Finally, take a look at the prime/spray valve. If the valve gets blocked or just doesn't seal correctly when you switch it to the "spray" position, pressure will bleed off instead of going to the gun.
If you’ve run through all these checks and your sprayer is still giving you trouble, it’s time to call in a pro. For complex internal repairs, especially for our customers in Atascadero, Pismo Beach, Grover Beach, and Morro Bay, reaching out to an authorized service center like Contractor's Maintenance Service is the best move. We’ll get it done right with genuine parts and have your sprayer running like new.
Building a Solid Sprayer Maintenance Routine
Let's be honest, the best way to troubleshoot your Wagner paint sprayer is to avoid having problems in the first place. I've seen it a thousand times: a solid maintenance routine is what separates a reliable, long-lasting machine from one that causes constant headaches on the job.
It's not about some complicated, time-consuming ritual. It’s about forming a few simple habits that protect your sprayer’s guts from the gunk. A quick rinse with water at the end of the day just isn't going to cut it.
What to Do After Every Single Job
Thorough cleaning is the one thing you absolutely cannot skip. Once paint dries inside your pump or gun, it's like concrete. It’ll seize up check valves, tear up your packings, and create stubborn clogs that a simple flush won’t ever touch.
Flush Until It’s Pure: Run the right cleaning fluid through the system—water for latex, mineral spirits for oil-based paints. Don't stop until it comes out perfectly clear. Seriously, don't rush this.
Break Down the Gun: Take the gun completely apart. That means the tip, tip guard, and the gun filter. Get a soft-bristled brush and scrub every single piece until it's spotless.
Clean Every Filter: Pull out the inlet filter (the little strainer on your suction tube) and give it a good cleaning. If your sprayer has a manifold filter at the pump, clean that too.
Finish with Storage Fluid: This is the step everyone wants to skip, but it’s critical. Once the system is clean, run a storage fluid like Pump Armor through it. This stuff prevents corrosion and keeps all the internal seals from drying out and cracking.
I can't tell you how many pumps I've seen ruined by skipping the storage fluid. Leaving plain water inside is a recipe for rust and mineral buildup. That gunk will freeze your piston rod solid. Think of Pump Armor as your sprayer’s best insurance policy.
Keeping an Eye on Wear-and-Tear Parts
Some parts on your sprayer are consumables—they’re designed to wear out. The trick is to replace them before they fail you in the middle of a project in San Luis Obispo or Atascadero.
Keeping spares organized is half the battle. If you've got a van or a busy shop, well-designed mobile workshop solutions can be a lifesaver for keeping track of tips, filters, and packing kits.
Being proactive here makes all the difference. Try keeping a simple log of how many hours you've run the sprayer or how many gallons you've pushed through it. This helps you get a feel for when parts are getting close to the end of their life, turning a surprise breakdown into a scheduled swap.
Here’s a simple checklist to follow. For a deeper dive, take a look at our complete equipment preventative maintenance checklist.
Your Wagner Sprayer Maintenance Schedule
Follow this checklist for tasks to perform after every use, after 10 hours of use, and annually to keep your sprayer in prime condition.
Frequency | Maintenance Task | Key Purpose |
|---|---|---|
After Every Use | Complete cleaning and flush with Pump Armor | Prevents paint from hardening and internal parts from corroding. |
Every 10-20 Hours | Inspect spray tip for wear and tear | Ensures a consistent spray pattern and prevents paint waste. |
Annually or as needed | Inspect and replace pump packings and seals | Maintains optimal pressure and prevents fluid leaks. |
Ultimately, a well-maintained sprayer is a money-maker. For our local customers in Paso Robles, Arroyo Grande, Pismo Beach, Grover Beach, and Morro Bay, equipment uptime is everything.
If you’re sticking to a good maintenance routine but still running into issues, it might be a sign of a deeper problem. That's when it's time to bring it in. Contractor's Maintenance Service is here to help with professional diagnostics and repairs to get you back on the job fast.
Need an Expert Wagner Repair in San Luis Obispo County?
Look, sometimes a sprayer problem is just stubborn. You’ve done everything right—cleaned every filter, double-checked every seal, and even thinned your paint to the perfect consistency—but it’s still not working. Whether you're dealing with a mysterious mechanical issue or a pressure loss that just won't quit, you eventually hit a wall.
When your DIY troubleshooting is exhausted, it’s time to bring in the pros. That’s where we come in.
For painters and contractors up and down the Central Coast, Contractor's Maintenance Service is the go-to authorized Wagner and Titan service center for San Luis Obispo County. We handle everything from diagnostics and warranty work to full-blown repairs, and we only use genuine factory parts. We get it—downtime costs you money and throws your whole schedule off track.
Your Local Authorized Service Center
Trust us, we’ve seen it all. Our team has the specialized tools and deep-seated knowledge to tackle the issues that go way beyond routine maintenance. We’re talking about worn-out pump assemblies, tricky electrical faults, and internal valve failures that would have most people scratching their heads.
Instead of burning hours on guesswork, let our trained technicians get straight to the root of the problem. We’ll give you a reliable repair that gets your sprayer back to peak performance, fast. We're proud to be the trusted local partner for pros across the entire region.
When your sprayer is your livelihood, a quick fix won't cut it. A professional repair doesn't just solve the immediate problem; it includes a full inspection to spot potential issues before they turn into your next breakdown.
Areas We Serve on the Central Coast
Our shop is set up to support contractors all over the county. If you're working a job in any of these spots, expert help is just a short drive away:
San Luis Obispo
Paso Robles
Atascadero
Arroyo Grande
Pismo Beach
Grover Beach
Morro Bay
And all the communities in between.
If you’ve tried every troubleshooting step and your Wagner sprayer is still giving you grief, don't let the frustration win. Contact our team at Contractor's Maintenance Service. We'll give you a clear diagnosis and a solid repair to get that essential piece of equipment back in your hands and working like it should.
Common Questions About Wagner Sprayer Problems
Even with the best maintenance, things can go sideways on a job. When you're troubleshooting your Wagner paint sprayer, sometimes you just need a quick, straight answer to a specific problem.
Here are a few of the most common questions we hear from painters and contractors who walk into our San Luis Obispo shop.
Why Won't My Wagner Sprayer Prime or Pick Up Paint?
This is a classic. You're ready to go, and the sprayer just won't pull paint. It’s a frustrating issue that stops projects cold, but the fix is usually pretty simple.
More often than not, the culprit is an air lock in the system or a check ball that's stuck in the fluid section. First, the obvious stuff: make sure your suction tube is fully submerged in the paint and its inlet screen is completely clean. A little bit of gunk here is all it takes to starve the pump.
Next, check that your prime/spray valve is set to "PRIME." If it still won't draw paint, my money is on a stuck inlet check ball, usually from dried paint residue.
You can often free it up with a few gentle taps on the outside of the fluid section with a rubber mallet or even the handle of a screwdriver. If that doesn't do the trick, you'll need to remove the suction tube and carefully nudge the ball loose with something blunt that won't cause damage, like the eraser end of a pencil.
How Often Should I Replace My Wagner Spray Tip?
Think of your spray tip as a consumable part, just like a filter. Its lifespan really depends on what you’re pushing through it. Abrasive paints like latex and especially elastomerics will wear a tip down way faster than thinner stuff like stains or lacquers.
For most of the painters we see from Atascadero to Paso Robles, a good rule of thumb is to swap out the tip after spraying about 40-50 gallons of latex paint.
The biggest clue that your tip is shot is a bad spray pattern. You'll start seeing heavy "tails" on the top and bottom of your spray fan, which means the orifice has worn into an oval shape. Using a worn tip wastes paint by applying it unevenly and also makes your pump work harder to keep up pressure. Swapping it out is just smart preventive maintenance.
A worn tip doesn't just look bad—it costs you money. It can jack up your paint consumption by up to 20% from all the overspray and force you to lay on extra coats to get decent coverage.
Is It Okay to Leave Paint in the Sprayer Overnight?
In a word: no. I know it’s tempting after a long day on a job site in Arroyo Grande or Pismo Beach, but leaving paint in your sprayer overnight is one of the worst things you can do for the machine. Honestly, it's the number one cause of stubborn clogs and premature failure of internal parts.
When paint sits, it starts to harden on critical components like the piston, packings, and check valves. This turns into a nightmare cleanup and can cause permanent damage that a simple cleaning won't fix.
Always—always—take the extra 15 minutes to flush your sprayer with the right solvent after you wrap up for the day. It’s the single most important thing you can do to make sure your Wagner is ready to go for the next job.
If you've run through these common fixes and you're still stuck, Contractor's Maintenance Service is here to help. For expert diagnostics, warranty work, and repairs in San Luis Obispo County and the surrounding areas, stop by the shop or visit us online at https://www.contractorsmaintenanceservice.com.