How to Clean Airless Paint Sprayer A Pro Contractor's Guide
- Jan 1
- 15 min read
Knowing how to clean an airless paint sprayer is about much more than a quick rinse at the end of the day. It’s a systematic flush of the pump, hose, and gun with the right solvent for the paint you just ran through it. Get this process down, and you’ll prevent the clogs and headaches that kill your momentum. It’s the single most important maintenance task you can perform.
Why Smart Contractors Prioritize Sprayer Cleaning
Every pro has been there: you’re mid-job, the deadline is closing in, and daylight is burning. Suddenly, your sprayer sputters and clogs. An equipment failure isn't just an annoyance; it's a direct hit to your bottom line. Every minute spent troubleshooting a jammed tip or a seized pump is time you aren't getting paid.
This guide isn’t about generic advice. It’s about the real-world costs of cutting corners—lost hours, wasted paint, and a reputation on the line. That 20-minute cleanup isn't a chore; it's the smartest investment you can make in your most valuable tool. A disciplined routine protects your sprayer and guarantees it performs flawlessly on the next job, saving you from expensive emergency repairs down the road.
The True Cost of Skipping a Cleanup
For contractors working up and down the Central Coast, from the vineyards of Paso Robles to the coastal homes of Pismo Beach, equipment reliability is everything. A single day of downtime can derail an entire project schedule, creating a domino effect that impacts other trades and damages your professional standing.
Skipping a thorough cleaning is just asking for trouble. Data from service centers like ours shows that neglecting maintenance leads to clogs in 65% of contractor-grade units within the first year, spiking repair costs by 40%. After the project disruptions of 2020, it was the contractors who meticulously maintained their gear who were ready for the market rebound, proving the long-term value of diligence. You can learn more about the industry's focus on equipment readiness from Future Market Insights.
At Contractor's Maintenance Service, we've seen it all. A simple, consistent cleaning process is what separates the most successful, profitable painting contractors from those constantly battling their equipment.
Your Local Partner in Equipment Health
As the go-to service center for pros in San Luis Obispo, Santa Maria, Paso Robles, Atascadero, Arroyo Grande, Grover Beach, Pismo Beach, Morro Bay, and Los Osos, we’ve seen firsthand how proper care separates the real professionals from the amateurs. A well-maintained sprayer delivers a perfect finish, runs efficiently, and lasts for years. A neglected one becomes a constant source of frustration and eats away at your profits.
This guide gives you the know-how to master the cleaning process. By making these steps a habit, you’ll not only protect your investment but also ensure you’re always ready to deliver the high-quality results your clients expect. Your sprayer is the heart of your operation—keeping it clean is just good business.
Setting Up Your Cleaning Station for Speed and Safety
Before you even think about running a cleaning fluid through your machine, get your workspace organized. A smart setup, whether you're on-site in Arroyo Grande or back at the shop in San Luis Obispo, turns a tedious chore into a quick, safe routine. Skipping this prep work doesn't just waste time—it's a serious safety risk.
The first and most critical step is to safely depressurize the sprayer. Don't mess around with this. High-pressure injection injuries are nasty and can happen in a blink. Always follow your sprayer's specific instructions for relieving pressure. It usually involves engaging the trigger safety, shutting off the power, and turning the prime valve to "prime" or "drain" while pointing the gun into a waste bucket. One last pull of the trigger releases any leftover pressure.
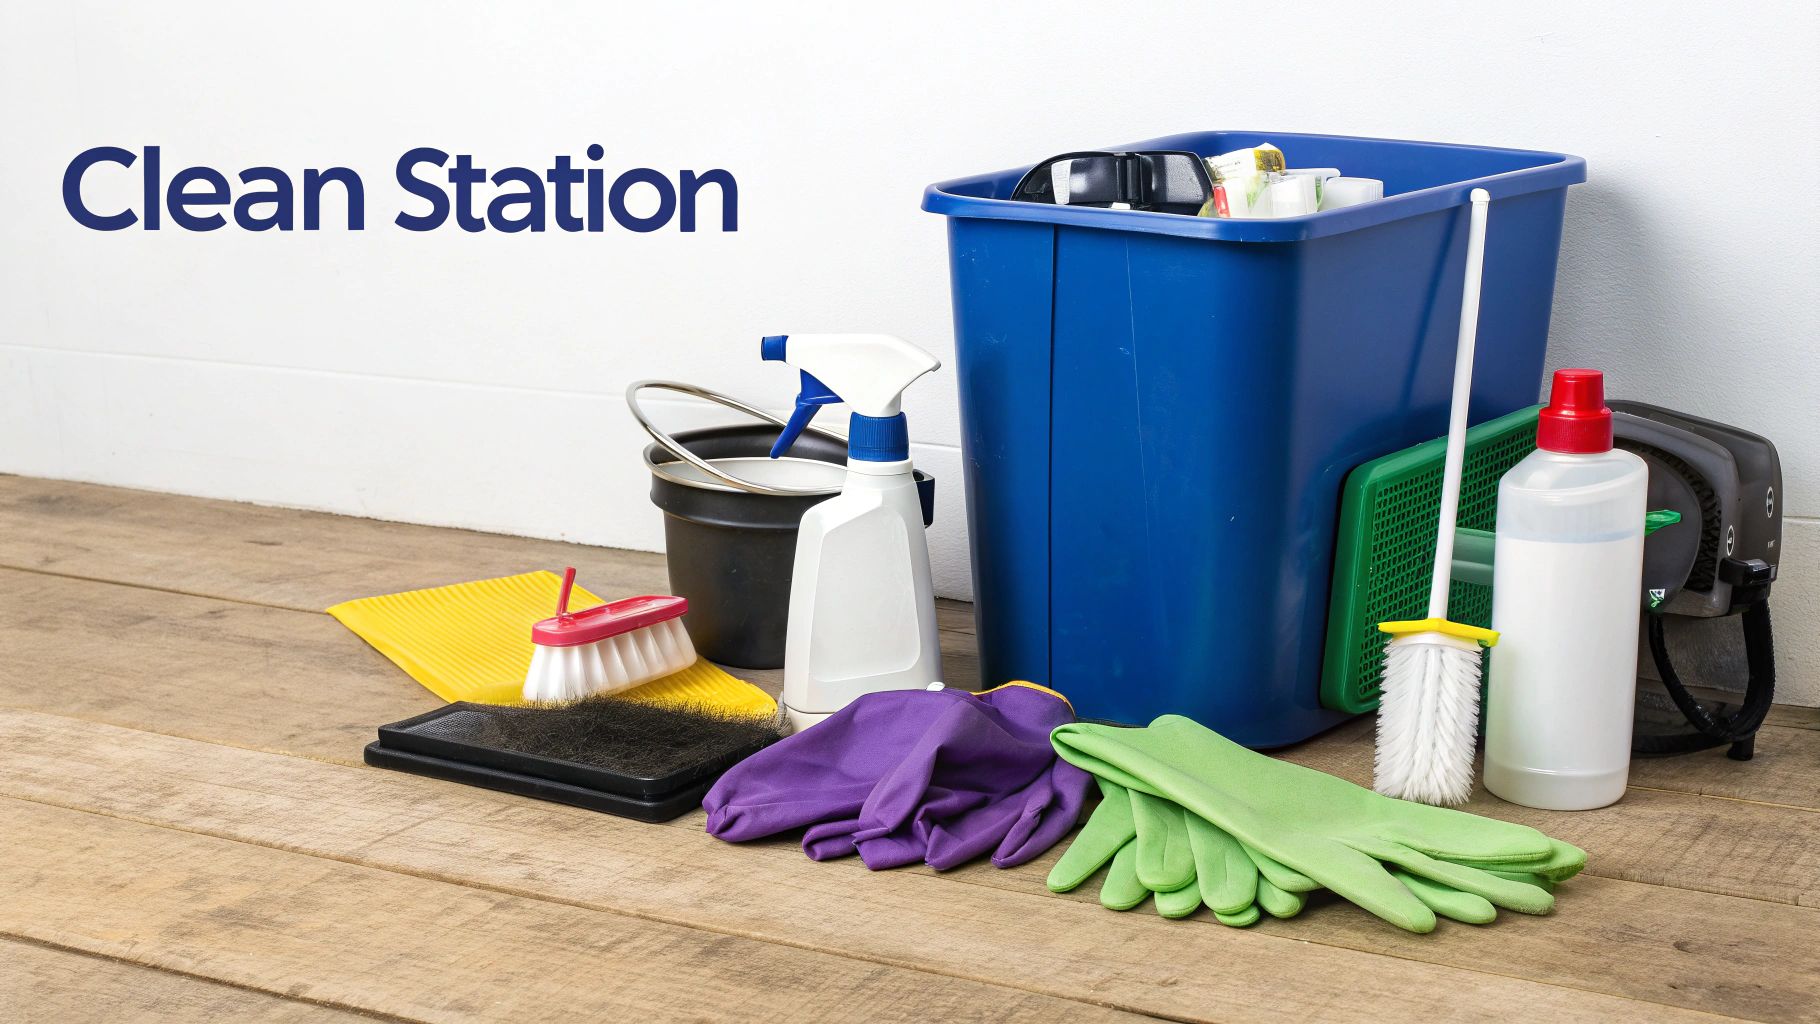
Your Essential Cleaning Gear Checklist
Nothing’s more frustrating than getting halfway through a cleanup and realizing you’re missing something. Having all your gear within arm’s reach is the key to getting this done fast. So, before you start, pull everything together.
Here’s what every pro needs on hand:
Two Designated Buckets: You need one for the initial paint purge and solvent flush (your "waste" bucket) and a second clean one for the final rinse. Never, ever mix the two.
The Right Cleaning Fluid: For latex and other water-based coatings, all you need is water. If you’ve been spraying oil-based paints, lacquers, or shellacs, have the correct mineral spirits or paint thinner ready to go.
Personal Protective Equipment (PPE): This part is non-negotiable. At a minimum, you need chemical-resistant gloves and safety glasses to guard against splashes and deadly injection hazards.
Cleaning Brushes: A few soft-bristle brushes are a must. An old toothbrush is perfect for scrubbing the spray tip, guards, and filters without scratching them up.
Getting this stuff ready ensures that once you start cleaning your airless sprayer, you can power through without stopping. Contractors from Paso Robles to Pismo Beach who make this a standard practice save a ton of time at the end of every single day.
A dedicated, well-stocked cleaning kit isn't just about being organized. It's a professional system that ensures safety, protects your equipment, and gets you packed up and on to the next job faster.
Water-Based vs. Solvent-Based Setups
Your cleaning station will look a bit different depending on what you just sprayed. The basic idea is the same, but your choice of fluid and how you dispose of it changes completely. Using the wrong solvent isn't just bad for your sprayer; it’s a fire hazard and an environmental issue.
For water-based (latex) paint, the setup is simple. You’ll just need a water source and your two buckets. The first flush is usually with warm, soapy water, followed by a final rinse with clean water to get rid of any soap residue.
For oil-based or solvent-based paints, you have to be more careful. You'll be using mineral spirits or another recommended solvent instead of water. These fluids are flammable and give off strong fumes, so make sure your cleaning area is well-ventilated. Do it outdoors or in a shop with the bay door wide open. Never clean with solvents in a small, enclosed room without proper airflow. It’s a simple step that keeps you safe. Your final flush will be with fresh, clean solvent to get rid of any lingering paint before you put the machine away.
The Complete Flushing Process for Any Paint Type
This is it—the most critical part of sprayer maintenance. Getting every last bit of paint out of your rig's internals isn't just a quick rinse. It's a methodical process that guarantees your pump, hose, and gun stay clean and ready to go. If you cut corners here, you're setting yourself up for those job-killing clogs that always seem to pop up at the worst possible time.
First things first, get your intake tube out of the paint and into a designated "waste" bucket. Keep the pressure low and the prime valve open. Now, run the pump just long enough to push the leftover paint in the hose back into your paint can. It seems like a small step, but doing this on every job adds up and saves you real money on materials over a year. Once that's done, you're ready to start the flush.
Choosing Your Cleaning Weapon: Water vs. Solvents
The single most important decision you'll make when cleaning your sprayer is what fluid to use. Get this wrong, and you'll end up with a gummy, semi-cured nightmare inside your machine that can take hours to fix—if it's fixable at all.
The rule is simple: like dissolves like.
For contractors in San Luis Obispo spraying latex or acrylics, cleanup is pretty straightforward. Your go-to cleaning fluid is plain old water. I've found that using warm, slightly soapy water for the first pass is incredibly effective at breaking down stubborn paint residue and flushing it out fast.
But if you've been spraying oil-based enamels, stains, or lacquers, water is your worst enemy. For these coatings, you have to use a solvent. Your best bets are mineral spirits or the specific paint thinner recommended right on the paint can. This isn't a suggestion; it's a must-do to stop the paint from turning into a solid block inside your pump and hose.
Picking the right paint for your sprayer is just as important as cleaning it correctly. If you want to dive deeper, check out our comprehensive guide to selecting the right paint for your airless sprayer.
Before you start, it helps to have a quick reference handy. This simple table breaks down what you need based on the coating you just sprayed.
Solvent Selection Guide: Water-Based vs. Oil-Based Coatings
Coating Type | Primary Cleaning Fluid | Final Flush/Storage Fluid | Recommended Brush Type | Disposal Consideration |
|---|---|---|---|---|
Water-Based (Latex, Acrylic) | Warm, soapy water | Clean water or Pump Armor | Soft nylon bristle | Can often be disposed of via sanitary sewer (check local regulations) |
Oil-Based (Enamels, Stains) | Mineral spirits or paint thinner | Fresh mineral spirits or Pump Armor | Natural bristle (solvent-resistant) | Must be collected and taken to a hazardous waste facility |
Having the right fluids and tools laid out before you begin makes the entire process smoother and ensures you don't accidentally mix incompatible materials.
Executing the Main Flush
With your intake tube sitting in the right cleaning fluid—water for latex, solvent for oil-based—it's time to get it flowing. Leave the prime valve in the "prime/drain" position and let the pump run for a minute or so. This pushes the fluid through the pump itself, doing the heavy lifting of dislodging the bulk of the leftover paint.
Now, switch the prime valve over to the "spray" position. Take the spray tip and guard off the gun, aim it into your waste bucket, and squeeze the trigger. You'll want to let the pump run until the liquid coming out is completely clear, with no streaks of paint. For a standard 50-foot hose, this might take a couple of minutes. Don't get impatient here.
A common mistake is to stop flushing as soon as the fluid looks mostly clear. Run it for an extra 30 seconds. That final push gets rid of the clinging residue that causes problems later.
The Critical Final Rinse
Once the main flush is done, there's one last step: the final rinse. This is where you use a fresh, clean batch of fluid. Move the intake tube into your second bucket, which should have either clean water or fresh mineral spirits. Run this clean fluid through the system just like you did before.
This step is absolutely crucial, especially when you're working with solvents. A final flush with clean solvent ensures no thinned-out paint residue is left behind to evaporate and gum up the works. This two-bucket method is what the pros do for a reason. It's the only way to guarantee a truly clean machine that's ready for storage or the next job in Paso Robles or Arroyo Grande.
Breaking Down Your Sprayer for a Deep Clean
A good flush is just the start. If you want a sprayer that’s ready to go every single time, the real work is in the details—the small, critical components where most job-stopping clogs and failures begin. Let's get into the parts that will give you the biggest headaches if you ignore them: the spray tip, gun filter, manifold filter, and the inlet strainer.
Treat this as a quick post-job inspection. By giving these parts a thorough clean after you wrap up for the day, you're not just preventing problems. You’re getting eyes on your equipment, letting you spot a worn-out seal or a damaged filter before it fails you mid-spray on a job in Atascadero or Paso Robles.
This diagram lays out the basic three-stage flushing process. It’s the essential first step before you start breaking down the individual components.
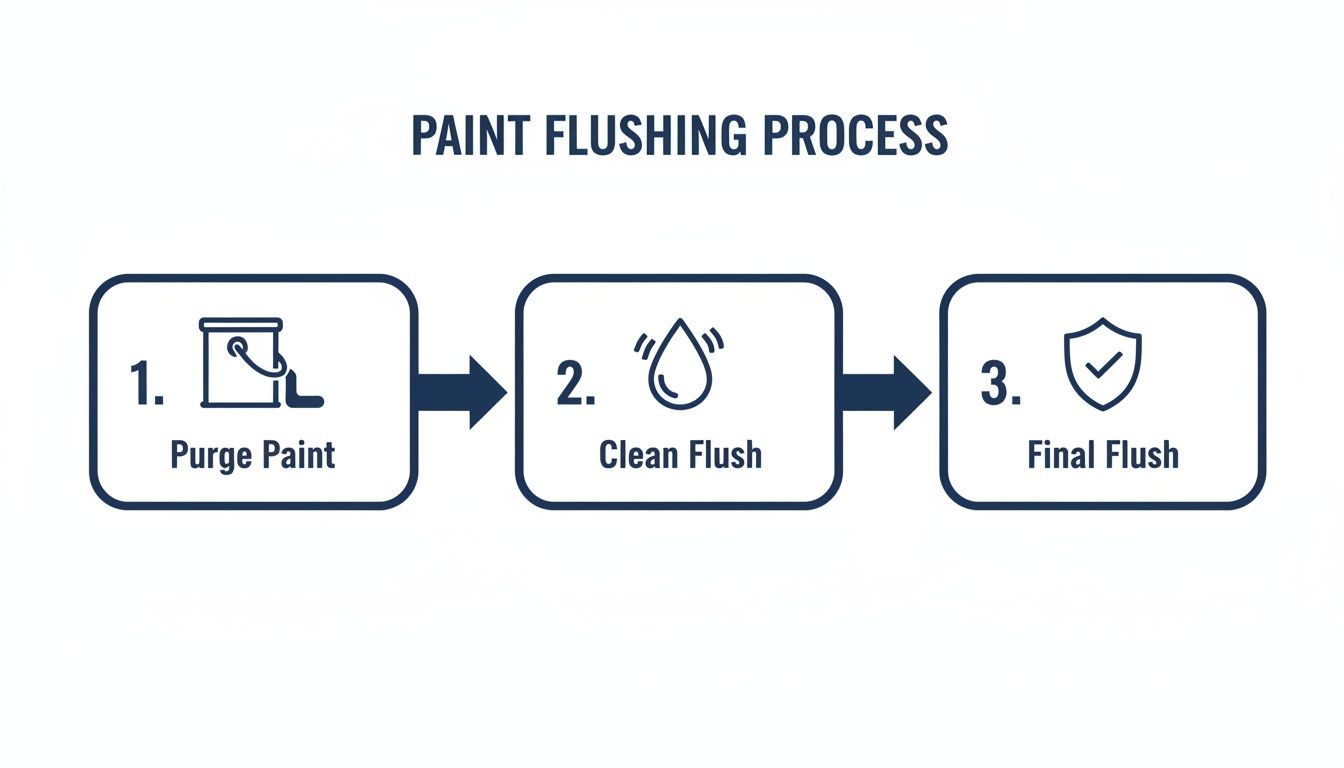
Following this sequence—purge, clean, and final flush—gets the bulk of the material out of the system. This makes cleaning the smaller, more sensitive parts much faster and more effective.
The Tip and Guard: Your Money-Makers
The spray tip is where the magic happens, but that tiny, precision-drilled orifice is incredibly easy to damage. Once you take it off the gun, never use a wire or any sharp object to poke out a clog. You'll permanently ruin the orifice, wreck your spray pattern, and cost yourself money.
Instead, drop the tip and guard into the right cleaning fluid—water for latex, or the appropriate solvent for oil-based paints. An old toothbrush or another soft-bristle brush is all you need to gently scrub away any paint residue. When it looks clean, hold the tip up to a light and look through it. The hole should be perfectly round and clear. To learn more about how a tip can make or break your finish, check out our guide on choosing the right tip size for airless sprayer finishes.
Gun and Manifold Filters: Your First Line of Defense
Your sprayer has two main filters working to keep debris out of your tip: one in the gun handle and another at the manifold where the hose connects to the pump. Forgetting about these is the fastest way to deal with constant tip clogs all day long.
Unscrew the gun handle to slide out the gun filter. Then, unscrew the manifold filter housing from the pump assembly. Clean both thoroughly with your brush and cleaning solution until every last bit of paint is gone. Before you put them back in, give them a quick inspection.
Look for Tears: Check the mesh screen for any rips, holes, or weak spots.
Check for Damage: Make sure the filter isn't crushed or bent out of shape, as that can let junk sneak past.
Look for Stains: If the mesh is caked with dried paint that won't come off, it's time for a new one.
Pro Tip: Always keep a spare set of filters for your sprayer in your truck or job box. Discovering a torn filter when you're setting up in Arroyo Grande can kill your morning. With a spare on hand, a potential crisis becomes a two-minute fix.
Meticulous cleaning of individual components is key, and it’s a principle that applies to all sorts of job site tools. If you're interested, you can find general guidance on how to clean various equipment filters.
The Inlet Strainer: Don't Overlook It
The inlet strainer, sometimes called a rock guard, is what stops trash from your paint bucket from getting sucked into the pump in the first place. For any contractor tackling remodels or new construction, keeping your Wagner or Titan sprayer clean is non-negotiable. Airless rigs dominate the industry for a reason—they can slash labor costs by 40-50%. The flip side? Poor maintenance is behind 70% of sprayer failures, driving up your operational costs by 25-35%.
Here at Contractor's Maintenance Service in San Luis Obispo, our advice is simple: pull the inlet strainer after every single job. Rinse it under warm water (keep it under 120°F so you don't warp the plastic) and check it for clogs and damage. If even 10% of it is hopelessly blocked, replace it. A shocking 45% of sprayer downtime is traced back to a clogged inlet.
A clean strainer means your pump gets a steady, consistent flow of material, preventing it from running dry and putting unnecessary wear on the motor. If it's damaged or just won't come clean, swap it out. It’s a cheap part that saves you from very expensive pump repairs down the line. And if you need genuine Graco, Titan, or Wagner replacements, our shop here in San Luis Obispo is stocked and ready to help contractors all over the Central Coast.
Proper Reassembly Lubrication and Storage
The job isn’t over once the paint is flushed. How you put your sprayer back together and store it is what separates a smooth startup from a frustrating fight on your next project. This final step is your best defense against the quiet killers of sprayer performance: rust, dried-out seals, and freeze damage.
After every part is spotless, the golden rule is to make sure everything is completely dry before you reassemble. Any bit of moisture left behind—especially in the pump or hose fittings—is an open invitation for corrosion. A quick wipe with a clean, lint-free rag and a shot of compressed air gets the job done right.
Lubrication The Secret to a Long Pump Life
Once everything is dry, you can start putting it all back together. This is where a few drops of the right lubricant can save you a world of hurt down the road. The most critical spot? The piston rod and packings, the heart and soul of your pump.
Using Throat Seal Liquid (TSL) isn't optional; it's essential. This special oil creates a barrier that stops paint from drying on the piston rod, which is the number one cause of shredded packings and costly repairs.
Apply the TSL: Put 2-3 drops of TSL right on the piston rod before you finish reassembly.
Work it In: If you can, cycle the pump by hand a couple of times. Otherwise, a quick, low-pressure prime will spread the oil evenly over the packings.
This takes less than a minute but can easily add hundreds of hours to the life of your pump seals, keeping you on the job instead of in the repair shop.
A dry piston rod grinding against the packings is like running an engine with no oil. It won't take long for serious damage to occur. TSL is the essential lubricant that keeps everything moving smoothly.
Prime the Pump for Long-Term Protection
With the sprayer reassembled, the last move is to protect its guts from rust and freezing. You do this by priming the pump with a dedicated storage fluid. Just leaving water or mineral spirits sitting in there is asking for trouble.
Drop the intake tube into a bottle of storage fluid like Graco Pump Armor. Run the pump on low pressure until you see that distinct fluid color coming out of the prime tube. Flip the valve to "spray" and run it through the hose and gun (tip removed) for just a few seconds.
Industrial maintenance pros know this final 20-minute routine is non-negotiable for machine uptime. For contractors running hydraulic airless models, flushing with a storage fluid can cut long-term expenses by 40% and prevent the 30-40% productivity loss that comes from a poorly maintained rig. You can dig deeper into airless sprayer market and maintenance trends from Arizton.
Final Storage and Local Service Tips
Now your sprayer is officially ready for storage. Coil the hose loosely to prevent kinks—hang it up if you have the space. Keep your clean tips, guards, and filters together in a small container so you’re not hunting for them later. To get a perfect watertight seal when reattaching hoses, a good understanding of NPT thread dimensions is a game-changer for peak performance.
Whether you're packing up the rig overnight in Paso Robles or for the winter in Atascadero, this routine ensures it’s protected and ready to go. And if you spot a worn-out part during reassembly, don't just hope it lasts another job. At Contractor's Maintenance Service, we serve all of San Luis Obispo county, including Arroyo Grande and Pismo Beach. We’ve got the genuine parts and know-how to keep your sprayer running like new.
Your Partner in Sprayer Maintenance and Repair
Doing a thorough cleaning every time is your best defense against sprayer problems, but every pro knows that gear still breaks down. This guide gives you the playbook for cleaning an airless paint sprayer, but sometimes a stubborn clog or a worn-out part needs a specialist's touch. When that day comes, you need more than a parts counter—you need a real partner in the field.
That’s where we come in. At Contractor's Maintenance Service, we’re that partner for painting contractors across the Central Coast. We handle authorized warranty service and expert repairs for the big names like Graco and Titan, so you know your equipment is getting the right fix.
Local Service You Can Count On
Our crew covers the whole San Luis Obispo area, and our focus is on getting you back to work fast. It doesn't matter if you're on a job in Paso Robles, Atascadero, Arroyo Grande, Pismo Beach, Santa Maria, Grover Beach, Morro Bay, or Los Osos—our techs are ready to roll.
Look, we get it. A sprayer that's down is a sprayer that's costing you money. Our whole goal is to figure out what's wrong, fix it right the first time, and get your machine back in your hands so you can keep your projects moving.
More Than Just Repairs
Fixing what's broken is only part of the job. We also stock the parts and have the know-how to help you stop problems before they start. Our San Luis Obispo shop is loaded with genuine replacement parts and all the maintenance essentials you need to keep your rig running like new. Our guys behind the counter have seen it all and can help you track down exactly what you need.
When you're up against a problem you can't solve, we're here to help. To see how we tackle the tough stuff, take a look at our contractor's guide to airless sprayer repair near San Luis Obispo. We want to be your go-to resource for everything sprayer-related.
Got Sprayer Cleaning Questions? We’ve Got Answers.
Even the most seasoned pros run into questions on the job. Over the years, we've heard them all from painters across the Central Coast. Here are the straight-up answers to the most common queries we get about keeping an airless sprayer in prime condition.
How Often Should I Really Clean My Sprayer?
The only answer is immediately after every single use. That’s not a best practice—it’s the golden rule for professional gear.
Think about it: today’s fast-drying paints can start to set up inside your pump, hose, and gun in less than an hour. Leave it any longer, and you're dealing with stubborn clogs that can grind your next job to a halt. A thorough flush at the end of the day is the best insurance you can buy to make sure your sprayer is ready to earn its keep tomorrow, whether you're in San Luis Obispo or Paso Robles.
Can I Just Use Water to Clean Up After Oil-Based Paint?
Definitely not. This is one of those critical mistakes that can absolutely wreck your equipment. Oil and water just don't mix, and trying to flush an oil-based coating with water will create a gummy, semi-cured disaster inside your sprayer’s guts.
Always, always, always use the solvent recommended on the paint can. This is usually mineral spirits or a specific paint thinner. Using the wrong fluid is the fastest way to create a costly, time-consuming jam that will have you kicking yourself later.
What are the Telltale Signs My Sprayer Needs a Pro to Look at It?
Even with perfect daily cleaning, parts eventually wear out. If you’ve done a full flush and are still seeing issues, it’s time to pay attention.
Keep an eye out for these warning signs:
A shaky or inconsistent spray pattern (tailing or uneven fans)
A noticeable drop in pressure that you can’t dial back up
The pump running constantly without building pressure
These symptoms usually point to worn packings, a damaged piston rod, or stuck valves—problems a standard cleaning just won't touch. When you see these signs, it's time to bring it into a professional service center like ours. We’ll get it diagnosed and fixed right for contractors in Atascadero, Arroyo Grande, Pismo Beach, and beyond.
When routine maintenance isn't enough, you need a partner you can trust. For expert repairs, genuine parts, and advice that keeps you on the job, count on Contractor's Maintenance Service. Visit us online at https://www.contractorsmaintenanceservice.com to see how we can support your business.