Pressure Washer Pump Troubleshooting: Quick Fixes and Tips
- Jan 5
- 17 min read
When your pressure washer pump starts acting up, the problem is often simpler than you think. Most issues like low pressure or sputtering trace back to basic water supply problems or air leaks, not a catastrophic pump failure. A quick, systematic check of your hoses, filters, and water source can often solve the problem in just a few minutes.
Your First Diagnostic Checks
Before you even think about grabbing a wrench to disassemble the pump, you've got to rule out the most common and easily fixable culprits. Trust me, a methodical approach here will save you a ton of time, money, and unnecessary frustration. From what we see in the shop, more than 90% of pump issues could have been solved with these initial checks.
This simple decision tree can help you visualize where to start your troubleshooting, guiding you from the symptom to the most likely cause.
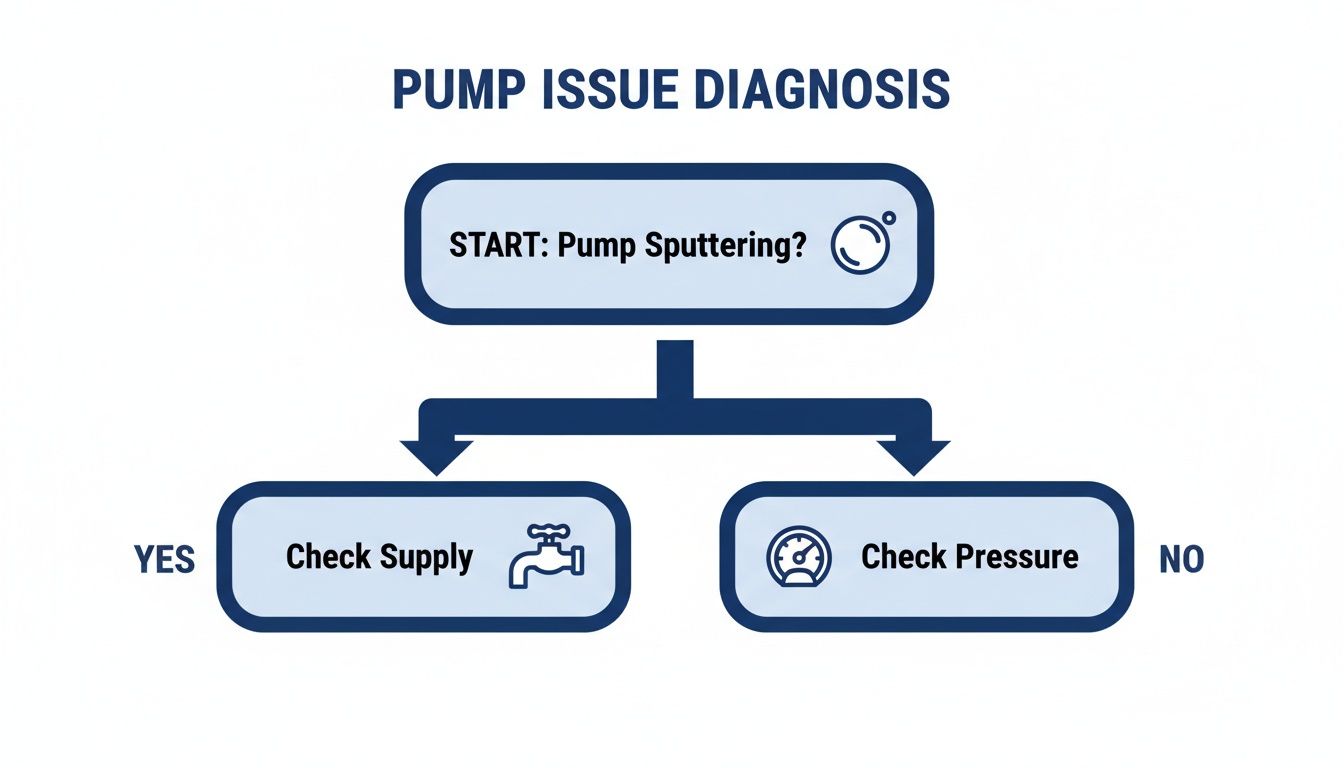
As you can see, the path forward starts by figuring out if your pump is sputtering or just putting out low pressure. That one observation will point you toward either the water supply or the pressure components first.
For a quick reference, here's a table that breaks down the most common symptoms we see and the first thing you should do for each.
Common Symptoms And Initial Actions
Symptom | Most Likely Cause | What to Check First |
|---|---|---|
Sputtering or Surging | Air leak or restricted water flow | Garden hose connections, kinks, and inlet filter |
Low, but Steady Pressure | Clogged nozzle or wrong nozzle size | Nozzle orifice for debris; verify correct nozzle size |
No Pressure at All | Unloader valve stuck or major water blockage | Unloader valve function; ensure water spigot is fully open |
Pulsating Pressure | Air in the system or failing check valves | Bleed air from the system; check hose for leaks |
This table should get you pointed in the right direction. It's all about tackling the easy stuff before assuming the worst.
Start with the Water Source
The pump is the heart of your machine, but it's useless without a steady, uninterrupted flow of water. When it doesn't get enough, we call it "water starvation," and it's a leading cause of poor performance and, eventually, serious damage.
First thing's first: verify the flow from your spigot. A typical pressure washer needs at least 2.5 gallons per minute (GPM), but beefier models will demand more. You can test this easily—just time how long it takes to fill a 5-gallon bucket. If it takes more than two minutes, your water supply is the problem.
Inspect Every Hose and Connection
Next, walk the entire length of your garden hose. Look for any kinks, twists, or flat spots that could be choking off the water flow. Even a small kink can starve the pump, causing it to surge and deliver inconsistent pressure.
Air leaks are another common enemy. If air gets into the line between the spigot and the pump inlet, it'll cause the pump to sputter and lose pressure. Make sure every garden hose fitting is snug and that the rubber washers inside are in good shape.
A tiny, almost invisible crack in a plastic garden hose fitting can be enough to suck air into the pump and mimic cavitation. We always recommend using a high-quality, reinforced garden hose that’s no longer than 50 feet to guarantee you're getting adequate flow.
Clean Your Filters Thoroughly
Every pressure washer has an inlet filter, usually a small screen right where your garden hose connects. This little screen is your pump's first line of defense against dirt and debris.
Find the Inlet Screen: Unscrew the hose and carefully pull the screen out. It's amazing how often we find these clogged with sediment, sand, or mineral buildup.
Get it Clean: Rinse it under clean water. For stubborn calcium deposits, let it soak in vinegar for 15-20 minutes and give it a gentle scrub with an old toothbrush.
A clogged filter is probably the most frequent find in our San Luis Obispo service center. It’s a five-minute fix that often brings a machine right back to full power.
For a deeper dive into the different components of your machine, our complete guide to pressure washer parts and repair is a great resource. And to broaden your general troubleshooting skills, it's always helpful to understand effective maintenance problem-solving strategies.
Solving Low Pressure And Pulsation Problems
Alright, so you’ve checked your water supply, made sure the hoses aren't kinked, and confirmed there are no obvious leaks. If you're still getting weak, inconsistent pressure or that frustrating pulsating surge, it's time to look inside the pump.
These symptoms are the classic signs of trouble with the parts that manage water under intense pressure. The good news? It doesn't mean your pump is shot. More often than not, a single, worn-out component is to blame. Knowing how to spot the problem can save you from replacing an entire pump when a simple valve or seal is the real issue.
The Unloader Valve: Your Pump’s Pressure Regulator
Think of the unloader valve as the traffic cop for your pressure washer. When you let go of the trigger, it instantly reroutes water in a loop inside the pump head—this is called bypass mode. If that valve gets stuck, clogged with gunk, or just wears out, it throws the whole system out of whack.
A bad unloader is the number one suspect for both low pressure and that annoying pulsing. If it’s stuck partially open, it’s constantly bleeding off pressure, giving you a weak stream. If it’s sticking and not moving smoothly, the pressure builds and drops erratically, causing that surging effect.
Here at our service center in San Luis Obispo, we get machines dropped off all the time for "pump failure." A surprising number of them just need a new unloader valve. It’s a textbook example of a small part causing a massive headache.
Inspecting The Unloader Valve
Before you grab your wrenches, do a quick diagnostic. Fire up the machine and pay close attention to what happens when you pull and release the trigger. Does the pressure lag? Does the engine sound like it's struggling or surging? Those are dead giveaways of an unloader problem.
To get a closer look:
Safety First. Always. Disconnect the spark plug or unplug the machine, then squeeze the trigger gun to release any trapped pressure.
Find the Valve. The unloader is usually a distinct assembly bolted to the pump head, often with a big adjustment knob or nut on it.
Take It Apart Carefully. Follow your owner’s manual to remove the valve. Be ready for a spring and other small parts to be inside—keep them organized so you know how they go back together.
Check for Debris or Damage. Look for mineral buildup, grit, or corrosion that could be stopping the piston from moving freely. Check the O-rings for any nicks, cracks, or flat spots.
Sometimes, all it needs is a good cleaning and some silicone grease. But if you see any obvious damage or the spring feels weak, just get a rebuild kit or a whole new valve. It's the smarter move.
Diagnosing Faulty Check Valves
Inside the pump manifold are a series of check valves, usually three or six of them. These are simple one-way gates that let water into the plunger cylinders and then force it out toward the hose. If even one of them fails, your pressure will tank.
A worn or stuck-open check valve allows water to flow backward, making it impossible for the pump to build pressure properly. This usually results in steady but very low pressure. It can also cause pulsation if a valve is fluttering instead of sealing tight. We see this a lot with equipment from Paso Robles and Atascadero, where sediment from well water is notorious for wrecking check valves.
We once had a contractor from Arroyo Grande bring in a machine he was sure needed a full pump rebuild. The pressure was pathetic, maybe half of what it should be. We popped open the manifold and found a tiny pebble holding one of the check valves open. We cleaned it out, and just like that, the machine was back to full power.
Leaking Seals And Packings
The last major internal culprit for low pressure is the plunger seals, often called packings. These are the heavy-duty seals that wrap around the plungers to create the high-pressure seal. Over time, heat and friction wear them down.
The tell-tale sign of failing seals is water dripping from the bottom of the pump, right where the manifold meets the crankcase. An even bigger red flag is milky-colored pump oil. That means water has breached the inner seals and contaminated the crankcase—a problem you need to fix immediately. Even a tiny leak can cause a significant drop in output pressure. Customers in coastal areas like Pismo Beach and Morro Bay often see accelerated seal wear from the salty air, so regular checks are a must.
While you're working on the pump's internals, it’s a great time to give your hoses a once-over for any wear and tear. For more on what to look for, check out our guide on high-pressure hoses and what you need to know.
How To Identify And Prevent Pump Cavitation
If you've ever heard a rattling, grinding noise coming from your pressure washer that sounds like it's gargling gravel, you've likely encountered cavitation. It's the silent killer of pressure washer pumps, a destructive force that can cause irreversible damage from the inside out. In our shop, we see this problem far too often.
Cavitation happens when the pump's demand for water outstrips the supply available at the inlet. This creates a low-pressure zone where tiny vapor bubbles form in the water. As these bubbles get pulled into the high-pressure side of the pump, they implode with incredible violence, creating micro-explosions against the plungers and manifold walls.
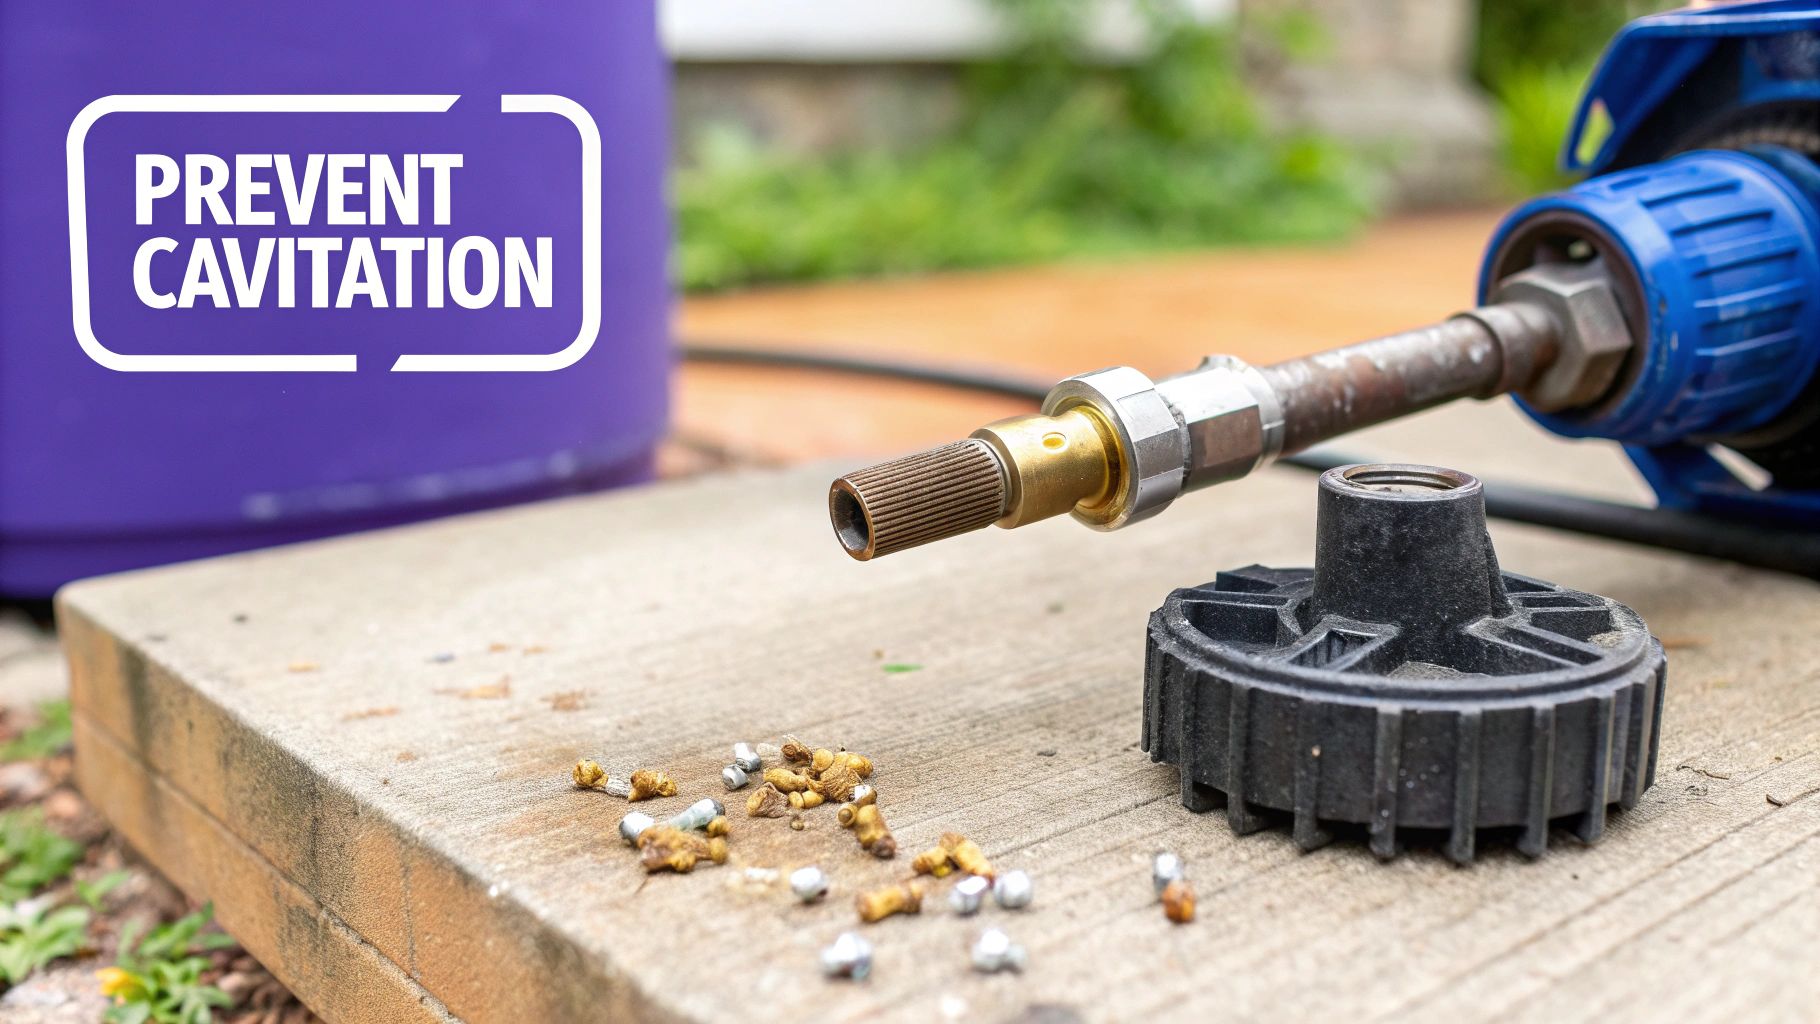
This isn't just a scary noise; it physically pits and erodes the metal components, leading to premature failure. Cavitation is one of the sneakiest culprits in pump troubleshooting, causing early failure in up to 55% of cases we see. It can slash your flow rate by 25-40% almost overnight, and data shows that 68% of these failures trace back to clogged inlet filters or undersized hoses—common issues on any busy job site.
You can learn more technical details about preventing pump cavitation on oemgroup.com.au.
Common Causes of Pump Cavitation
Understanding what causes cavitation is the first step to stopping it. When a machine comes to us with cavitation damage, our diagnostic process almost always points to one of these usual suspects.
Inadequate Water Supply: Your pump has a specific Gallons Per Minute (GPM) rating it needs to operate correctly. If your spigot can't deliver that volume, the pump will starve for water and start to cavitate.
Restrictive Hoses: Using a garden hose that's too long (over 50 feet) or too narrow (less than 3/4" diameter) creates friction loss, which effectively chokes the water volume reaching the pump.
Clogged Inlet Filters: A dirty or debris-clogged inlet filter screen is a primary cause. It's like trying to breathe through a straw—it completely strangles the water flow right before it enters the pump.
Air Leaks in the Inlet Line: Any loose fittings or cracked hoses on the supply side can suck air into the system. This creates the same destructive bubble-implosion cycle as vapor bubbles.
These issues pop up a lot for our clients working in San Luis Obispo, Paso Robles, and the surrounding agricultural areas, where water sources can really vary in pressure and cleanliness.
Actionable Prevention Strategies
The good news? Cavitation is almost entirely preventable with the right setup and a few routine checks. Trust me, preventing this is a whole lot cheaper than a full pump rebuild. Here are the strategies our techs recommend every single day.
First, guarantee a positive inlet pressure. Always use a high-flow, 3/4-inch diameter garden hose and keep it as short as you possibly can. A shorter, wider hose dramatically cuts down on friction and ensures your pump gets all the water it's asking for.
Second, eliminate all potential air leaks. Double-check that all garden hose connections are tight and that the rubber washers are in good shape. It only takes a tiny bit of air getting into the system to start causing damage.
A local contractor from Atascadero was going through pumps every season. After a quick look, we found he was using a 100-foot, coiled 1/2" hose. We had him switch to a 50-foot, 3/4" commercial-grade hose, and his new pump has now lasted over two years without a single issue. It’s a simple change that saved him thousands.
Finally, make filter cleaning a non-negotiable part of your routine. Inspect and clean the inlet screen before every single use. For contractors in Arroyo Grande, Pismo Beach, or Morro Bay dealing with older plumbing or well water, this step is absolutely critical for pump longevity.
Dealing with Overheating and Electrical Problems
When your pump starts to overheat, you need to shut it down. Immediately. It doesn't matter if it's a gas or electric model; excessive heat is a blaring alarm that something is putting extreme stress on the internal components. If you ignore it, you’re basically asking for a catastrophic—and expensive—failure.
Most of the time, the culprit is surprisingly simple: the pump is starved for water. Think of it like an engine running without oil. Your pressure washer pump relies on a steady flow of cool water to keep friction-generated heat in check. Any restriction, whether it's a kinked garden hose, a clogged inlet filter, or a weak spigot, will force that pump to work way too hard and heat up fast.
Another common mistake we see all the time is letting the machine run too long in bypass mode. When you let go of the trigger gun, the unloader valve just recirculates the same water inside the pump head. That water can get dangerously hot in as little as 30-60 seconds. If you’re taking a break for more than a minute, do yourself a favor and turn the machine off.
What’s Going on with Your Electric Model?
With electric pressure washers, overheating and electrical issues often go hand-in-hand. The motor is engineered to draw a very specific amperage. When a problem makes it struggle, that amp draw spikes, creating a ton of heat and often tripping the breaker.
A partially clogged nozzle is a classic example. When the motor has to force water through a tiny, blocked-up hole, the strain is immense. Using an extension cord that's too long or too thin is just as bad—it starves the motor for voltage, forcing it to pull more amps to compensate, which leads to overheating.
Our service logs show that nearly 40% of failures in electric models are linked to thermal stress. From our shop in San Luis Obispo, we regularly see equipment from all over the Central Coast—Paso Robles, Atascadero, Arroyo Grande, Pismo Beach, and Morro Bay—suffering from preventable heat damage.
If your electric unit keeps tripping the breaker or blowing a fuse, that’s your machine screaming that it has an over-amperage problem. The cause could be a failing motor, an internal short, or one of the simple issues I just mentioned. When a pressure washer unexpectedly loses power, a common culprit is a tripped circuit breaker. Learning the different causes of a tripped circuit breaker can really help with your electrical diagnostics.
How to Safely Check Electrical Parts
If you think you have an electrical fault, a multimeter is going to be your best friend. But let’s be clear: working with electricity is no joke. Always, always unplug the machine from its power source before you start poking around.
Once you're safely disconnected, you can use the multimeter to check for a few things:
Continuity: Test the power cord, on/off switch, and motor windings to make sure there are no breaks in the electrical path.
Voltage: Plug the multimeter into your wall outlet (with the machine still unplugged!) to confirm you’re getting the correct voltage, which should be 110-120V for most standard U.S. models.
Resistance (Ohms): Check the motor windings for any signs of a short. Your owner’s manual should list the correct resistance range. If your reading is way off, it's a strong sign the motor is on its way out.
This kind of troubleshooting is absolutely critical. Overheating and over-amperage issues take out countless pumps every single year. It’s no surprise that equipment mismanagement is a huge reason why 80% of new pressure washing businesses fail in their first year. Data from the PWNA shows that 52% of breakdowns in commercial fleets are directly tied to not enough water flow or running the machine for too long without a break.
The single best thing you can do to protect your investment is to shut it down at the first sign of trouble. If you want to learn more, check out these helpful resources on pressure washer safety on ConsumerReports.org.
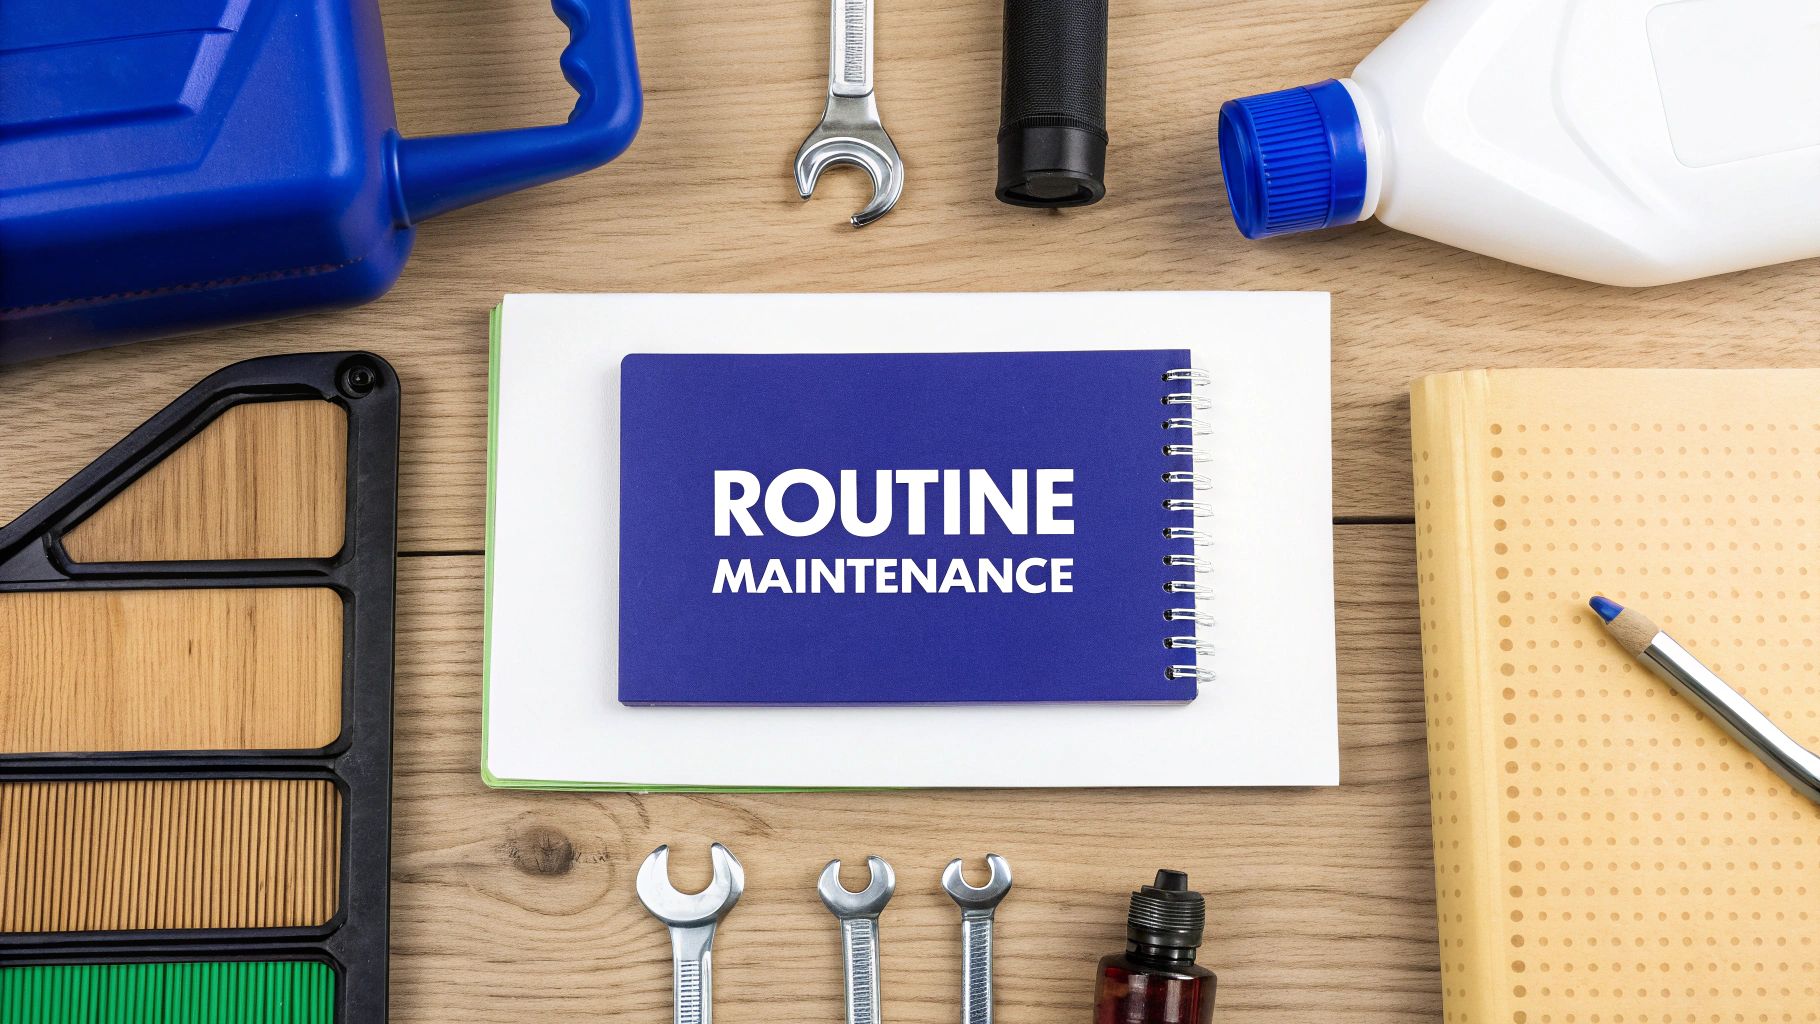
A Proactive Maintenance Checklist For Your Pump
The best way to troubleshoot a pressure washer pump? Do the kind of maintenance that means you never have to. If you can shift from a reactive, "fix-it-when-it-breaks" mindset to a proactive one, you’ll sidestep the vast majority of common pump failures before they even get a chance to start. This is more than just cleaning a filter now and then; it’s about adopting a professional-grade routine that can dramatically extend the life of your equipment.
Honestly, neglecting these simple checks is the single biggest reason pumps fail. It’s a fact we see confirmed every single day here in our San Luis Obispo service center. Did you know that a lack of maintenance is the number one cause of pump failure? Industry data shows that pumps serviced every 50 hours can last up to 2,000 hours—that's a solid three times longer than a pump that's ignored until it breaks down.
And it gets worse. A survey from the Power Washers of North America (PWNA) revealed that 62% of commercial contractors admitted to skipping oil changes, which directly led to a 45% spike in repair calls during their busiest seasons. You can learn more about these pump failure findings from the PWNA.
Routine Oil Changes Are Non-Negotiable
Think of the oil in your pump's crankcase as its lifeblood. It's what keeps the plungers, bearings, and connecting rods lubricated and moving smoothly. Over time, that oil breaks down from heat and friction, losing its ability to protect those critical internal parts.
Forgetting to change it is a recipe for disaster. Our recommendation is an oil change every 50-100 hours of operation, or at the very least, once per season. And whatever you do, use a non-detergent pump oil made specifically for pressure washers. Using standard motor oil is a common—and costly—mistake; its detergents can cause the seals to foam up and fail, leading to catastrophic water intrusion.
Inspect Filters and Fittings Religiously
Your pump’s first line of defense is the filtration system. Before every single use, you need to inspect and clean the inlet water screen. It’s a 30-second task that stops sediment and debris from getting sucked into the pump, where it can score the plungers and wreck the check valves.
While you're at it, give the hose fittings a quick check to make sure they're snug—both on the inlet and high-pressure sides. A loose garden hose fitting is the number one cause of air leaks, which leads directly to performance-killing cavitation.
A proactive approach means treating your equipment like a professional investment, not just another tool. A five-minute pre-operation check can easily save you from a five-hundred-dollar repair bill. For contractors in Paso Robles or Atascadero, where dust and debris are a constant battle, this routine is especially critical.
The Critical Role of Nozzle Selection
Using the wrong size nozzle for your machine is like forcing your car to drive everywhere in second gear. It puts a constant, unnecessary strain on the pump and the engine.
Every pressure washer has a specific rating for pressure (PSI) and flow (GPM), and your nozzle absolutely must match these specs. If the orifice is too small, it creates excessive backpressure, forcing the unloader valve to constantly cycle. This leads to premature wear on the entire system. If you’re ever unsure, check your owner’s manual or give our team a call—we help contractors from Arroyo Grande to Morro Bay select the right nozzles for their specific machines all the time.
Proper Winterization Prevents Cracked Manifolds
If you store your equipment during the colder months, proper winterization isn't optional—it's essential. Any water left inside the pump will freeze, expand, and exert enough force to crack the pump manifold. That's a costly failure that's often beyond repair.
Thankfully, the process is simple:
Flush the System: Disconnect all the hoses and run the machine for just a few seconds to clear out most of the water.
Introduce Antifreeze: Grab a dedicated "pump saver" product, which is basically a specialized antifreeze for this purpose.
Run Until Protected: Connect the pump saver bottle to the water inlet. Then, pull the starter cord (or briefly turn on an electric model) just until you see the protective fluid exit the high-pressure outlet.
This simple step ensures your pump will be ready to work when you are, without any nasty surprises in the spring. For a deeper dive into pump care, check out our guide on how to master pressure washer pump maintenance with these essential tips.
When It's Time to Call In the Pros
Look, I'm a huge fan of rolling up your sleeves and fixing things yourself. A lot of common pressure washer pump issues can be sorted out with a bit of know-how and the right parts. But there comes a point where pushing forward on your own can turn a manageable problem into a catastrophic, expensive failure.
Knowing when to put the wrench down is just as important as knowing how to use it.
There are a few tell-tale signs that your pump needs an expert eye. If you hear a deep, internal grinding noise, that’s not something a new seal can fix—you’re likely looking at bearing failure. See oil and water mixing into a milky mess? That's another red flag. And if you suspect a cracked manifold, it's definitely time to stop.
These aren't simple weekend fixes. They often require a complete pump teardown, precision measuring tools, and access to genuine OEM parts that you just can't get at a big-box store. Trying to muscle your way through these repairs without the right training or equipment is a surefire way to cause even more damage.
Your Local Experts on the Central Coast
This is exactly where we, at Contractor's Maintenance Service, step in. For all the hardworking contractors and businesses in San Luis Obispo, Paso Robles, Atascadero, Arroyo Grande, Pismo Beach, Morro Bay, and the surrounding Central Coast communities, our service center is your go-to for these complex pump repairs.
We're an authorized service center for major brands like Graco and Honda, which means our techs have the factory training and the genuine parts to get the job done right the first time.
When you bring your equipment to a certified technician, you're not just getting a repair—you're getting a guarantee that it's restored to factory specifications. This is about more than just performance; it’s a critical safety measure. It ensures your pressure settings and safety valves work exactly as they were designed to.
Opting for a professional service really pays off. Here’s why:
We Have the Right Tools: We’re talking hydraulic presses for seating bearings and specialized tools for calibrating unloader valves. This is gear you won't find in a typical toolbox.
Genuine Parts on Hand: We stock the specific seals, plungers, and valves for your model. No more guesswork or risking it with questionable aftermarket parts that might fail when you need them most.
Warranty and Peace of Mind: As an authorized service center, we can handle warranty claims. Plus, all our repairs are backed by our commitment to solid workmanship.
When you're dealing with a tricky internal pump problem, professional service isn't just another cost. It’s an investment in your equipment's lifespan, its safety, and its reliability out on the job site.
Common Pump Problems We See All the Time
When you're out on a job and your pressure washer pump starts acting up, you need answers fast. We get calls all the time from contractors across San Luis Obispo and the Central Coast with the same handful of issues. Here are the most common questions we hear, along with some straight answers from our technicians.
Why Is My Pump Pulsating Or Surging?
If your pump is pulsating, it's almost always one of two things: air getting into the system or a blockage somewhere. Don't immediately tear into the pump itself.
Your first move should be to check the easy stuff. Look for a clogged nozzle or a dirty inlet filter. Another huge culprit is a loose garden hose connection—even a tiny air leak there can cause surging. If you've checked all that and the problem persists, your next stop is the unloader valve.
What Causes A Pump To Suddenly Lose All Pressure?
A sudden, complete loss of pressure is a classic symptom of a faulty unloader valve. What happens is the valve gets stuck in bypass mode. When that occurs, the water just keeps circulating inside the pump head instead of getting pushed out through the wand. This can be caused by a piece of debris getting lodged in the valve or just simple internal wear and tear.
We see this a lot with contractors in Paso Robles and Atascadero who are working with well water. Sediment from the well can get stuck in the unloader valve and jam it open. Often, a professional cleaning is all it takes to get it working again, no new parts needed.
Can I Use Car Motor Oil In My Pump?
Please, don't do this. It's one of the fastest ways to destroy your pump.
Pressure washer pumps need a very specific non-detergent pump oil. The detergents in automotive oil will cause the water seals to foam up and fail, letting water flood the crankcase. That's a catastrophic failure. Always, always use the oil recommended by your pump's manufacturer.
When you've tried the basics and are still stuck, or if you just need a repair done right the first time, our expert technicians at Contractor's Maintenance Service are ready to help. If your pressure washer pump troubleshooting has hit a dead end, contact us for professional diagnostics and repair and we'll get your equipment back on the job.