How to Calculate Paint Coverage Like a Pro
- Jan 26
- 13 min read
Calculating paint coverage really just boils down to a simple formula: (Total Square Feet ÷ Paint Spread Rate) x Number of Coats = Gallons Needed. This is the core equation every pro uses to make sure they buy the right amount of material from the get-go. Nailing this calculation prevents both wasteful overspending and those project-stalling trips back to the paint store.
Your Blueprint for Accurate Paint Estimation

Moving beyond guesswork is the first real step toward a profitable, efficient paint job. Any solid estimate is built on three key variables: the total area you’re painting, the paint’s specified spread rate, and how many coats you’ll need for a durable finish.
The spread rate tells you how many square feet a single gallon can cover. You’ll find it right on the paint can or the technical data sheet. While most architectural paints average 350-400 sq. ft. per gallon, you have to treat that number as just a baseline. Real-world conditions, which we’ll get into later, can change that number quite a bit.
The Critical Role of a Waste Factor
Even with a perfect formula, you need a buffer. It’s a rookie mistake not to plan for it.
Professionals always add a waste factor of 10-15% to their total paint calculation. This is non-negotiable, as it accounts for the inevitable material loss that happens on every single job.
Paint left behind in the can, tray, or sprayer lines.
Overspray, especially when you’re using an airless sprayer.
The usual spills and drips during application.
Porous or textured surfaces that just drink up more paint than you’d expect.
Ignoring this buffer is one of the most common ways contractors blow their budget. The logic of estimating materials holds true across different trades; for instance, getting quick estimates with simple formulas for concrete projects follows a similar process of measuring and accounting for all the variables.
For contractors here on the Central Coast, from the vineyards of Paso Robles and Templeton to the coastal homes in Pismo Beach and Arroyo Grande, precise estimation is everything. At Contractor's Maintenance Service, we support pros in San Luis Obispo, Atascadero, Santa Maria, and the surrounding areas by providing not just the equipment, but the practical know-how needed to succeed.
Typical Paint Coverage Rates at a Glance
To give you a head start, here’s a quick reference table for typical coverage rates. Just remember, this is a general guide. Always check the manufacturer's specific data for the exact product you're using.
Paint Finish | Average Coverage per Gallon (sq. ft.) | Common Use Case |
|---|---|---|
Flat/Matte | 350-400 sq. ft. | Ceilings and low-traffic interior walls. |
Eggshell/Satin | 350-400 sq. ft. | Living rooms, bedrooms, and hallways. |
Semi-Gloss | 300-350 sq. ft. | Kitchens, bathrooms, trim, and doors. |
Gloss | 300-350 sq. ft. | High-traffic areas, trim, and cabinetry. |
These numbers assume you're working on a standard, smooth, primed surface. The actual mileage you get out of a gallon will always depend on the job's specific conditions.
Mastering the Formulas Professional Painters Use
Simple area calculations work fine for a bedroom, but when you step up to commercial and industrial jobs, the game changes. You're no longer just slapping on latex paint; you're dealing with performance coatings, high-end equipment like Graco or Wagner sprayers, and tight project specs. This is where the pros leave basic estimates behind and get into the real math.
It all starts with a concept called theoretical coverage. Think of this as the perfect-world scenario—how much surface one gallon of paint should cover if every single drop made it to the wall, based purely on its chemical makeup.
The formula looks a bit technical, but it’s straightforward:
Theoretical Coverage = (10 × % Volume Solids) / Dry Film Thickness (µm)
Let's quickly break that down. Volume solids is the good stuff—the percentage of paint that actually stays on the surface after all the solvents have evaporated. A higher percentage means more coating is left to do its job. Dry Film Thickness (DFT), measured in microns (µm), is the final cured thickness of that coating, which is a huge deal for things like durability and corrosion resistance.
From Theory to the Real World
Theoretical coverage is a great starting point, but it doesn't account for what actually happens on a job site. That's where experienced pros in places like San Luis Obispo and across the Central Coast have to get practical. We know there’s always unavoidable loss.
A practical formula adjusts for the real-world messiness of a project, giving you a much more accurate estimate of how much paint you’ll truly need. It factors in everything from overspray to the paint that gets left behind in hoses, cans, and buckets. For contractors bidding on big projects in Paso Robles, Arroyo Grande, or Atascadero, getting this number right is what separates a profitable job from a painful one.
The difference between making money and losing it often boils down to accounting for waste. A 15% wastage factor might not sound like a lot, but on a large industrial job, that can easily mean hundreds or even thousands of dollars in extra material costs.
The Real-World Wastage Formula
To get a truly accurate estimate, you have to factor in those real-world losses. The complete equation that industry leaders rely on is Volume (litres) = [10 × Area (sqm) × DFT (µm)] / [% Volume Solids × (100 – % Wastage)].
For example, let's say you're coating 100 square meters at 100 µm DFT. The paint has 50% volume solids, and you realistically expect a 15% wastage factor. Your calculation shows you need 23.5 litres.
If you had ignored that wastage adjustment, your math would have told you 20 litres—leaving you 15% short on material. That’s a costly mistake, especially since post-COVID supply chain issues saw some paint costs jump by as much as 25%. Miscalculations like that can wreck a budget. You can dive deeper into the technicals behind these numbers in this handy guide on spread rates.
Getting this formula down is non-negotiable for any professional painter, whether you're bidding on a winery in Arroyo Grande or managing a facility in Santa Maria. It turns your estimate from a good guess into a data-driven calculation, ensuring you have enough paint to meet specs without blowing your budget.
How Surface Texture and Porosity Impact Your Numbers
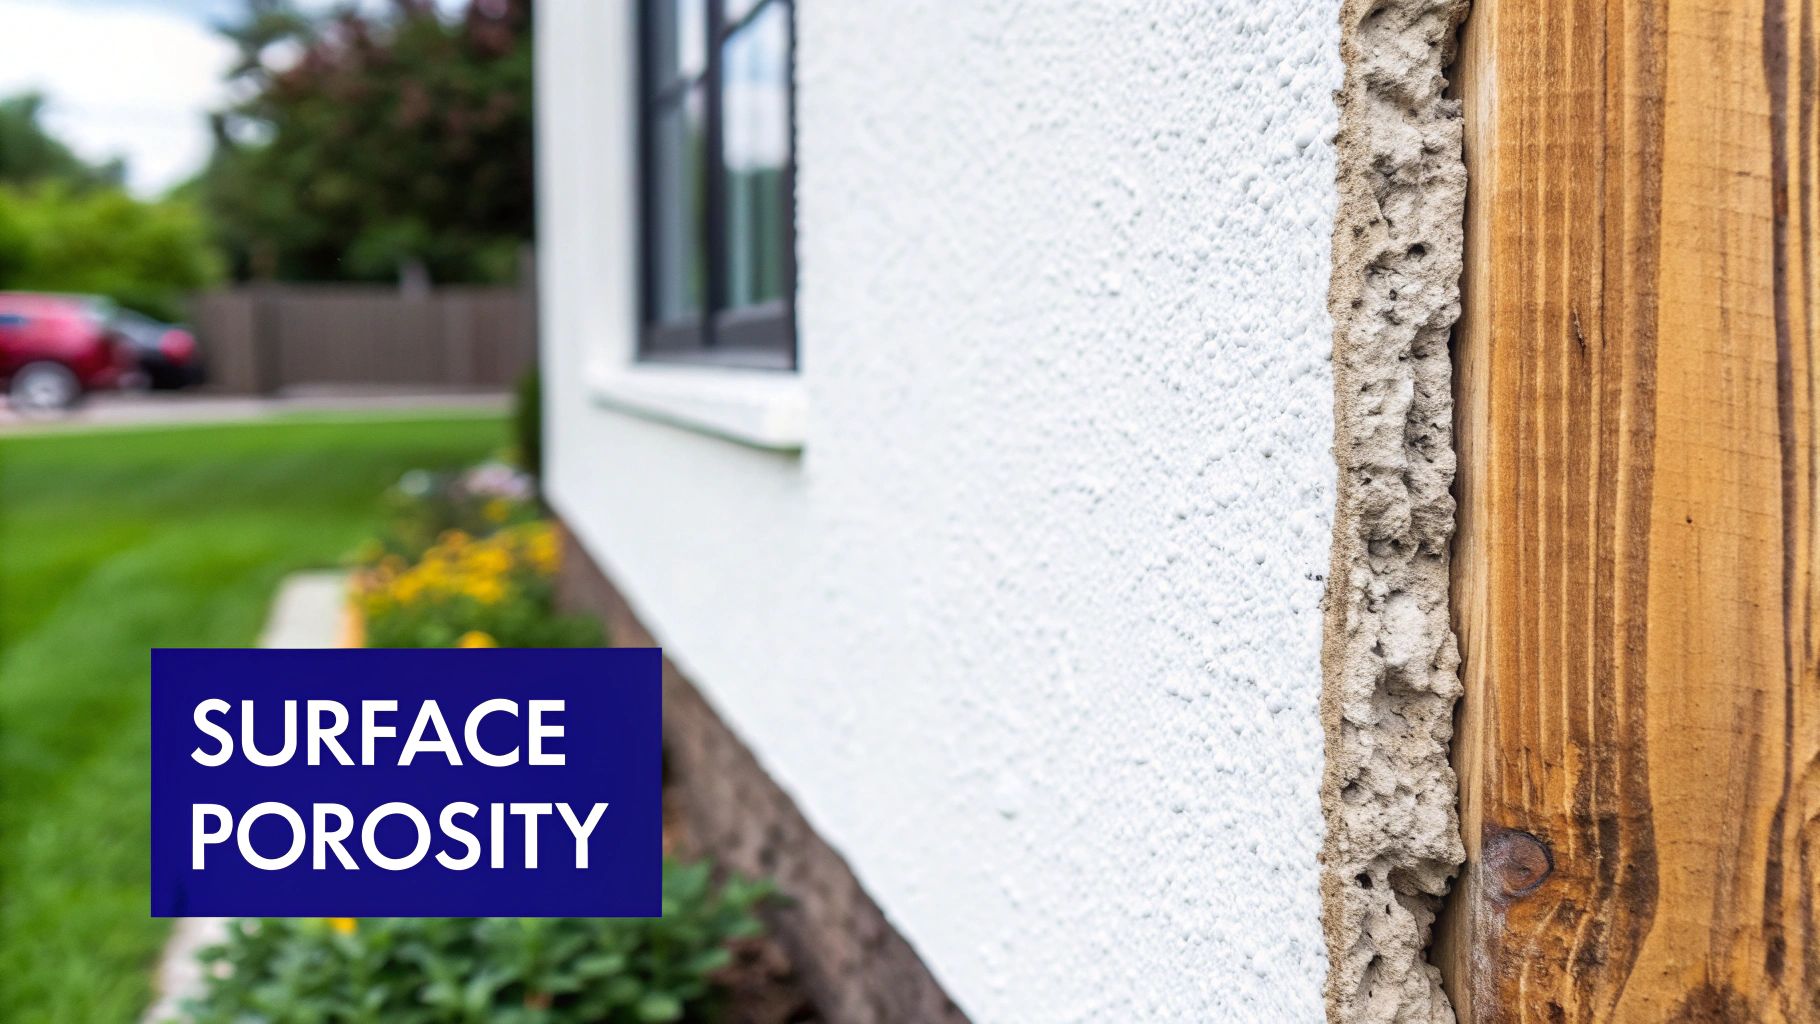
It's tempting to treat every wall like a perfectly smooth, primed canvas. That’s also one of the fastest ways to blow your project budget. The reality on the ground is that every surface has its own personality, and those characteristics can dramatically change how much paint you’ll actually need.
A gallon of paint on pristine, sealed drywall might get you the 350-400 square feet the manufacturer promises. But take that same gallon to a different surface, and your coverage can plummet. Porous materials are the biggest culprits—they drink up that first coat like a sponge.
Think about surfaces like unsealed cinder blocks, old weathered wood, or brick. You can count on these materials soaking up 15-25% more paint right from the start. The same goes for heavily textured walls, like those with a heavy knockdown finish or rough-sawn lumber. The simple length-times-width calculation doesn't account for all the extra nooks and crannies you have to cover.
Why Texture Is a Budget Buster
Ignoring texture is a surprisingly common—and costly—mistake. On a smooth wall, your spread rate is fairly predictable. But the moment you introduce a rough profile, the whole game changes.
It’s such a frequent issue that a 2022 survey from the Painting Contractors Association found that 22% of jobs run over budget specifically because texture wasn't accounted for properly. Some of those textured walls ended up needing 20-30% more paint than planned. This is something pros learn to factor in when they estimate paint coverage with these factors in mind.
This effect gets even more extreme in industrial settings. Take abrasive-blasted steel with a 50-micron profile, for example. The paint coverage can drop by a massive 58%. All that paint is just filling in the microscopic peaks and valleys before it can even start building up a protective film.
Your Pre-Paint Surface Checklist
Before you lock in that paint order, do a quick reality check on your surfaces. For any contractor working across the Central Coast, from Arroyo Grande and Nipomo to Santa Maria and beyond, this is the kind of diligence that prevents those frustrating last-minute trips to the paint store.
Do a Porosity Test: Just splash a little water on the surface. Does it soak in right away and darken the material? If so, you’re dealing with a highly porous surface that will need a dedicated sealer or extra paint.
Feel the Texture: Run your hand over the wall. Is it slick and smooth, or does it feel sandy, rough, or like popcorn? The rougher the texture, the more you’ll need to bump up your paint quantity.
Check the Previous Coating: Is the surface bare, primed, or already painted? A wall that’s already painted with a similar color will take far less paint than raw, unsealed wood or concrete.
A huge part of learning how to calculate paint coverage is simply adjusting for the real world. Knowing a gallon won't go nearly as far on stucco as it does on smooth drywall is the mark of a seasoned pro. It’s how you write accurate quotes for clients and keep your jobs profitable.
Adjusting for Application Method and Environment
The calculations we’ve covered so far will get you in the ballpark, but the real world always has the final say. Two massive variables can completely throw off your paint consumption: your application method and the environment you're working in.
How you put the paint on the wall and the conditions at the job site are just as critical as the surface area itself.
How Your Tools Dictate Paint Use
The tool you choose—whether it’s a brush, roller, or sprayer—directly impacts how much paint actually lands on the surface versus getting lost in the process. This is what we call transfer efficiency, and it varies wildly from one method to another. For contractors here in San Luis Obispo and the surrounding areas, including Morro Bay, Cambria, and the Five Cities, nailing this down is the key to accurate quotes and staying profitable.
Brushing and rolling are pretty efficient for smaller, more detailed work. But when you scale up to larger jobs, sprayers are king.
The catch? Not all sprayers are created equal. A conventional sprayer atomizes paint with a high volume of air, which creates a fine mist but also leads to a ton of overspray. You can lose a staggering 40-50% of your material this way.
On the other hand, an airless sprayer—like the Graco and Titan models we service right here at Contractor's Maintenance Service—is a different beast entirely. It uses high pressure to force paint through a tiny tip, creating larger droplets that have less bounce-back. This is where you see a huge jump in efficiency.
Industry data shows that switching from a conventional sprayer to an airless system can cut your paint wastage from nearly 50% down to a much more manageable 10-15%. On a large commercial project, that difference can translate into saving hundreds of gallons of material and thousands of dollars.
To get a feel for how different sprayer technologies stack up, check out our guide on choosing between an airless sprayer and HVLP systems. These differences are a critical part of figuring out your real-world paint needs. The practical losses are significant; you can learn more about how application methods impact paint coverage and why these adjustments are essential for accurate job costing.
To put this into perspective, here’s a quick breakdown of what you can expect in terms of paint loss depending on your tool of choice.
Paint Loss by Application Method
Application Method | Estimated Wastage Percentage | Best For |
|---|---|---|
Brush and Roller | 5-10% | Small, detailed jobs; textured surfaces; interior walls. |
Airless Sprayer | 10-25% | Large-scale commercial and residential projects; smooth surfaces. |
HVLP Sprayer | 20-30% | Fine finishing on cabinets, trim, and furniture. |
Conventional Sprayer | 40-50%+ | Automotive and industrial applications (less common in painting). |
As you can see, simply switching from a conventional sprayer to an airless rig can immediately cut your material waste in half, which is a game-changer for your bottom line.
Battling Environmental Paint Thieves
Once you’ve got your tool dialed in, you have to deal with the job site itself. The environment can literally steal paint right out of the air before it even hits the wall.
Here are the biggest culprits we see:
Wind: For exterior jobs in coastal spots like Pismo Beach, Morro Bay, or windy inland areas like Paso Robles, even a light breeze can carry away a huge amount of atomized paint. Using wind guards or spraying during calmer parts of the day is a must.
Temperature and Humidity: High heat can cause the paint to flash-dry, leading to "dry spray." This is where particles are already partially solid by the time they hit the surface, causing poor adhesion and wasted material. High humidity can mess with curing times and ruin the final finish.
Technique: An operator's skill makes all the difference. Holding the spray gun too far from the surface, using the wrong tip size, or cranking the pressure too high are all classic ways to create excessive overspray and waste paint.
Mastering these adjustments is what separates the pros from the amateurs. For contractors tackling public works jobs or large industrial sites, fine-tuning your technique and accounting for the environment isn't just a detail—it's often the single most important factor in keeping a project on time and under budget.
Putting It All Together with a Commercial Example
All the theory and formulas are great on paper, but where the rubber really meets the road is on a real-world job. This is where your bid either makes you money or costs you. Let's walk through the exact calculation for a common project we see all the time: a 5,000 sq. ft. concrete tilt-up warehouse right here in Paso Robles.
This is the same process that savvy industrial maintenance managers and commercial painters from San Luis Obispo to Santa Maria use to nail their bids every time.
First, we need the total surface area we're painting. This warehouse has four walls, each measuring 100 feet long by 25 feet high. That gives us a total gross area of (100 ft x 25 ft) x 4 walls = 10,000 sq. ft. Simple enough.
Accounting for Openings and Surface Porosity
Now for the details. We have to subtract the areas that won't get painted. The building has two big roll-up doors (12 ft x 14 ft each) and four standard windows (4 ft x 6 ft each).
Roll-Up Doors: 2 x (12 ft x 14 ft) = 336 sq. ft.
Windows: 4 x (4 ft x 6 ft) = 96 sq. ft.
Total Deductions: 336 + 96 = 432 sq. ft.
So, our net paintable area is 10,000 sq. ft. – 432 sq. ft. = 9,568 sq. ft.
But we can't stop there. We're dealing with unpainted, porous concrete, and that stuff is thirsty. You have to account for the first coat soaking in. We always add a 20% buffer for that initial coat, bringing our effective area to 9,568 x 1.20 = 11,482 sq. ft. Once that first coat is on and sealed, the second coat will only need to cover the actual 9,568 sq. ft.
Applying the Practical Coverage Formula
For this warehouse, we’re using a high-performance industrial acrylic coating. Pulling up the technical data sheet (TDS), we see it has 45% volume solids, and the job specs call for a Dry Film Thickness (DFT) of 3 mils. Remember the rule: one gallon of 100% solids paint covers 1,604 sq. ft. at 1 mil DFT.
So, the theoretical spread rate is (1,604 x 0.45) / 3 mils = 240.6 sq. ft. per gallon.
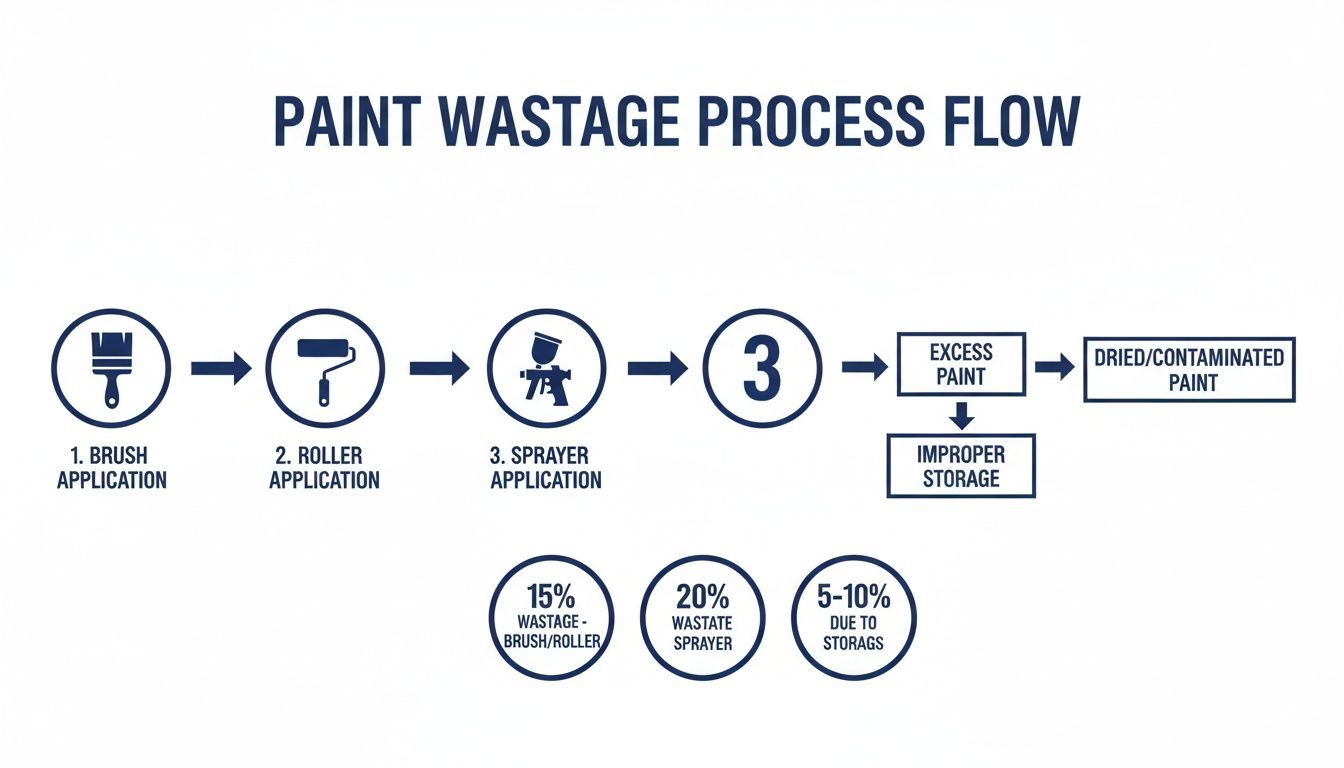
This is where experience comes in. The infographic above shows how different application methods affect how much paint you lose. We’ll be using an airless sprayer, which is way more efficient than conventional methods but still has some material loss. To be safe, we'll factor in a conservative 15% wastage factor.
This brings our practical coverage down to 240.6 sq. ft. x (1 - 0.15) = 204.5 sq. ft. per gallon.
This is the step where bids are won or lost. Forgetting to adjust for porosity or wastage is how a profitable job quickly turns into a money pit. It’s a common mistake we help contractors in Atascadero, Santa Maria, and Arroyo Grande avoid.
Finally, let's figure out how many gallons we need to order.
Coat 1: 11,482 sq. ft. / 204.5 sq. ft./gallon = 56.1 gallons
Coat 2: 9,568 sq. ft. / 204.5 sq. ft./gallon = 46.8 gallons
Add them up, and our total is 56.1 + 46.8 = 102.9 gallons. Since this paint comes in 5-gallon pails, we'll need to order 21 pails (105 gallons) to get this two-coat system done right, with just a little left over for touch-ups.
More Than Just Numbers: The Right Gear for the Job
Nailing your paint calculations is a huge part of running a profitable job, but it’s only half the story. You still need the right equipment to get that paint on the wall efficiently and to spec. At Contractor's Maintenance Service, we're not just a parts shop—we’re here to make sure you have the gear and support to back up your bids.
We’re based right here in San Luis Obispo, serving pros across the entire Central Coast, including Paso Robles, Santa Maria, Atascadero, Arroyo Grande, Pismo Beach, Morro Bay, Nipomo, and all surrounding areas. We know the kinds of commercial projects you’re up against because we’re part of the same community.
Whether you're looking to upgrade to a new Graco airless sprayer, need an expert to get your Wagner/Titan unit back in fighting shape, or want custom-fabricated hoses to eliminate downtime, our team has your back. We’ll set you up with the high-performance tools you need to apply coatings perfectly, cut down on waste, and boost your bottom line. If you're weighing your options, our guide on finding the best airless paint sprayer for contractors is a great place to start.
Having the right sprayer isn't just a convenience—it's critical. The difference in paint consumption between a well-tuned airless unit and one that's poorly maintained can easily top 10%. That’s enough to turn a winning bid into a losing one.
Swing by our shop or give us a call. Let's talk about how we can keep your projects moving forward.
Got Questions? We’ve Got Answers
Even seasoned pros run into questions on the job. Here are a few common ones we hear from contractors around San Luis Obispo when they're dialing in their paint estimates.
How Much Extra Paint Should I Buy for Touch Ups?
It’s always smart to have a little extra on hand. A good rule of thumb is to grab about 10% more paint than your calculations call for. You never know when you'll need it for scuffs, repairs, or client touch-up requests down the road.
For bigger commercial projects, I always recommend keeping a sealed, clearly labeled gallon of each color and finish used. This is a lifesaver because it guarantees a perfect match, since paint batches can have slight variations in color.
Does the Paint Color Really Affect Coverage?
Absolutely. It's not just about the shade, but the chemistry behind it.
Deep, rich colors like bold reds and vibrant yellows often have less titanium dioxide—that's the key pigment that gives paint its hiding power. Because of this, you might find yourself needing an extra coat to get that full, uniform finish you're after. Using a specialized tinted primer first can make a huge difference and save you a coat of that expensive topcoat.
What's the Difference Between WFT and DFT?
This is a critical distinction, especially for industrial or spec jobs.
Wet Film Thickness (WFT) is the thickness of the coating the moment you lay it down.
Dry Film Thickness (DFT) is what’s left after all the solvents evaporate and the paint is fully cured.
DFT is the number that really matters for the coating's long-term performance and durability. If a job spec calls for a certain DFT, you can figure out how thick to apply it wet using a simple formula: WFT = DFT / (% Volume Solids / 100). Getting this right is key to meeting project requirements and ensuring the coating lasts.
Nailing your calculations and having equipment you can count on are what separate a profitable job from a frustrating one. Whether you're working in Paso Robles, Atascadero, or Arroyo Grande, the crew at Contractor's Maintenance Service has the gear and the know-how to back you up.
Swing by our San Luis Obispo shop or check us out online at https://www.contractorsmaintenanceservice.com to see how we can help keep your projects running without a hitch.