A Pro's Guide to Using a Airless Sprayer for a Perfect Finish
- Feb 11
- 16 min read
If you want speed and a finish that rollers just can't touch, an airless sprayer is the tool for the job. It’s all about how the machine atomizes paint under high pressure, creating that flawless, glass-smooth look you see on professional projects and large surfaces.
Why Pros Rely On Airless Sprayers for Flawless Results
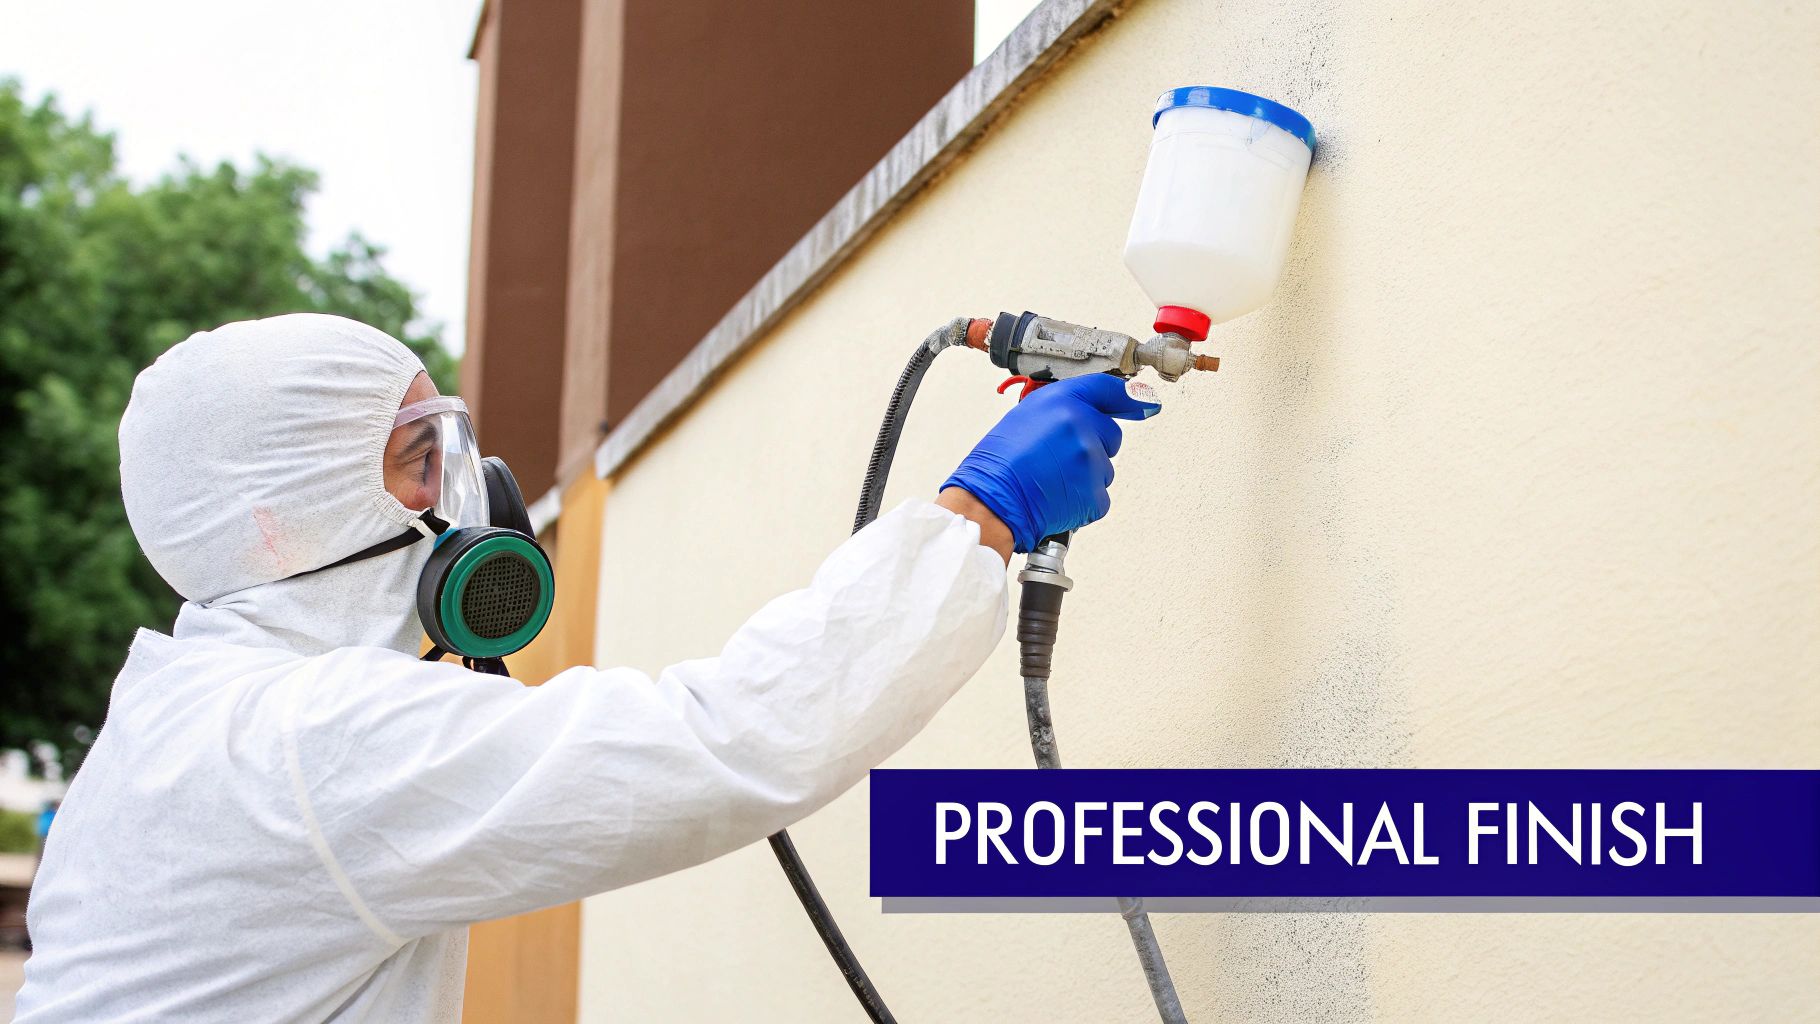
Ever wonder how new commercial buildings or freshly painted home exteriors get that perfectly uniform finish? Odds are, an airless sprayer was behind it. Rollers leave behind stippling, and brushes leave marks. An airless sprayer, on the other hand, forces paint through a tiny tip at thousands of pounds per square inch (PSI), breaking it into a fine, controlled mist.
This atomization process is what delivers that coveted factory-like finish. For professional painters, that power and efficiency are everything—it means better quality and getting the job done faster.
Understanding the Core Components
No matter the brand, every airless sprayer has four key parts working together. Get to know their roles, and you're one step closer to mastering the machine.
The Pump: This is the heart of the sprayer. The pump, or fluid section, is what pressurizes the paint.
The Hose: A specialized high-pressure hose moves the paint from the pump to the gun safely.
The Gun: This is where you're in control. The trigger starts and stops the flow of paint.
The Tip: You could argue this is the most critical piece. The tip shapes the spray pattern and dictates how much paint comes out.
The effectiveness of this system is why airless technology is king in the pro market. In fact, airless sprayers are projected to capture 41.2% of total revenue in the spray painting machine market in 2025. Their speed and ability to handle thick coatings without thinning give them a serious edge.
Non-Negotiable Safety Protocols
That same high pressure that gives you a perfect finish can cause serious harm. High-pressure injection injuries are no joke and require immediate medical attention. Never, ever treat an airless sprayer like a toy.
An airless sprayer is not a pressure washer. The fluid stream can pierce the skin and inject paint or solvent directly into your body, which is a medical emergency. Always engage the trigger safety lock when not actively spraying.
Always gear up with the right personal protective equipment (PPE). That means safety glasses, gloves, and a respirator rated for the material you're spraying. Good ventilation is also a must to keep fumes from building up.
For big jobs, airless sprayers are unbeatable for applying all kinds of coatings, including different types of specialized container paints, giving you a consistent and tough finish.
Your Local Expert in San Luis Obispo
For painting contractors here on the Central Coast—from Paso Robles and Atascadero down to Santa Maria, Arroyo Grande, and San Luis Obispo—reliable equipment isn't just nice to have, it's essential. At Contractor's Maintenance Service, we're the trusted, authorized service center for top brands like Graco and Wagner/Titan. We proudly serve all of San Luis Obispo County, including Pismo Beach, Grover Beach, Morro Bay, and the surrounding communities.
Whether you need a part, routine maintenance, or an urgent fix, our team is here to keep your sprayer running like new. We'll handle the machine so you can focus on delivering those flawless results for your clients.
Setting Up Your Sprayer and Workspace Like a Pro
A flawless finish isn't just about how you handle the gun; it starts with meticulous preparation. Before you even think about pulling that trigger, taking the time to set up your sprayer and workspace properly is the most important thing you'll do all day. This discipline is what prevents frustrating clogs, ensures a smooth, even flow of paint, and keeps overspray exactly where it belongs—nowhere near your client's floors or furniture.
First things first: prep your material. Even a brand-new can of paint needs a serious stir. I always use a power drill with a paddle mixer to make sure any solids that have settled at the bottom get fully mixed back in.
This isn't a step you can rush. A quick shake is never enough to get consistent color and sheen. After stirring, straining the paint through a mesh filter bag is absolutely non-negotiable. This simple move catches any dried bits, clumps, or other gunk that would otherwise clog your gun's filter or, worse, the tip itself.
The Machine Itself: Assembly and Priming
With your paint ready to go, it’s time to focus on the machine. Start by securely connecting the suction tube and the prime return tube. The larger suction tube goes right into your bucket of strained paint, while the smaller return tube should be placed in a separate waste bucket for the priming process.
Priming is how you purge the pump of air and any leftover storage fluid (like Graco Pump Armor). To get started, turn the prime/spray valve to the "prime" position. With the suction tube submerged in your paint, switch on the sprayer at a low-pressure setting.
You'll see fluid start to flow out of the return tube into your waste bucket. Just wait until you see a steady, solid stream of paint coming out. That's your signal that all the air and storage fluid have been pushed out. Once you see pure paint, turn the sprayer off.
Pro Tip: Never, ever skip priming. Trying to spray with air still in the lines will cause the gun to spit and sputter, leaving you with a messy, uneven finish and putting a ton of unnecessary strain on the pump’s packings.
Now you’re ready to get some pressure in the system. Move the return tube from the waste bucket into your main paint bucket. Next, turn the valve to the "spray" position and, without a tip in the gun, point the gun into the waste bucket. Turn the sprayer back on and pull the trigger until you get a solid stream of paint. You’re now officially primed and ready to spray.
Dialing In the Workspace and Choosing the Right Tip
Your workspace prep is just as critical as getting the machine ready. Cover everything you don't want painted with plastic and lock it down with good painter's tape. Spend the extra time to mask off trim, windows, and floors with precision—rushing this step always comes back to bite you during cleanup. For pros working in places like San Luis Obispo, Paso Robles, or Atascadero, a spotless job site is your best business card.
A common mistake I see all the time is poor hose management. Lay out your entire hose before you start, making sure there are no kinks or tight coils that could mess with your flow or become a trip hazard. As you work, always keep the hose behind you, well away from the fresh surface you just painted.
Finally, we get to the most impactful decision you'll make: choosing the right spray tip. The tip is what controls both the fan width and the flow rate. Using the wrong one is a recipe for disaster—you'll end up with too much paint, ugly runs, excessive overspray, and a finish you're not proud of. The right tip depends entirely on what you're spraying and what you're spraying it on.
For those looking to really get a handle on their gear, you can learn more about finding the best airless paint sprayer for contractors in our detailed guide.
To help you get started, here's a quick-reference chart that breaks down common tip sizes for different jobs.
Sprayer Tip Selection Guide by Project Type
This table gives you a solid starting point for matching your material to the right tip size. Remember, these are general guidelines, so always check the paint manufacturer's recommendation as well.
Coating Material | Recommended Tip Size (Orifice in Inches) | Ideal Fan Width | Common Projects |
|---|---|---|---|
Stains & Lacquers | .009" – .013" | 6-8 inches | Cabinetry, Trim, Woodwork |
Interior Latex Paint | .015" – .019" | 10-12 inches | Walls, Ceilings |
Exterior Latex Paint | .017" – .021" | 10-14 inches | Siding, Fences, Decks |
Elastomerics & Fillers | .025" – .035" | 12-16 inches | Masonry, Stucco, Block |
Selecting the correct tip from a chart like this is the final piece of the puzzle. It ensures you’re laying down the right amount of material with a pattern that’s perfect for the surface, giving you that professional, factory-like finish every single time.
Mastering Your Spray Technique for a Uniform Finish
Alright, your sprayer is primed and the area is masked off. Now comes the part that really separates the pros from the rookies: the actual spray technique. This is where your control and consistency translate directly into a flawless, uniform finish.
It’s not about just pointing and shooting. The real art is in mastering three things: pressure, distance, and speed. Get these right, and you'll sidestep all the common headaches like runs, sags, and stripes, leaving you with that glass-smooth surface everyone wants.
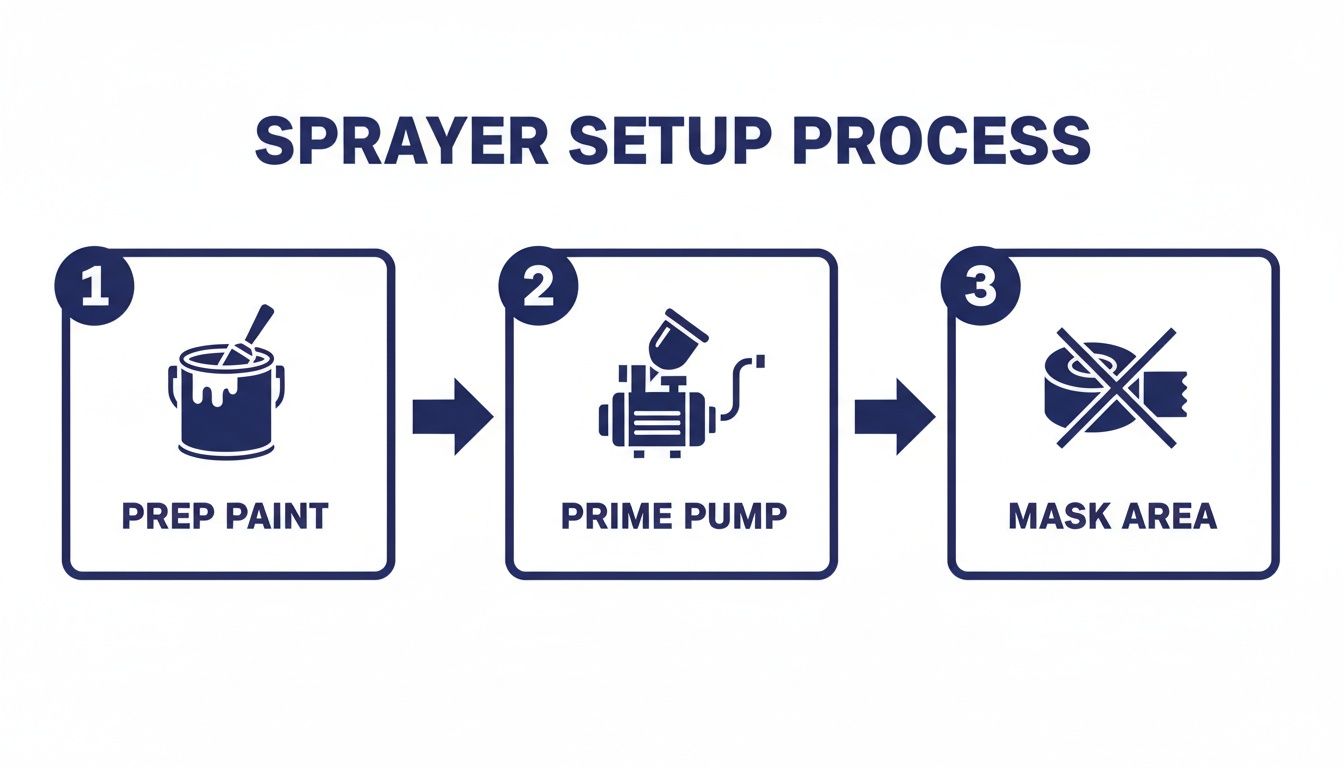
Before you pull that trigger, make sure you've followed these initial setup steps. A little prep work here prevents clogs and ensures your sprayer runs smoothly from the get-go.
Dialing In the Perfect Pressure
One of the biggest mistakes I see painters make is just cranking the pressure dial all the way up. More pressure doesn't automatically mean a better finish. It usually just means more overspray, wasted paint, and a ton of unnecessary wear and tear on your pump and tips.
The goal is simple: use the lowest possible pressure that still gives you a clean, atomized spray pattern.
Start with the pressure set to its lowest setting. Grab a piece of cardboard or use a masked-off test spot, pull the trigger, and look at the fan pattern. At low pressure, you’ll probably see "tails" or "fingers" along the top and bottom edges.
Slowly turn up the pressure just until those tails disappear and you’re left with a sharp, well-defined spray pattern. That’s your sweet spot.
Finding this minimum effective pressure is a game-changer. It can cut your paint consumption by 20% or more and make your spray tips last significantly longer, saving you real money on every single job.
Mastering Gun Control and Movement
Technique is everything when it comes to the gun. You’re aiming for a consistent distance and a perfect angle as you move across the surface. Think of your arm as an extension of the machine, moving with a smooth, deliberate motion.
Maintain Distance: Keep the spray gun 10-12 inches from the surface at all times. If you get too close, the paint builds up way too fast and you'll get runs. Too far, and you'll end up with excessive overspray and a thin, almost sandy-feeling finish.
Stay Perpendicular: Always keep the gun pointed straight at the surface, never swinging your arm in an arc. Arcing the gun deposits a heavy coat in the middle of your pass and feathers out the ends, which is a surefire way to get stripes.
Move First, Then Spray: Here's a pro tip that makes a huge difference. Start moving your arm before you pull the trigger, and release the trigger before you stop moving. This technique, known as "leading and trailing," prevents thick blobs of paint from building up at the start and end of each pass.
For professionals working everywhere from San Luis Obispo and Arroyo Grande to Pismo Beach, consistent, high-quality work is what builds a reputation. Mastering these fundamental movements is non-negotiable.
The 50% Overlap Method
To get a truly uniform coat without any striping or light spots, you need to use the 50% overlap method. This technique is dead simple but incredibly effective.
On your next pass, aim the center of your spray gun directly at the bottom edge of the pass you just made. This simple adjustment ensures every inch of the surface gets an equal amount of paint, blending each pass seamlessly into the next.
This method guarantees full coverage and kills the risk of "striping," a tell-tale sign of an amateur job. A consistent overlap is the final piece of the puzzle for that perfect, professional-grade finish your clients are paying for. And if you everfind your pattern is off, you might want to learn more about choosing the right tip size for airless sprayer finishes in our article.
The efficiency you gain here is huge. Airless sprayers can handle thick paints at speeds up to 10 gallons per minute, which can reduce material use by 20-40% and cut overspray to under 5%. With the construction market booming, tools that reduce labor by up to 50% are in high demand. For contractors, this means covering 300-500 sq ft/min compared to just 50-100 sq ft/min with old-school rollers.
The Cleanup and Maintenance Routine That Prevents Downtime
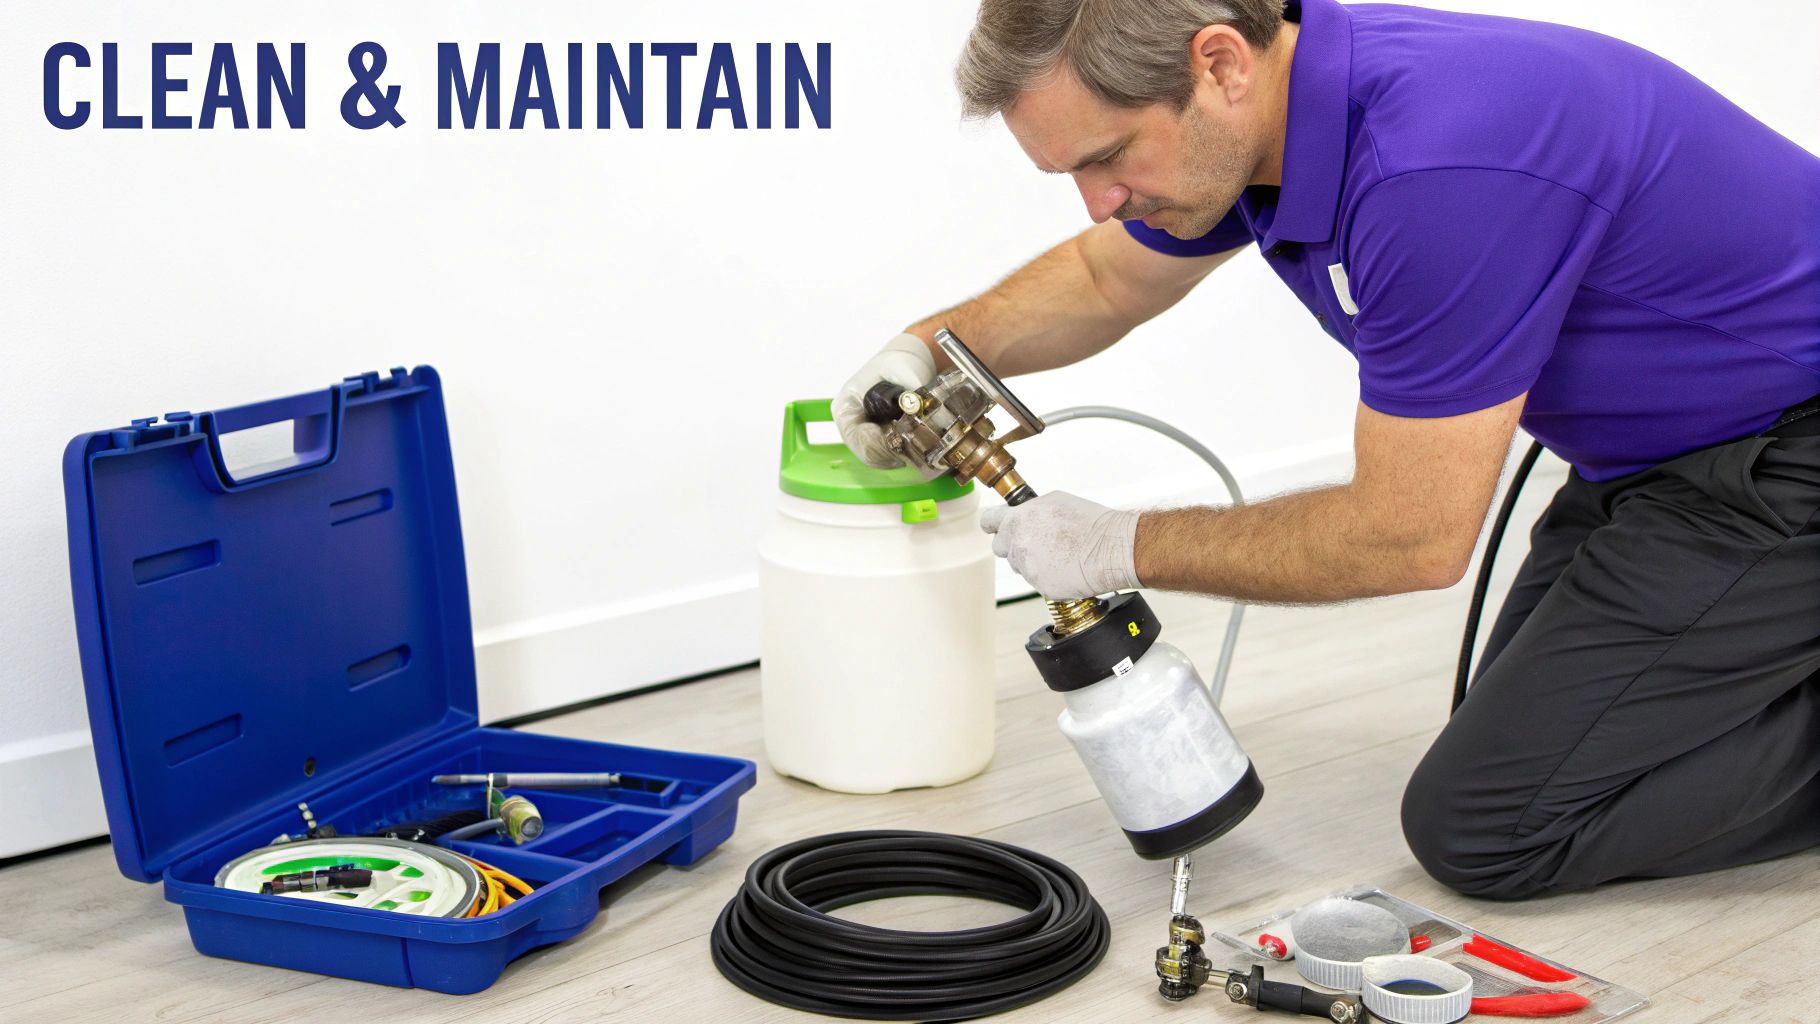
How you end your day with your airless sprayer is a pretty good indicator of how the next morning will start. A clean, well-maintained machine is ready to make you money. A neglected one? That’s just a source of frustration and expensive downtime.
If you want to protect your investment, the single best thing you can do is lock down a solid cleanup and maintenance routine.
This isn't about a quick rinse. It’s a methodical process of flushing the system, cleaning the critical parts, and doing the preventative checks that keep you spraying smoothly on jobs from San Luis Obispo to Paso Robles.
Safely Depressurize and Flush the System
First thing's first: always relieve the pressure in the system. Never, ever try to take apart the gun or hose while it's still under pressure.
Start by engaging the gun's trigger safety lock. Next, kill the power to the sprayer and flip the prime/spray valve over to "prime." This sends any built-up pressure back through the return tube. To finish, just give the gun's trigger a squeeze to bleed out any pressure left in the hose.
Now that the system is safe, you can get to flushing. Pull the suction tube out of your paint bucket and drop it into a bucket with the right cleaning fluid—water for latex, mineral spirits for oil-based paints. Put the smaller return tube into an empty waste bucket.
Fire up the sprayer on a low-pressure setting and let it cycle until you see clean fluid coming out of the return tube. Once it’s running clear, switch the valve to "spray." With the tip removed, point the gun into your waste bucket and pull the trigger to flush out the hose and gun.
Cleaning the Gun, Filters, and Tip
Dried paint is the mortal enemy of a high-performing airless sprayer. Even the tiniest flakes can cause those maddening clogs and ruin your spray pattern. That’s why cleaning the gun, filters, and tip is a non-negotiable part of the job.
Gun and Manifold Filters: Your sprayer has at least two filters—one in the gun’s handle and another inside the pump manifold. Pull them out and give them a good scrub with a brush and the proper cleaning solution. Remember, a clogged filter is one of the main culprits behind pressure loss.
Tip and Guard Assembly: Take the tip guard apart and remove the spray tip. An old toothbrush is perfect for scrubbing away any paint residue. Whatever you do, don't use a wire brush or any sharp metal tool to clean the tip's orifice—you’ll damage it in a heartbeat.
A clean tip is a happy tip. After cleaning, store your tip in a small container of cleaning fluid or pump protectant. This prevents any microscopic paint particles from drying inside, guaranteeing a perfect pattern when you start your next job.
Beyond Daily Cleanup to Preventative Maintenance
A daily flush is essential, but you need to think about long-term reliability too. A few simple maintenance tasks, done regularly, are your best defense against a sudden breakdown on a job in Atascadero or Santa Maria.
Get in the habit of inspecting your high-pressure hose for cuts, bulges, or scuffs. A compromised hose is a serious safety risk. You should also check the pump's fluid section for leaks, which often means the packings are worn and need to be replaced. For a deeper dive, check out our complete guide on how to properly clean an airless paint sprayer.
Lubrication and Proper Storage
Finally, a little lubrication and proper storage go a long way in preventing corrosion and premature wear. After every single cleaning, put a few drops of Throat Seal Liquid (TSL) on the piston rod. This keeps the packings lubricated, extending their life and maintaining a solid seal.
If you're storing the sprayer overnight or for a couple of days, leaving it filled with water or mineral spirits is fine. For long-term storage, though, you have to protect the pump from rust and corrosion. Flush the cleaning fluid out completely and then circulate a dedicated pump protectant, like Graco Pump Armor, through the entire system. This fluid has anti-corrosion and anti-freeze agents that safeguard the delicate metal parts inside the pump, making sure your sprayer is ready to work when you are.
Troubleshooting Common Sprayer Issues on the Job
Even when you do everything right—perfect prep, flawless technique—things can still go sideways in the middle of a job. But when your sprayer starts acting up, you don't always have to pack it in and call it a day. A lot of the most common airless sprayer hiccups can be diagnosed and fixed right on the spot with a little know-how.
Hitting the brakes to deal with a malfunction is always frustrating. Knowing how to quickly spot the problem, though, can save you hours of downtime and keep your project moving. Most issues boil down to a few usual suspects: clogs, worn-out parts, or the wrong pressure settings.
Sprayer Fails to Prime
One of the most common headaches is a sprayer that just won't prime. You've got it turned on, but it's not drawing any paint into the system. More often than not, the culprit is a stuck inlet valve ball.
This tiny steel ball can easily get gummed up with dried paint, which keeps it from seating correctly and creating the suction you need.
The Quick Fix: First, make sure the sprayer is safely turned off and unplugged. Then, using the handle of a screwdriver or a small hammer, give the side of the fluid section a firm but gentle tap. That little jolt is usually all it takes to free the stuck ball. If it’s still not priming, you may need to take the inlet valve apart for a manual cleaning.
It could also be something simpler. Check that your suction tube is fully submerged in the paint and that all your connections are tight. A loose connection will suck air into the line and prevent priming every time. Always check the simple stuff first.
Dealing with an Inconsistent Spray Pattern
Is your spray pattern looking weak, spitting, or showing heavy "tails" on the edges? If you've already tried adjusting the pressure, this almost always points to a blockage or a worn-out part. Don't just crank up the pressure to muscle through it—that only makes the problem worse and puts a ton of extra strain on your pump.
The first thing to look at is your tip. A worn tip will have an enlarged, rounded-out orifice that completely ruins your fan pattern. A good quality tip is typically good for about 40-50 gallons of latex paint. If you’ve been spraying for a while, it might just be time for a new one.
If the tip is new, you’re almost certainly dealing with a clog.
A pulsating spray is the machine’s way of screaming for help. It's telling you it's struggling to maintain pressure because a blockage is forcing the pump to work overtime. Check and clean all your filters—the one in the gun handle and the manifold filter at the pump—since they're designed to catch the very debris that causes these headaches.
When to Call for Professional Service
While you can solve plenty of issues on-site, it’s critical to know when a problem is beyond a quick field fix. If you've cleaned all the filters, put in a fresh tip, and still can't build or hold pressure, you're likely looking at a more serious internal issue like worn packings or a damaged piston rod.
For contractors in San Luis Obispo, Arroyo Grande, Grover Beach, and Pismo Beach, this is your cue to stop and call in the experts. Pushing a sprayer with major internal problems can cause permanent, expensive damage. At Contractor's Maintenance Service, we have the diagnostic tools and genuine parts to get you back up and running fast, without the guesswork.
The right tools are essential profit multipliers. Airless sprayers have completely changed the painting industry, with the global market valued at USD 12,850.75 million in 2024. This technology isn't just a tool; it's a key to efficiency and can cut labor costs by up to 50% on big jobs. You can learn more about the market growth of airless paint sprayers in this report.
Common Questions We Hear All the Time
After years of servicing equipment for painting contractors, we’ve heard just about every question you can imagine. From quick troubleshooting calls from a job site to long-term care debates in the shop, a few topics come up over and over again.
Here are some direct answers to the most frequent questions we get from pros in San Luis Obispo and the surrounding areas. These insights are pulled straight from real-world scenarios we see every day at our service center.
What Is the Biggest Mistake People Make When First Using an Airless Sprayer?
By far, the single most common mistake is setting the pressure way too high. There's this myth that you have to max out the pressure dial to get a good finish. The truth is, you only need just enough pressure to achieve a clean spray pattern without "tails" or fingering on the edges. That's it.
Cranking the pressure to the max creates a whole mess of problems. It leads to massive overspray, which wastes a ton of expensive paint and makes cleanup a nightmare. It also chews through your tips in record time and puts a huge amount of unnecessary strain on the pump's motor and packings.
Here’s a simple adjustment that will save you money: Always start with your pressure low and slowly dial it up until your spray pattern looks even and clean. This one habit alone can cut your paint use by 20-30% and seriously extend the life of your sprayer's most critical parts.
How Often Do I Really Need to Replace My Spray Tip?
Think of a spray tip like the tires on your truck—it’s a wear item. Its performance gets worse over time as the tiny orifice widens from the constant abrasion of paint blasting through it at high pressure. As the tip wears out, the fan width shrinks, and it starts dumping more paint onto the surface. The result? Runs, sags, and wasted material.
For a standard latex paint, a quality tip will usually last for about 40-50 gallons. But if you’re spraying thicker, more abrasive stuff like block fillers or tough elastomeric coatings, you might only get 20-30 gallons out of it.
The most obvious sign of a worn-out tip is a changing spray pattern. It will start to look more rounded, with heavy "tails" on the edges that you can’t get rid of no matter how you adjust the pressure. Swapping out your tip regularly is one of the cheapest and most effective things you can do to guarantee a top-notch finish on every job.
Can I Use Just Any Extension Cord with My Electric Sprayer?
Absolutely not. This is a critical mistake that can—and will—damage your sprayer's electric motor. Airless sprayers draw a serious amount of electrical current, especially when they first kick on. Plugging into an undersized or ridiculously long extension cord causes a severe voltage drop.
That voltage drop starves the motor of the power it needs, forcing it to work way harder and get dangerously hot. Sooner or later, it’s going to burn out. That’s an expensive and completely preventable repair.
Always check your sprayer's manual for what the manufacturer recommends for cord gauge and maximum length. But as a solid rule of thumb for professional use:
Use a minimum of a 12-gauge, heavy-duty extension cord.
Keep the cord length to 100 feet or less.
If you need more reach, the right way to do it is with a longer paint hose, not a longer extension cord. This guarantees the motor gets the stable voltage it needs to run safely and efficiently, whether you're working a job in Paso Robles, Atascadero, Arroyo Grande, or anywhere else on the Central Coast. A healthy motor means a reliable sprayer, and that's what keeps you making money.
For parts, expert repairs, or advice on getting the most out of your equipment, trust the team at Contractor's Maintenance Service. We're here to keep your gear running at its best. Visit us online to learn more or schedule a service.