


DIY Guide on How to Repair Pressure Washer
- Dec 4, 2025
- 16 min read
When your pressure washer decides to quit on you, it can feel like a major setback. But here’s the good news: many of the most common problems are surprisingly easy to fix yourself. Getting it right starts with a solid foundation—gathering the right tools and, most importantly, putting safety first. This prep work is the single most critical step to a successful DIY repair.
Your Pressure Washer Repair Toolkit and Safety Guide
Before you even start diagnosing a sputtering engine or weak spray, you need to make the machine safe to work on. These things operate at incredibly high pressures, and you can get seriously hurt if you're not careful.
Always start by disconnecting the spark plug on a gas model or unplugging an electric one. No exceptions. Next, squeeze the trigger gun to relieve any pressure still trapped in the system. It’s a simple move that prevents a nasty, high-pressure surprise. Finally, you have to protect yourself.
Essential Safety Gear
Your personal protective equipment (PPE) is non-negotiable. Don't even think about starting a repair without it.
Safety Glasses: This is mandatory. You need to shield your eyes from flying debris, cleaning chemicals, or any unexpected spray.
Gloves: A solid pair of durable gloves will protect your hands from grease, fuel, and sharp metal edges. We're big fans of these black industrial nitrile gloves because they offer great dexterity and stand up to chemicals.
Once you’re geared up for safety, it’s time to talk tools. Having what you need within arm's reach can turn a day of frustration into a quick, manageable fix. You don't need a professional-grade setup, but a few key items will handle the vast majority of common repairs.
Essential Toolkit for Pressure Washer Repair
Having the right tools ready to go makes all the difference. This table breaks down the must-haves for most common pressure washer fixes.
Tool/Supply | Primary Use | Pro Tip |
|---|---|---|
Socket and Wrench Set | Removing engine covers, pump manifolds, and other bolted parts. | A set with both metric and standard sizes will cover nearly any model you encounter. |
Spark Plug Socket | Safely removing and installing spark plugs on gas engines. | Make sure it has a rubber insert to grip the plug and prevent cracking the ceramic. |
O-Ring Pick Set | Carefully removing small rubber seals without causing damage. | These are invaluable for pump and hose repairs. A flathead screwdriver will just tear them. |
Carburetor Cleaner Spray | Dissolving fuel varnish and clogs in carburetor jets and passages. | A quick spray can often solve no-start issues on gas models in minutes. |
Nozzle Cleaning Tool | Clearing debris from the spray tip—a common cause of low pressure. | Keep it handy. A tiny speck of dirt is all it takes to ruin your spray pattern. |
With these items in your toolbox, you’ll be well-equipped to tackle most of the issues that pressure washers throw at you, saving yourself time and a trip to the hardware store.
Local Repair Tip: If you're in San Luis Obispo, Atascadero, Paso Robles, Arroyo Grande, or the Five Cities area and a DIY fix starts to feel like too much, our team at Contractor's Maintenance Service is here to help. We offer professional diagnostics and repairs to get your equipment running like new again.
Troubleshooting Low or No Pressure Problems
When your pressure washer suddenly loses its punch, it's easily one of the most common—and frustrating—failures you'll run into. The good news? The fix is often surprisingly simple. A methodical approach, starting with the easiest checks, will help you figure out how to get your machine running right without spending money on parts you don't need.
Your first instinct might be to assume a major internal failure, but more often than not, the problem lies somewhere far more accessible. Before you start tearing things apart, let's walk through the basics that solve the issue 80% of the time.
This decision tree gives a quick visual guide to the initial steps for any pressure washer repair.
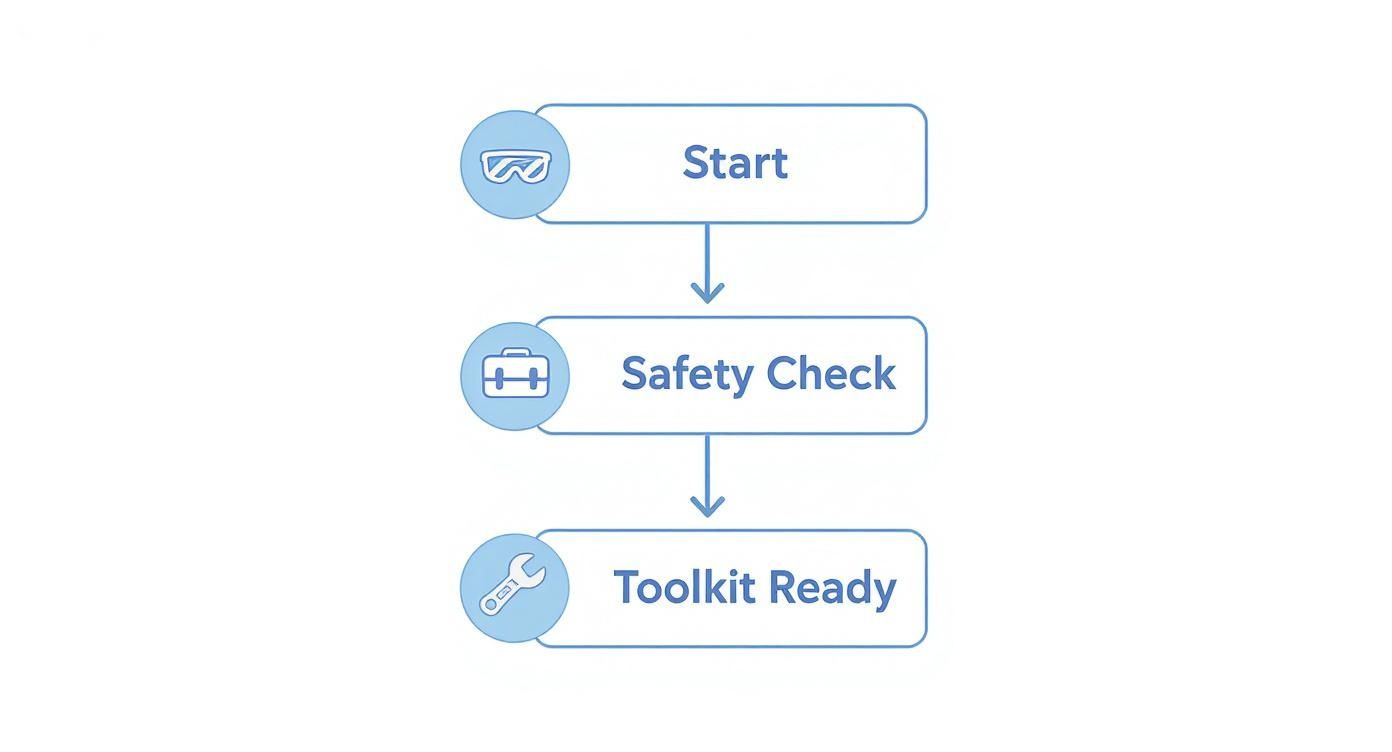
Following these prep steps—making sure you're safe and have your tools handy—is the foundation for a successful and efficient repair.
Start With the Obvious Culprits
Low pressure often starts at one of two places: where water goes in or where it comes out. Let's check these first.
Your water supply is everything. Is the spigot for your garden hose turned on all the way? Look for any kinks or twists that might be choking off the flow. Even a hose that's been partially crushed can starve the pump and kill your output pressure. You need a steady, strong flow from your source.
Next, take a close look at the spray nozzle itself. A tiny speck of sand or debris is all it takes to clog the orifice and mess up the spray pattern, giving you a weak or sputtering stream. Use a nozzle cleaning tool (or even a straightened paperclip in a pinch) to carefully clear any blockage from the tip.
If you find yourself constantly cleaning the nozzle, that's a big clue that your water source might have sediment. Always check the small mesh screen filter on the garden hose inlet and give it a thorough cleaning.
Differentiating Pressure Symptoms
Pay attention to how the machine is behaving, as this gives you important clues. Is the pressure just consistently weak, or is it pulsating and surging between high and low?
Weak but Steady Pressure: This usually points back to a water supply issue, a clogged nozzle, or simply using the wrong size nozzle for the job. You can learn more about how to choose the right pressure washer nozzle in our detailed guide.
Pulsating or Surging Pressure: This classic symptom often means air is trapped in the pump or that the unloader valve is sticking. To purge the air, turn off the machine, disconnect the high-pressure hose from the pump, and let water run through it for a minute until you see a solid, uninterrupted flow.
If purging the air doesn't fix the pulsing, the unloader valve becomes your prime suspect. This component regulates pressure by recirculating water when you release the trigger. When it gets stuck or dirty, it can make the pressure surge erratically.
Inspecting the Unloader Valve and Pump
If the simple checks haven't brought your pressure back, it’s time to look at the pump's core components. The unloader valve is typically found on the pump manifold and can often be serviced. With the machine off and all pressure relieved, you may need to remove the valve, clean it of any debris, check for worn O-rings, and make sure it moves freely.
Should the valve seem fine, the final area to check is the pump seals. When seals wear out, they allow water to bypass internally, which directly causes a loss of pressure. Replacing them is a more involved repair, but it's entirely manageable if you have the right seal kit for your specific pump model.
This kind of mechanical issue is pretty common. In fact, repair statistics show that mechanical pump failures, hose leaks, and disconnected fittings make up nearly 40% of all serviced cases in the market. This has led to a wide availability of spare parts and guides. It’s also worth noting that electric pressure washers, now favored by over half of consumers, generally have simpler maintenance routines compared to their gas-powered counterparts.
For our local customers, tackling a pump rebuild can feel a bit daunting. If you're in San Luis Obispo or the surrounding communities like Arroyo Grande or Paso Robles and run into an issue you can't solve, our expert technicians at Contractor's Maintenance Service are here to help. We have the specialized tools and parts on hand to get your machine back to peak performance quickly, saving you time and frustration.
Solving Engine and Motor Starting Issues
There's nothing quite like the frustration of yanking a starter cord or flipping a switch and getting absolutely nothing back. A pressure washer that won't start can bring your whole day to a grinding halt, but the fix is often simpler than you might think. The first thing you have to do is figure out if you're dealing with a gas engine or an electric motor, because their starting problems—and the solutions—are worlds apart.
This isn't just a minor detail; it’s the whole ballgame. While electric models make up over 54% of the market share in 2024, gas-powered washers are seeing a huge surge in popularity, and their mechanics are completely different. According to Arizton's latest report, the market is shifting, but the repair fundamentals remain. Gas engines need tune-ups and clean fuel systems, while electric units usually have issues with cords or switches.
Diagnosing a Gas Engine That Won't Start
When a gas engine gives you the silent treatment, the problem almost always boils down to one of three things: fuel, spark, or air. If you check each one methodically, you’ll find the culprit pretty fast.
Start with the fuel system—it's the most common troublemaker. Has the gas been sitting in the tank for over a month? The ethanol in modern fuel goes stale quicker than you'd think, leaving behind a gummy mess that clogs up the carburetor. If the fuel is old, drain it and fill it with fresh gas.
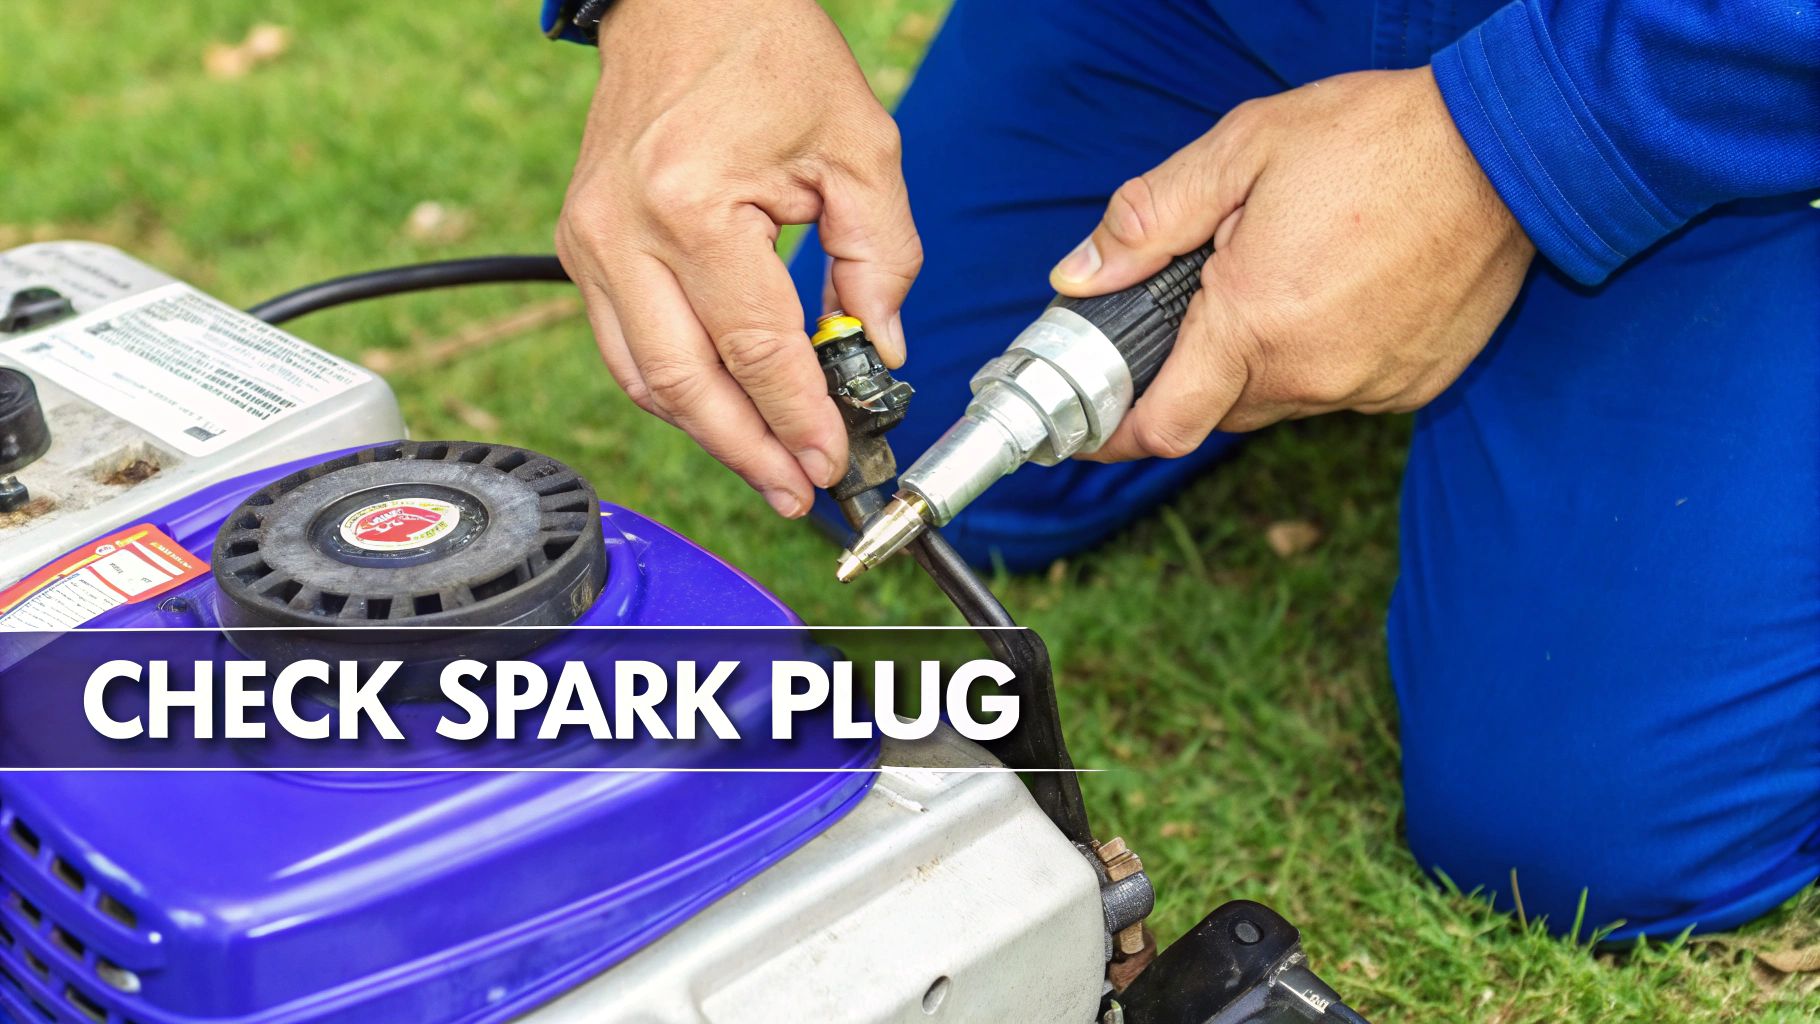
If that doesn't do the trick, the spark plug is your next stop. Pull it out and look for black carbon buildup or oily residue on the electrode. A dirty plug can't create a strong spark. You can try cleaning it with a wire brush, but honestly, if it looks even slightly worn, just replace it. It's a cheap and easy fix that solves a ton of problems.
Last but not least, check the air filter. A clogged filter is like trying to breathe with a pillow over your face—it chokes the engine by cutting off airflow. Just pop the cover off, pull the filter out, and give it a clean. If it's really grimy, swap it for a new one.
Cleaning a Clogged Carburetor
Okay, so you've confirmed you have fresh fuel, a good spark, and a clean air filter, but the engine still won't start. Your next likely suspect is a clogged carburetor. Those tiny jets inside get gummed up with old fuel residue all the time.
To get it clean, you'll have to take it off the engine. First, remove the air filter housing to get access. Be methodical here—carefully disconnect the fuel lines and linkages, and maybe snap a quick photo with your phone so you remember how everything goes back together.
Once it's off, spray carburetor cleaner directly into all the jets and passages. This should dissolve most of the varnish. If you have a really stubborn clog, you might need to gently clear the main jet with a very thin piece of wire.
Pro Tip: When you take the carburetor apart, be extra careful with the bowl at the bottom. The float and needle valve inside are delicate. Bending any of those tiny components during cleaning is a surefire way to create new problems.
Troubleshooting an Electric Motor Failure
Electric pressure washers have fewer moving parts, which is great, but they have their own unique set of starting issues. If your electric model is dead in the water, your troubleshooting should focus on the power supply and its components.
First, the obvious stuff. Is it plugged into a working outlet? Test the outlet with a lamp or your phone charger to be sure. Check the GFCI (Ground Fault Circuit Interrupter) on the plug or the outlet itself. If it’s tripped, just hit the "Reset" button.
If the power source is good, run your hands along the entire length of the power cord. Look for any cuts, frays, or damage. A beat-up cord is a serious fire hazard and needs to be replaced immediately, no questions asked. While you're at it, check the power switch on the machine; they can fail and might need replacing.
Finally, use your ears. Does the motor hum but not turn over? That often points to a seized pump or a bad starting capacitor. If the motor is completely silent, the issue is likely the power supply, a bad switch, or a tripped thermal overload.
For anyone in San Luis Obispo, Paso Robles, Atascadero, Arroyo Grande, or the greater Five Cities area, sometimes a DIY fix turns into a major headache. If you’ve worked through these steps and are still stuck, Contractor's Maintenance Service is here to help. Our pros can handle anything from a full carburetor rebuild to tricky electrical faults, getting you back up and running without the hassle.
Finding and Fixing Leaks in Hoses and Pumps
When your pressure washer starts leaking, it’s not just making a mess—it’s bleeding power. Every drop of water spraying from somewhere other than the nozzle tip is a loss of precious PSI. That means less cleaning force and more time on the job. The good news? Most leaks are simple to track down and fix yourself.
The hunt for a leak should always start with a low-pressure check. Before you even think about starting the engine, just connect your garden hose to the pressure washer's inlet and turn on the spigot. This simple step often reveals drips from loose fittings or bad seals right away, without the added complexity of a running machine.
Pinpointing Leaks in Your Hoses and Connections
Leaks love to show up at connection points—the places where seals and fittings are constantly under stress. It's best to work your way through the system logically, from the water source to the spray wand.
Start with the garden hose connection. If you see a steady drip where it connects to your machine, the culprit is almost always a worn-out or missing rubber washer. This is a fix that costs less than a dollar. Just use a small flathead screwdriver to pry out the old washer and press a new one into place.
Next, give the high-pressure hose a thorough inspection. With the machine running, look carefully along its entire length for pinhole leaks, scuffs, or bulges. Never run your hand over a pressurized hose to find a leak; a tiny puncture can release a stream of water powerful enough to cause serious injury. Look for fine mists or tiny jets of water instead.
Your high-pressure hose is more than just a tube—its condition is critical for both safety and performance. For a closer look at what makes a quality hose and how to care for it, check out our detailed guide on what you need to know about high-pressure hoses.
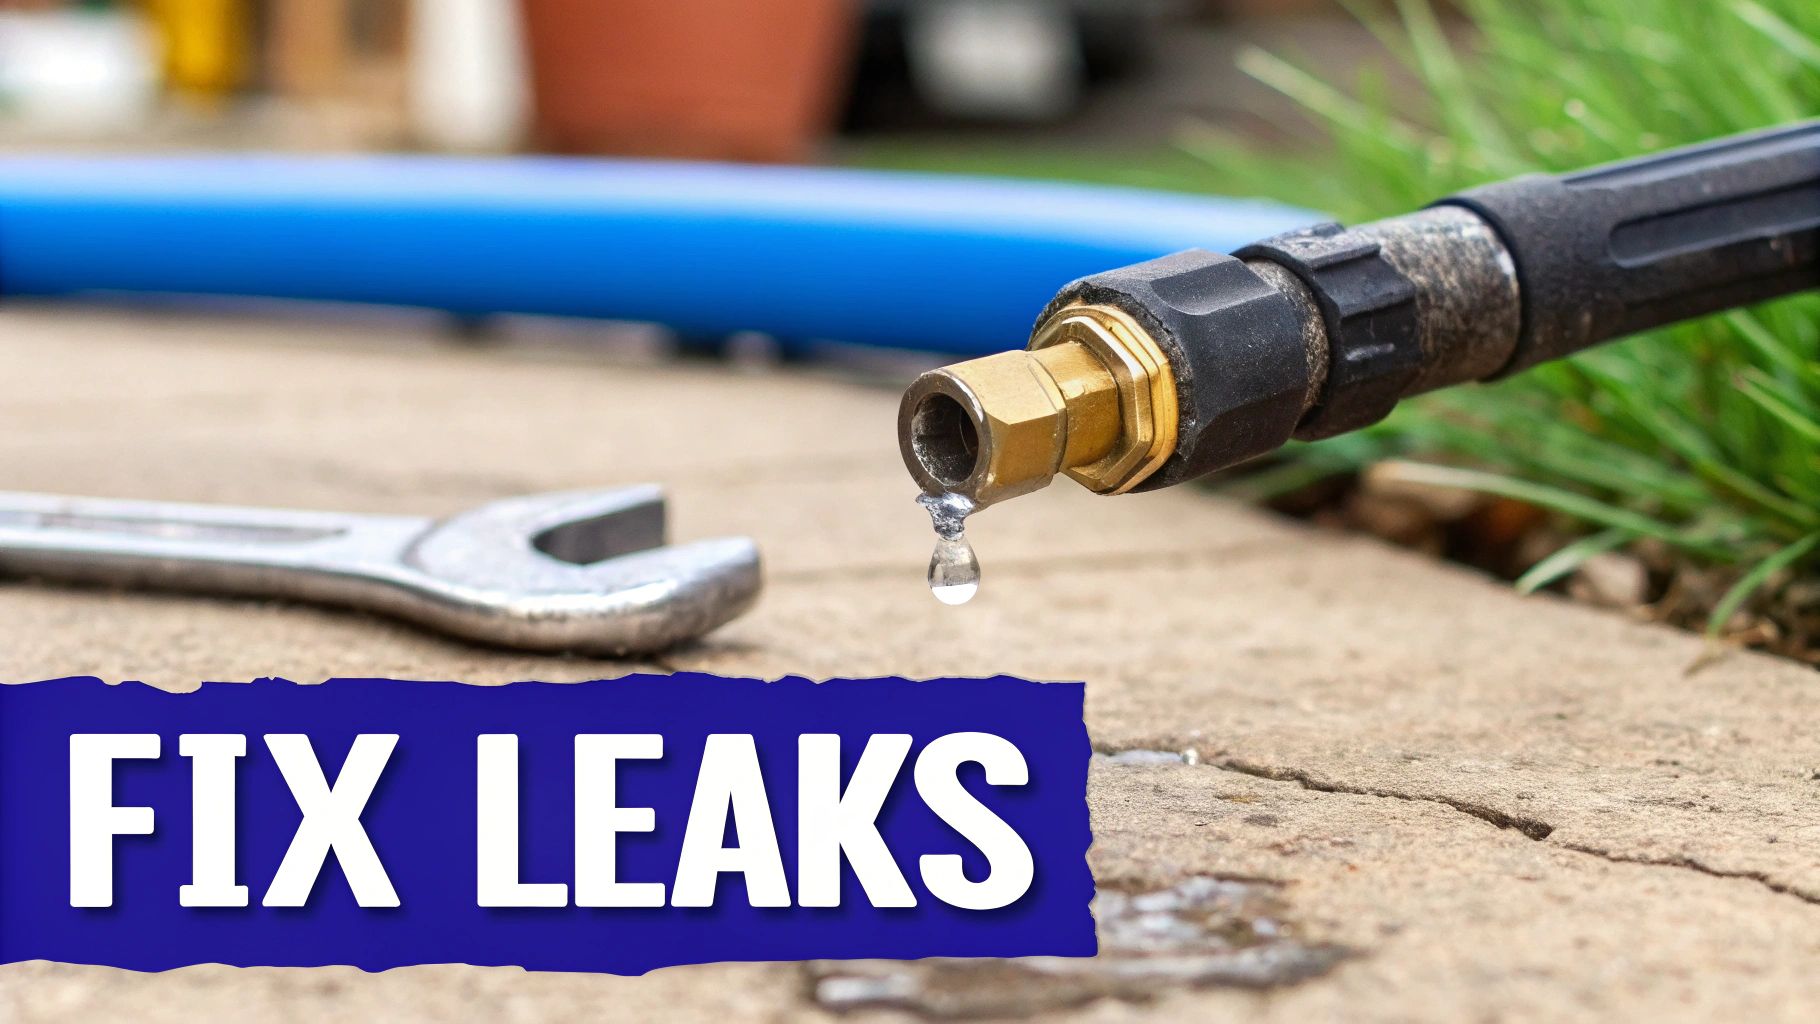
The fittings at both ends of the high-pressure hose are another prime suspect. These connections rely on small O-rings to create a watertight seal. With time and use, these O-rings can dry out, crack, or get nicked, causing frustrating leaks. Replacing them is easy. Just unscrew the fitting, use an O-ring pick to carefully remove the old one, and roll a new, lubricated O-ring into its groove.
To help you quickly diagnose where that pesky drip is coming from, here's a quick reference table.
Common Leak Locations and Solutions
Leaking From | Common Cause | DIY Fix or Professional Help? | Estimated DIY Cost |
|---|---|---|---|
Garden Hose Connection | Worn or missing rubber washer. | Easy DIY. | $1 - $2 for a new washer. |
High-Pressure Hose Fitting | Damaged or missing O-ring. | Easy DIY. | $5 - $10 for an O-ring kit. |
High-Pressure Hose Body | Puncture, abrasion, or bulge. | Replace the hose (DIY). | $40 - $100+ depending on length/quality. |
Pump Manifold | Worn internal seals or frost damage. | Advanced DIY or Professional. | $30 - $70 for a seal kit; $200+ for pump replacement. |
Trigger Gun or Wand | Worn O-rings or internal seals. | Easy DIY. | $5 - $15 for O-rings or a gun repair kit. |
This table covers the most common scenarios we see in the shop. Most of these are quick fixes you can handle with basic tools and the right parts.
Tackling Leaks from the Pump Itself
If your hoses and connections are bone dry but water is still dripping from the main unit, the leak is probably coming from the pump. This might sound intimidating, but it often boils down to a few common culprits.
Water weeping from the pump housing is a classic sign of worn internal seals. As the pump pressurizes water, these worn seals let it slip past the pistons and out through the manifold. Replacing these requires taking the pump apart, but it's a standard repair. You can usually find a seal kit specific to your pump model that includes every O-ring and seal you need for a full rebuild.
Another major cause, especially if you live in a colder climate, is frost damage. If water was left inside the pump during a freeze, the expanding ice can crack the pump housing or pop out a dedicated frost plug. A cracked manifold usually means a new pump is in order, but a dislodged frost plug can sometimes be resealed or replaced.
Finding Drips in the Spray Gun and Wand
Don't forget to check the business end of your pressure washer. The spray gun and wand have several connection points that are common sources of leaks.
Trigger Gun Body: Water dripping from the seams of the plastic housing? An internal seal has probably given up.
Wand Connection: The spot where the metal wand screws into the trigger gun uses an O-ring that can wear out.
Nozzle Connection: The quick-connect fitting where the nozzle tips attach can also leak if its internal O-ring is damaged.
Most of these are simple O-ring replacements. The trick is getting the exact right size for your model to guarantee a tight, lasting seal. We always recommend keeping a small kit of assorted O-rings on hand—it can turn a frustrating leak into a five-minute fix.
If you're in San Luis Obispo, Atascadero, Paso Robles, Arroyo Grande, or anywhere in the Five Cities area and you're dealing with a stubborn leak you can't solve, give us a call. The team at Contractor's Maintenance Service has the tools, parts, and expertise to get your machine running leak-free.
Knowing When to Call a Repair Professional
Even the most seasoned DIYer has to know when to put the tools down. While this guide will walk you through plenty of common pressure washer fixes, some problems are more than just a simple parts swap. They're symptoms of deeper internal issues that require specialized tools and years of experience to diagnose correctly. Pushing your luck can quickly turn a manageable repair into a costly, machine-ending disaster.
The whole point of doing it yourself is to save some time and money, right? But that math starts to look a little different when you're staring at a complex diagnostic puzzle or the cost of parts keeps climbing. It’s all about making a smart call before you get in over your head.
Red Flags That Signal It's Time for an Expert
Certain symptoms should be an immediate sign to step back and call in a pro. If you run into any of these, it's almost always cheaper and safer to get a professional opinion.
Deep Internal Pump Problems: You’ve replaced the seals and checked the valves, but you've still got terrible pressure or leaks coming from the pump manifold. This usually points to worn pistons, cracked ceramic plungers, or a damaged wobble plate—none of which are simple fixes. These jobs require a full pump teardown.
Major Engine Failure: If your gas engine won't start and you've already confirmed it's getting fuel, spark, and air, something more serious is going on. It could be anything from a loss of compression to a sheared flywheel key or internal carburetor damage that a basic cleaning won't touch.
Cracked Pump Housing: This is the classic sign of freeze damage. Sometimes you can get away with replacing a frost plug, but a crack in the main pump body or manifold is a fatal blow. It typically means a full pump replacement is needed, and that’s a job best left to the pros.
Electrical Motor Seizure: On an electric model, if the motor just hums loudly but won't turn over—and you've made sure the pump itself isn't seized—the motor’s internal components like bearings or windings have probably failed.
A great rule of thumb we use in the shop is the 40% rule. If the total cost of the parts you need for the repair is more than 40% of what it would cost to buy a brand new, comparable machine, it’s time to hit pause. Get a professional quote first—it might make more sense to have it serviced or even replaced.
The Value of Professional Service in San Luis Obispo
For anyone in San Luis Obispo, Arroyo Grande, Paso Robles, Atascadero, or the greater Five Cities area, our team at Contractor's Maintenance Service is your best bet when DIY frustration sets in. Bringing your machine to us isn't just about getting a repair; it's about getting peace of mind.
We have the diagnostic tools to pinpoint the exact cause of a problem in minutes, not hours. More importantly, we have direct access to high-quality, OEM-spec parts and the know-how to install them the right way, the first time. This ensures your pressure washer is brought back to factory standards, extending its life and restoring the performance you depend on.
Don't let a complex issue sideline your equipment. Our expert technicians are here to provide a fast, reliable solution.
Common Questions About Pressure Washer Repair
Even after you've gone through all the main troubleshooting steps, a few questions can still pop up. That's totally normal. When you're figuring out how to fix a pressure washer, some problems show up time and time again.
Think of this section as a quick-fire round of answers to the most common questions we get right here in the shop from DIY folks just like you.
Why Does My Pressure Washer Keep Shutting Off?
An engine or motor that just quits in the middle of a job is a classic head-scratcher. The reason almost always comes down to whether you have a gas or electric machine, since their safety systems are completely different.
If you have an electric model, the usual suspect is overheating. These units have a thermal overload switch that cuts power to stop the motor from frying itself. Take a look at the air vents on the motor housing—are they clogged with dirt and grime? If so, clean them out and give the machine a good 15-20 minutes to cool down before you try starting it again.
With a gas engine, the problem is almost always fuel or oil. First thing to check is the fuel cap. It sounds simple, but many have a tiny vent hole that gets clogged. This creates a vacuum in the tank and starves the engine of fuel. Also, pull the dipstick and check your oil. Most modern engines have a low-oil sensor that will shut everything down instantly to prevent catastrophic failure.
What Does Milky Oil in My Pump Mean?
Seeing milky, coffee-colored oil through your pump's sight glass is a major red flag. It's a sure sign that water has gotten past the internal seals and contaminated the oil. This isn't something you can ignore. That water-oil sludge can't properly lubricate the pump's moving parts, which leads to a fast and very expensive failure.
Simply draining and refilling the oil won't fix it. The real problem is failed water seals inside the pump manifold. The only correct way to fix this is to drain the contaminated oil, take the pump apart, and replace all the water seals and O-rings.
Pro Tip: When you do this repair, it is absolutely critical to get the right seal kit for your exact pump model. Guessing or using a seal that's "close enough" will guarantee it fails all over again.
How Often Should I Service My Pressure Washer?
Regular maintenance is the secret to a long-lasting, reliable machine. For most homeowners, a tune-up once a year is plenty. I always recommend doing it right at the start of the season before you plan on using it a lot.
A good annual service should always include:
Engine Oil Change: Fresh oil is the lifeblood of any gas engine.
Pump Oil Change: Don't forget the pump! Its oil is just as important.
Spark Plug Inspection: Look for carbon buildup or wear, and don't hesitate to replace it.
Filter Cleaning: Clean both the engine's air filter and the water inlet screen.
Now, if you use your washer commercially, you need to be much more aggressive with maintenance. Plan on changing the pump oil every 50-100 hours of use. And for anyone who lives where it freezes, winterizing with pump saver fluid isn't a suggestion—it's mandatory to prevent ice from cracking your pump.
Can I Use Regular Motor Oil in the Pump?
We get this question constantly, and the answer is a hard no. You should never, ever use standard motor oil (like 10W-30) in your pressure washer pump.
Motor oils are full of detergents and additives made for the intense heat and combustion inside an engine. In a pump, those detergents cause the oil to foam up under pressure, which completely destroys its ability to lubricate. It’s a surefire way to wreck your pump’s seals and bearings in a hurry.
Always use a non-detergent pump oil made specifically for high-pressure pumps. Your owner’s manual will tell you exactly what weight and type to get. Using the right fluid is one of the simplest and most important things you can do to protect your machine.
When a simple fix turns into a major headache, don’t be afraid to call in the pros. For folks in San Luis Obispo, Atascadero, Paso Robles, Arroyo Grande, or the Five Cities area, Contractor's Maintenance Service is your local expert for parts, diagnostics, and professional repairs. We've got the tools and experience to solve any pressure washer problem, big or small. Visit us online at https://www.contractorsmaintenanceservice.com to see how we can get your equipment back in top shape.


Comments