


8 Essential Paint Spraying Tips for a Flawless Finish in 2026
- Jan 12
- 16 min read
Achieving a durable, high-quality finish on commercial or industrial projects requires more than just pointing and spraying. It demands precision, the right technique, and a deep understanding of your equipment. From initial surface preparation to the final clean-up, every step is critical. Small mistakes can lead to costly rework, premature coating failure, and unnecessary downtime, impacting both your reputation and your bottom line.
This comprehensive guide moves beyond basic advice to deliver actionable, professional-grade paint spraying tips. We will cover the essential pillars of a successful application, from dialing in your equipment settings and mastering spray patterns to navigating environmental challenges and performing crucial maintenance. These strategies are designed to elevate your skills, streamline your workflow, and ensure every project meets the highest professional standards.
Whether you're a seasoned contractor looking to refine your process or a facilities manager aiming for greater efficiency, these insights will help you avoid common pitfalls and produce flawless, long-lasting results. For contractors and maintenance teams based in San Luis Obispo and the surrounding areas, including Paso Robles, Atascadero, Arroyo Grande, Grover Beach, Pismo Beach, Nipomo, and Santa Maria, mastering these techniques is key to delivering work that stands out for its superior quality and durability. This guide provides the practical knowledge you need to tackle any coating job with confidence and expertise. We will explore the following key areas:
Proper Surface Preparation and Cleaning
Maintaining Optimal Spray Distance and Angle
Proper Equipment Setup and Pressure Adjustment
Using Quality Paint, Proper Thinning, and Multiple Thin Coats
Controlling Environmental Conditions During Application
Regular Equipment Maintenance and Cleaning
Masking and Protecting Non-Target Areas
Understanding Paint Types and Substrate Compatibility
1. Proper Surface Preparation and Cleaning
The most advanced spray gun and premium coating will fail if the surface isn't properly prepared. Think of surface preparation as the foundation of your entire project; it’s the non-negotiable first step that dictates the adhesion, durability, and final appearance of the coating. Skipping or rushing this stage is the primary cause of coating failures like peeling, blistering, and premature corrosion.
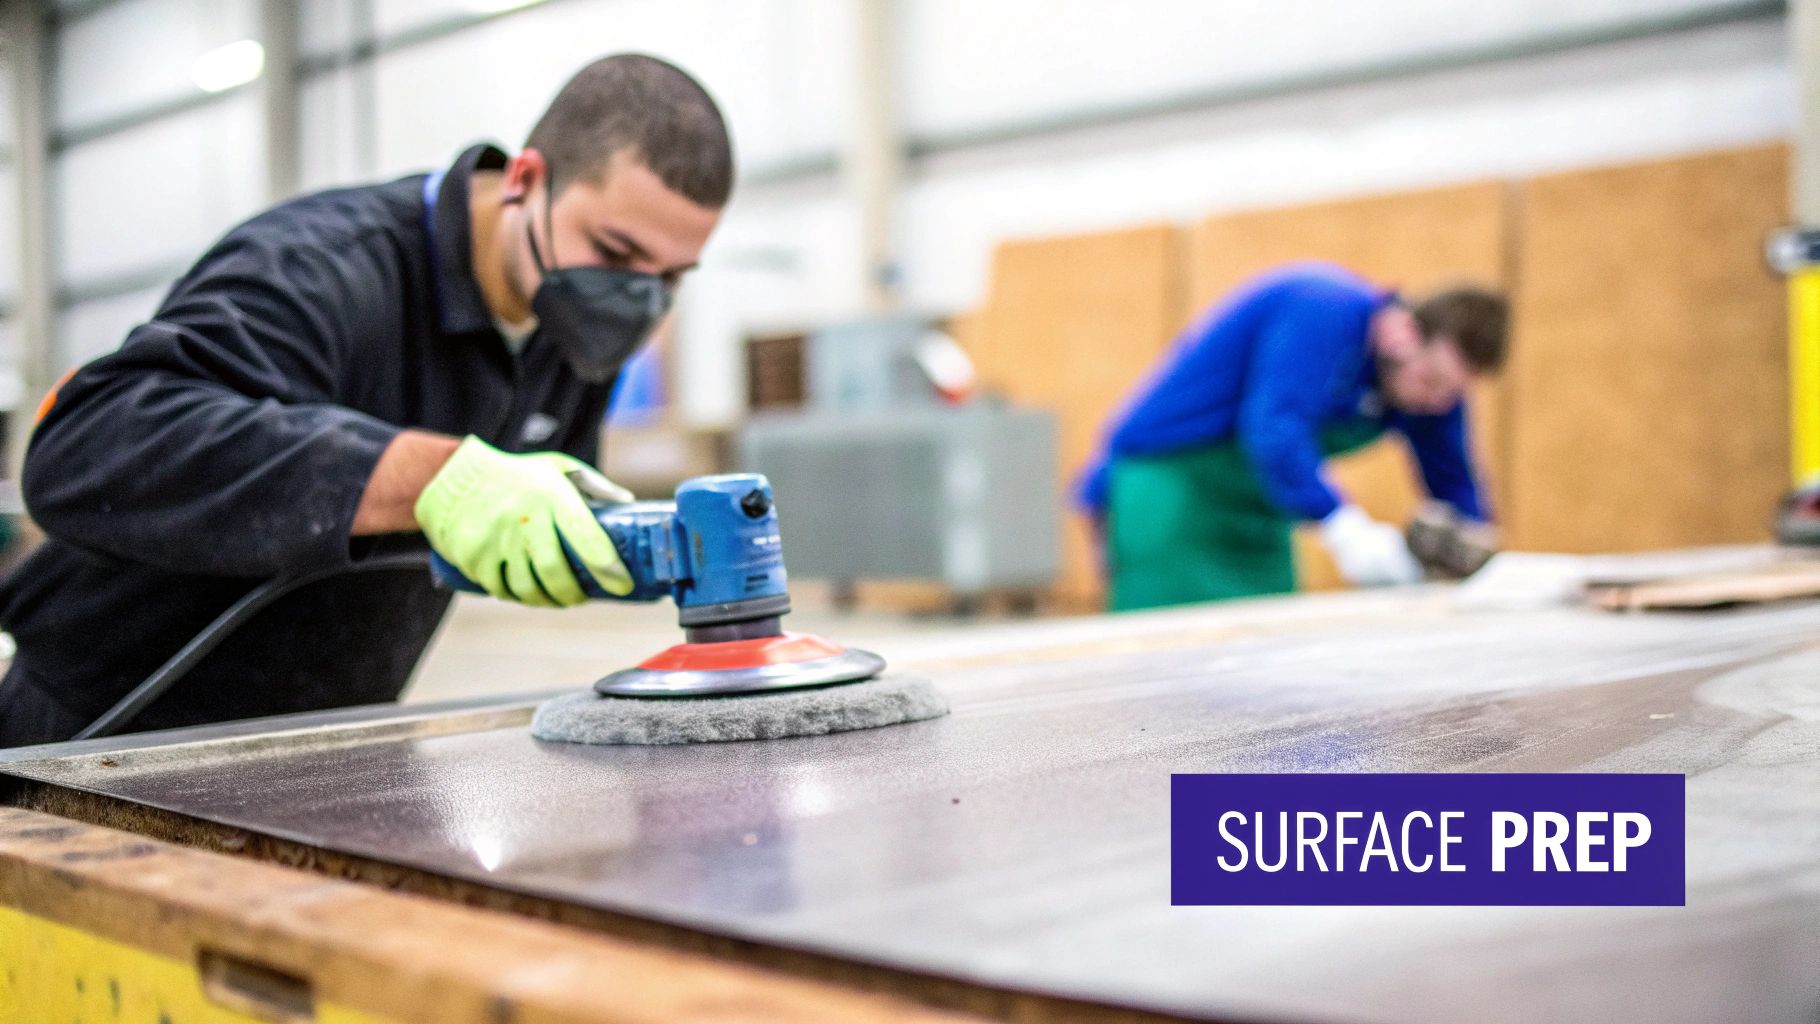
For industrial and commercial applications, from machinery in a Paso Robles manufacturing plant to structural steel in San Luis Obispo, preparation ensures the coating can perform its protective function. The goal is to create a clean, dry, and uniformly textured surface that is free of contaminants like oil, grease, rust, and loose paint. This creates an optimal profile for the new coating to mechanically bond to, ensuring longevity and performance.
Actionable Preparation Tips
To guarantee a flawless finish, follow a systematic approach. Before you even pick up your sprayer, it's crucial to correctly prepare your surfaces. Learn how to prepare walls for painting like a pro for detailed guidance on common substrates.
Here are key steps for industrial and commercial projects:
Deep Clean the Surface: Use a pressure washer (1500-2500 PSI is effective for most concrete and metal) with an appropriate degreaser to remove dirt, grime, and loose paint. For stubborn industrial contaminants, you may need a solvent wipe-down.
Create a Surface Profile: Mechanical abrasion is critical. Use sandpaper, grinders, or sandblasting to remove old coatings and rust. The grit depends on the substrate and coating requirements, typically ranging from 80-grit for heavy removal to 220-grit for a smoother finish.
Address Corrosion: On oxidized metal, don't just paint over rust. After removing loose scale, apply a rust converter to chemically transform the iron oxide into a stable, paintable surface before priming.
Ensure Complete Dryness: After washing, allow the surface to dry completely. Trapped moisture is a leading cause of coating failure. In coastal areas like Pismo Beach or Morro Bay, allow at least 24-48 hours, and check for hidden moisture with a moisture meter if necessary.
Mask and Protect: Meticulously protect all surrounding areas, equipment, and components not being painted. Use high-quality masking tape, plastic sheeting, and drop cloths to prevent costly overspray damage.
2. Maintaining Optimal Spray Distance and Angle
Achieving a uniform, flawless finish is less about the paint and more about physics and technique. Your spray distance and angle are two of the most critical variables that directly impact the coating's thickness, texture, and overall consistency. Spraying too close causes runs, drips, and an overly thick application, while spraying too far results in a dry, sandy texture and significant overspray waste.
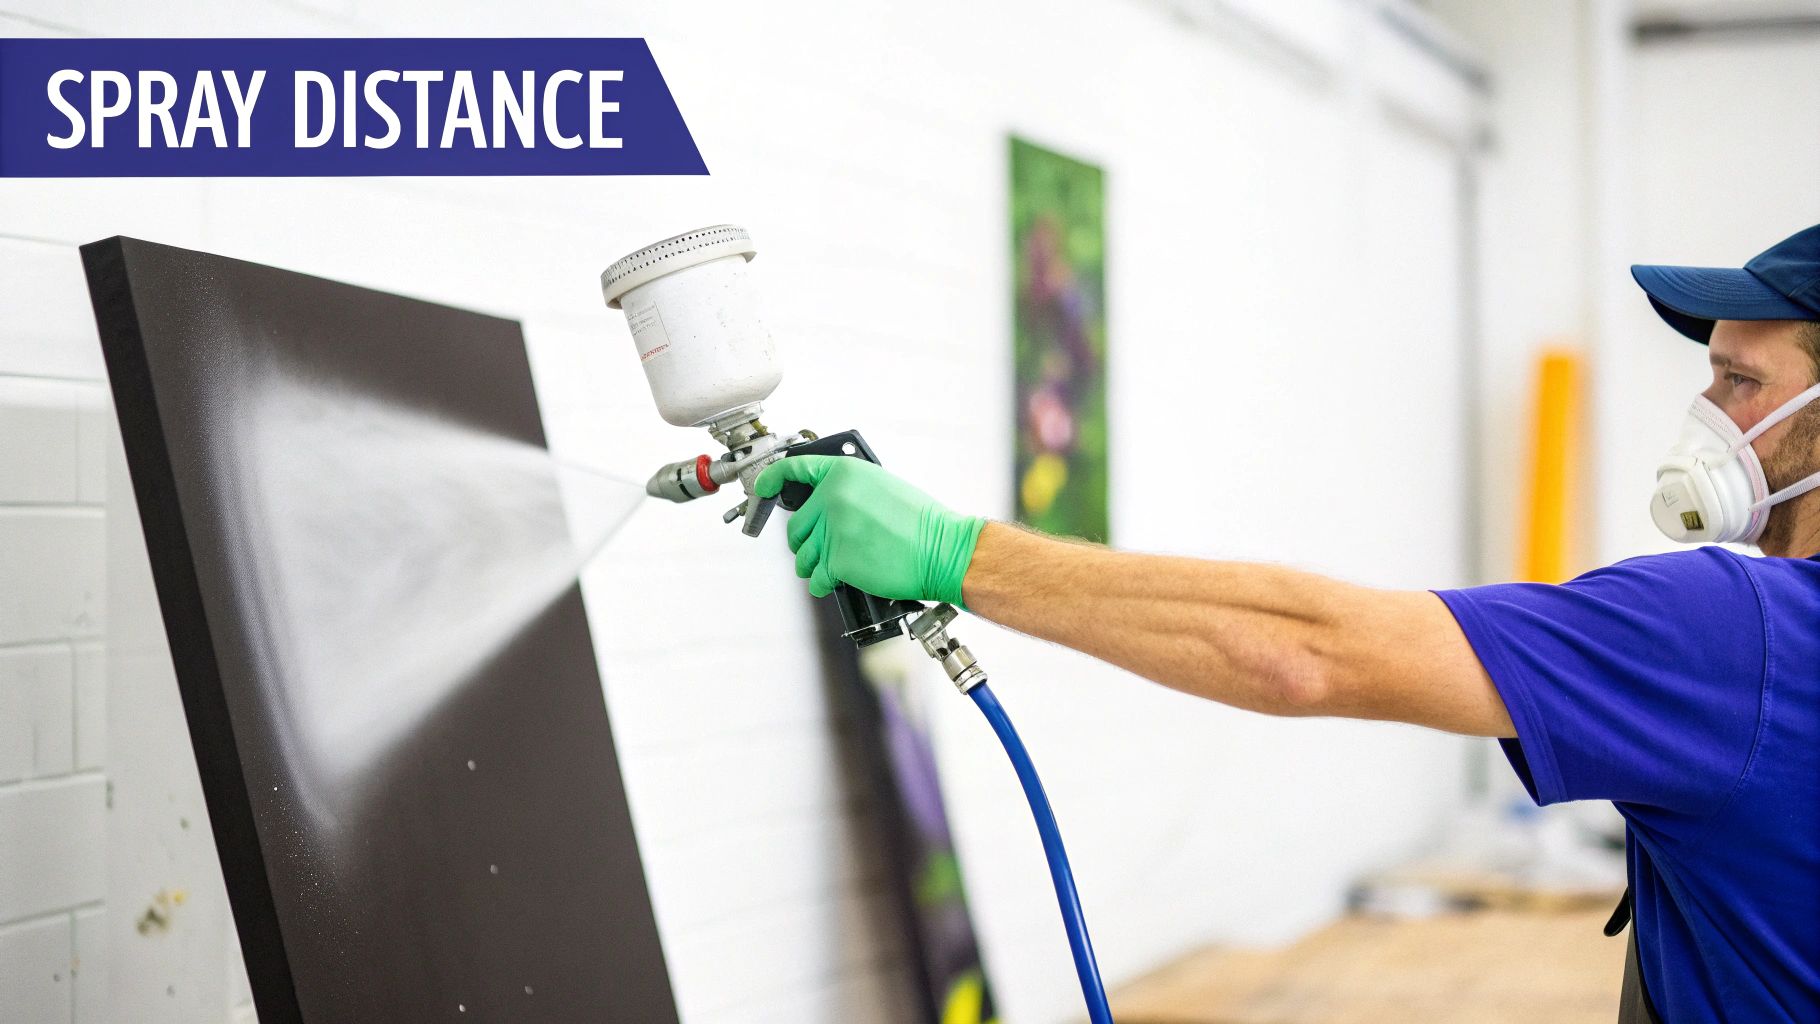
This fundamental principle is non-negotiable for achieving professional results on any project, from applying architectural coatings on commercial buildings in Atascadero to refinishing industrial equipment in Paso Robles. The goal is to maintain a consistent distance, typically 8-12 inches, and keep the spray gun perfectly perpendicular to the surface at all times. This ensures the paint particles land evenly, creating a uniform wet film that cures into a durable, aesthetically pleasing finish.
Actionable Technique Tips
Mastering your distance and angle requires conscious practice. Instead of pivoting your wrist, which creates an arcing motion and uneven coverage, you must move your entire arm parallel to the surface. This technique, emphasized by manufacturers like Graco and Titan, is key to avoiding defects.
Here are the key steps for perfect application control:
Establish Your Distance: Start with the manufacturer's recommended distance, usually around 10-12 inches for most airless sprayers. Use your hand as a rough guide; the space between your thumb and pinky is about 8-9 inches.
Maintain Perpendicularity: Always keep the spray gun aimed directly at the surface. Tilting the gun up or down will cause the spray pattern to become distorted, leading to heavy application on one side and light, dry spray on the other.
Move with Your Arm, Not Your Wrist: Lock your wrist and move your entire arm back and forth across the workpiece. This ensures the gun remains parallel to the surface from the start to the end of each pass.
Overlap Each Pass by 50%: To create a seamless finish without visible lines or "striping," overlap each new spray pass over the previous one by about 50%. This is one of the most vital paint spraying tips for a uniform build.
Maintain Consistent Speed: Move at a steady, controlled pace. Moving too quickly will result in a thin, transparent coat, while moving too slowly will cause sagging and runs.
For a visual demonstration of how to perfect this technique, the following video provides excellent guidance:
3. Proper Equipment Setup and Pressure Adjustment
Once your surface is prepared, the next critical step is dialing in your equipment. Proper setup and pressure adjustment are not just technical details; they are the controls that determine the efficiency, quality, and cost-effectiveness of your entire project. The right configuration ensures the paint is atomized correctly, creating a uniform, durable coat without wasting material or causing excessive overspray.
For commercial painters in Arroyo Grande or industrial facilities in Santa Maria, calibrating sprayers like those from Graco or Wagner/Titan is a fundamental skill. Improper pressure can lead to "tailing" (uneven spray patterns) or excessive fogging, while the wrong tip size can cause constant clogging or apply too much material. This step bridges the gap between a high-quality coating and a high-performance finish, ensuring the material is applied exactly as the manufacturer intended.
Actionable Setup Tips
To achieve a factory-like finish, a systematic approach to equipment setup is essential. Fine-tuning your sprayer prevents common issues and guarantees a professional result, whether you're coating structural steel or commercial buildings. For more in-depth guidance, see our guide on choosing the right tip size for airless sprayer finishes.
Here are the key steps for perfect equipment calibration:
Consult the Manual and Data Sheets: Always start by reviewing the technical data sheet for your coating and the manual for your sprayer. These documents provide the recommended pressure ranges and compatible tip sizes.
Start Low and Increase Gradually: Begin with the pressure at the lowest recommended setting. Perform a test spray on a piece of cardboard or an inconspicuous area. If you see "tails" or "fingers" in the pattern, increase the pressure in small increments (around 100-200 PSI) until the pattern is even and fully atomized.
Strain Your Material: Before it ever enters the sprayer, filter all paint through a mesh strainer. This simple act is the single best way to prevent frustrating and time-consuming nozzle clogs.
Prime and Purge the System: Ensure the pump and hose are fully primed with material, purging all air and solvent from the lines. Trapped air can cause pressure fluctuations and spitting from the gun.
Verify with a Pressure Gauge: Don't just rely on the machine's dial. Use a pressure gauge at the gun to verify the actual PSI output, ensuring you are spraying within the optimal range for your specific material and conditions. This is a critical step for quality control on projects throughout the Central Coast.
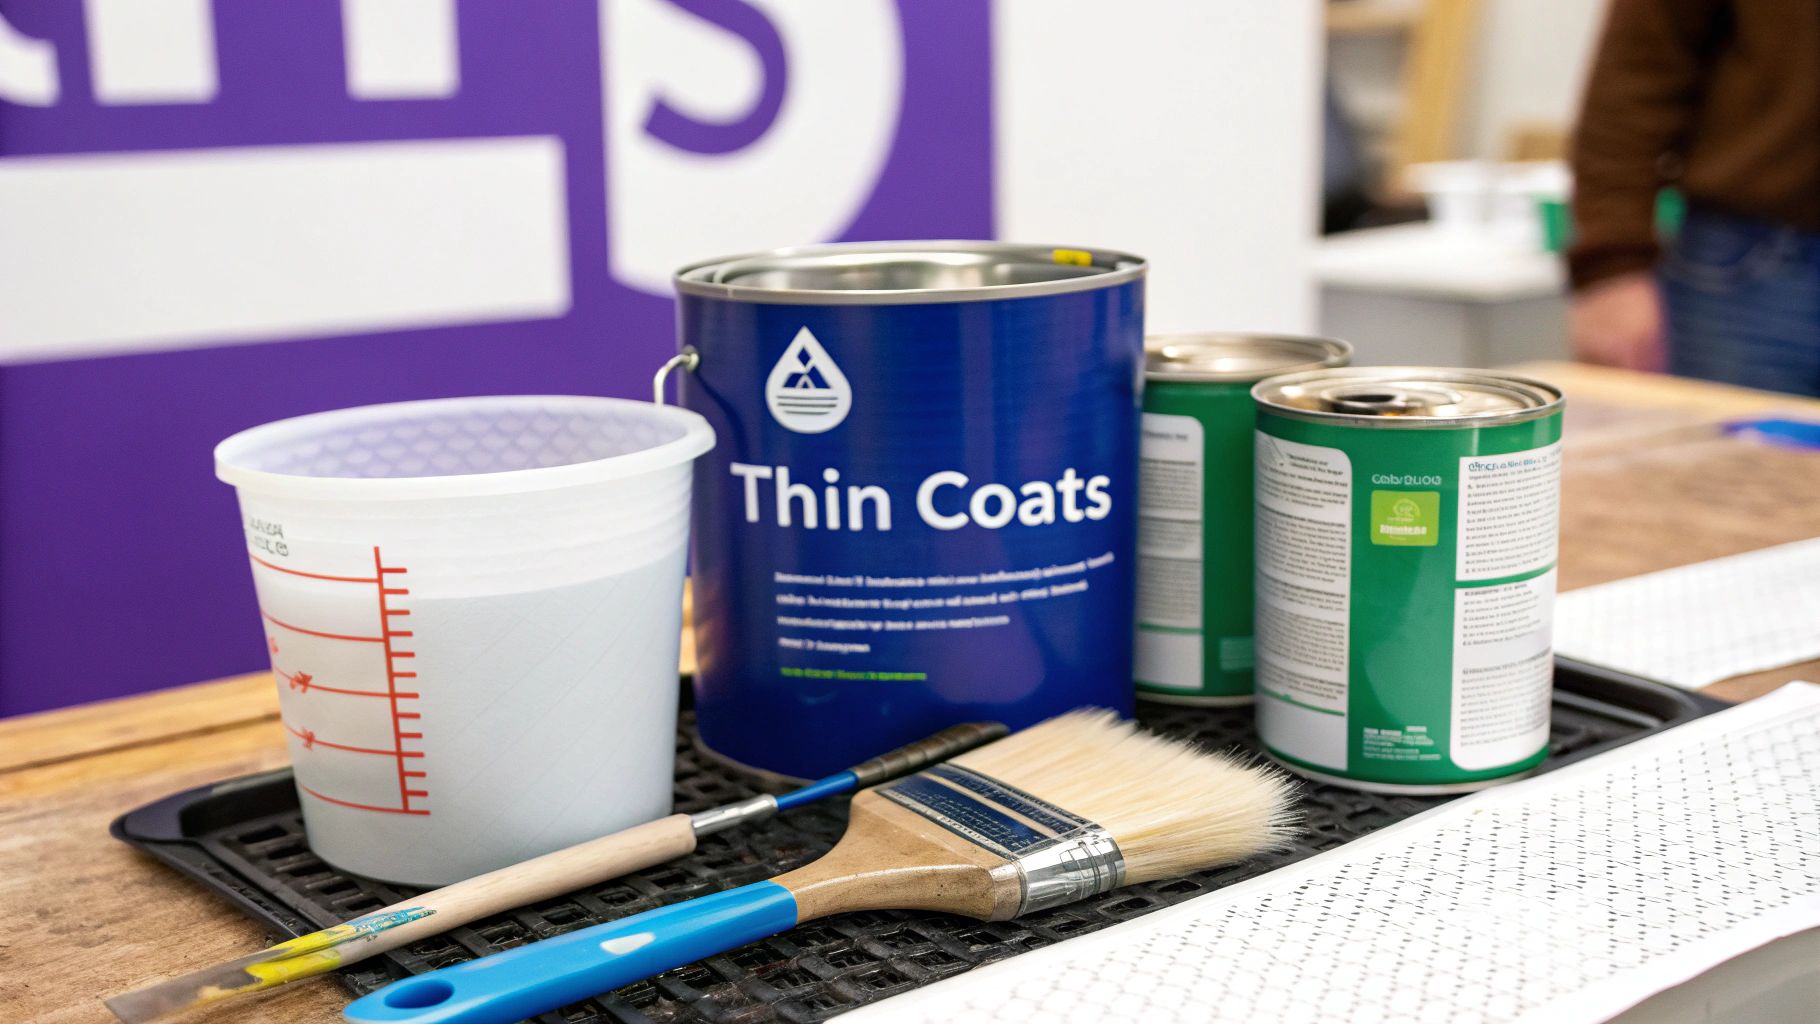
4. Using Quality Paint, Proper Thinning, and Multiple Thin Coats
The quality of the coating and the way it's applied are just as critical as the equipment used. Attempting to save costs with inferior paint or improper application techniques invariably leads to premature failure. Using high-quality industrial coatings, thinned precisely to the manufacturer's specifications, and applied in multiple thin layers is the professional standard for achieving a durable, protective, and aesthetically superior finish.
This methodical approach is fundamental for industrial projects, from applying heavy-duty topcoats on manufacturing equipment in Santa Maria to using DOT-approved coatings for infrastructure in Atascadero. A single, thick coat is prone to sagging, running, and inconsistent curing, creating weak points in the protective barrier. In contrast, multiple thin coats build a stronger, more uniform film with superior adhesion between layers, ensuring the coating performs as engineered for years.
Actionable Coating Application Tips
To ensure your coating provides maximum protection and longevity, focus on precision from can to substrate. Proper material handling is a core element of expert paint spraying tips. For an in-depth look at material selection, see our guide to the best paints for airless paint sprayers.
Follow these key steps for professional-grade results:
Use the Right Thinner: Never substitute thinners. Always use the specific reducer recommended by the paint manufacturer, as incompatible solvents can ruin the coating's chemical composition.
Measure with Precision: Use graduated mixing cups to measure thinning ratios exactly. Start at the lower end of the recommended range (e.g., 10%) and only add more if necessary to achieve proper atomization.
Strain Before Spraying: After mixing, strain all paint through a fine-mesh strainer (at least 200-mesh) to remove any clumps or contaminants that could clog the spray gun tip.
Respect Flash-Off Times: Adhere strictly to the manufacturer's specified flash-off (recoat) time between coats. Applying a subsequent coat too soon can trap solvents, leading to a soft, under-cured finish.
Build in Layers: Plan for a minimum of two to three thin coats. This technique eliminates holidays (missed spots), reduces the risk of drips, and ensures you achieve the required dry film thickness (DFT) for optimal protection.
5. Controlling Environmental Conditions During Application
Even with perfect surface prep and a finely tuned sprayer, the surrounding environment can make or break a project. Temperature, humidity, wind, and direct sunlight are powerful variables that directly impact how paint flows, adheres, and cures. Ignoring these conditions is a common mistake that leads to defects like sags, runs, blushing (a milky film caused by trapped moisture), and poor adhesion, compromising the coating's protective qualities and aesthetic finish.
For professional contractors, managing the environment is a core part of delivering consistent, high-quality results. Whether painting agricultural equipment in the variable weather of Paso Robles or applying a marine coating in the humid air of Morro Bay, the goal is to create a controlled "application window" where the coating can perform exactly as designed by the manufacturer. This proactive control prevents costly rework and ensures the coating meets its specified lifespan and performance standards.
Actionable Environmental Control Tips
To ensure a durable and flawless finish, you must actively manage the conditions at your job site. Before you start spraying, it's crucial to minimize airborne particles that can settle on your freshly painted surface. Explore additional tips for reducing airborne dust to create an optimal painting environment.
Here are key steps for controlling your surroundings:
Monitor Temperature and Humidity: Most coatings have an ideal application range, typically between 50°F and 90°F (10°C to 32°C) with humidity below 85%. Use a digital hygrometer to check conditions. If they are outside the manufacturer's specified range, postpone the work.
Manage Airflow and Contaminants: Proper ventilation is essential for safety, but excessive wind can cause overspray and introduce debris. In open areas like job sites in San Luis Obispo, use windscreens or portable spray shelters. Indoors, use fans to create gentle, controlled airflow that removes fumes without kicking up dust.
Avoid Direct Sunlight: Spraying a hot surface causes the paint to dry too quickly, leading to poor adhesion and a rough texture. If possible, work in the shade or schedule painting for cooler parts of the day, such as early morning or late afternoon, to avoid the intense sun.
Allow for Proper Curing Time: Pay close attention to the coating's data sheet for "flash-off" times between coats and full cure times. In cooler or more humid conditions, these times will be longer. Using industrial heaters or dehumidifiers can help create the right conditions for proper curing.
Protect Freshly Coated Surfaces: Once the paint is applied, it remains vulnerable. Protect the wet surface from rain, dew, dust, and physical contact until it has adequately dried. This might mean covering the project with clean plastic sheeting held on a frame, ensuring the plastic does not touch the wet paint.
6. Regular Equipment Maintenance and Cleaning
Your paint sprayer is the heart of your operation, and just like any high-performance engine, it requires consistent maintenance to function reliably. Neglecting this crucial step leads to costly downtime, inconsistent finishes, and premature equipment failure. Proper maintenance isn't just about cleaning after a job; it's a proactive strategy to ensure your sprayer operates at peak performance every time you pull the trigger.
For professional contractors from Arroyo Grande to Atascadero, a well-maintained sprayer is a non-negotiable asset. Dried paint buildup in nozzles, hoses, and pumps is the primary cause of clogs, pressure loss, and distorted spray patterns. By establishing a routine for cleaning and inspection, you prevent these issues, extend the life of your equipment, and protect your professional reputation by delivering consistently high-quality results.
Actionable Maintenance Tips
A systematic maintenance schedule turns a reactive, problem-solving approach into a proactive, performance-enhancing one. Before storing your equipment, it's essential to perform a thorough cleaning and inspection. Dive deep into the process and learn how to clean an airless paint sprayer like a pro with our detailed guide.
Follow these key steps to keep your equipment in top condition:
Clean Immediately After Use: Never let paint dry inside your sprayer. As soon as a job is complete, purge all fluid lines with the appropriate solvent, such as mineral spirits for oil-based coatings or a water-based cleaner for latex.
Address Clogs Properly: Soak clogged spray tips, guards, and nozzles in a compatible solvent for 15-30 minutes. Use a soft-bristle brush to gently remove softened paint residue; never use hard objects that can damage the orifice.
Inspect and Clean Filters: Regularly check and clean all filters, including the manifold, gun, and suction filters. Use a soft brush to clean them and replace any that show signs of damage or remain clogged after cleaning.
Follow Lubrication Schedules: Refer to your manufacturer's manual to inspect and lubricate all moving parts, such as the pump's piston rod, according to the recommended schedule. This prevents premature wear on critical components.
Establish a Replacement Cycle: Seals and packings are wear items. Proactively replace them annually or as needed based on your usage to prevent pressure loss and leaks. Keeping a maintenance log helps track these service intervals.
7. Masking and Protecting Non-Target Areas
Effective paint spraying is as much about what you don't paint as what you do. Masking is the meticulous process of covering and protecting any surface not intended to be coated, preventing overspray from causing costly damage and extensive cleanup. For professional contractors, proper masking is a hallmark of quality that ensures clean lines, protects valuable assets, and delivers a polished final result.
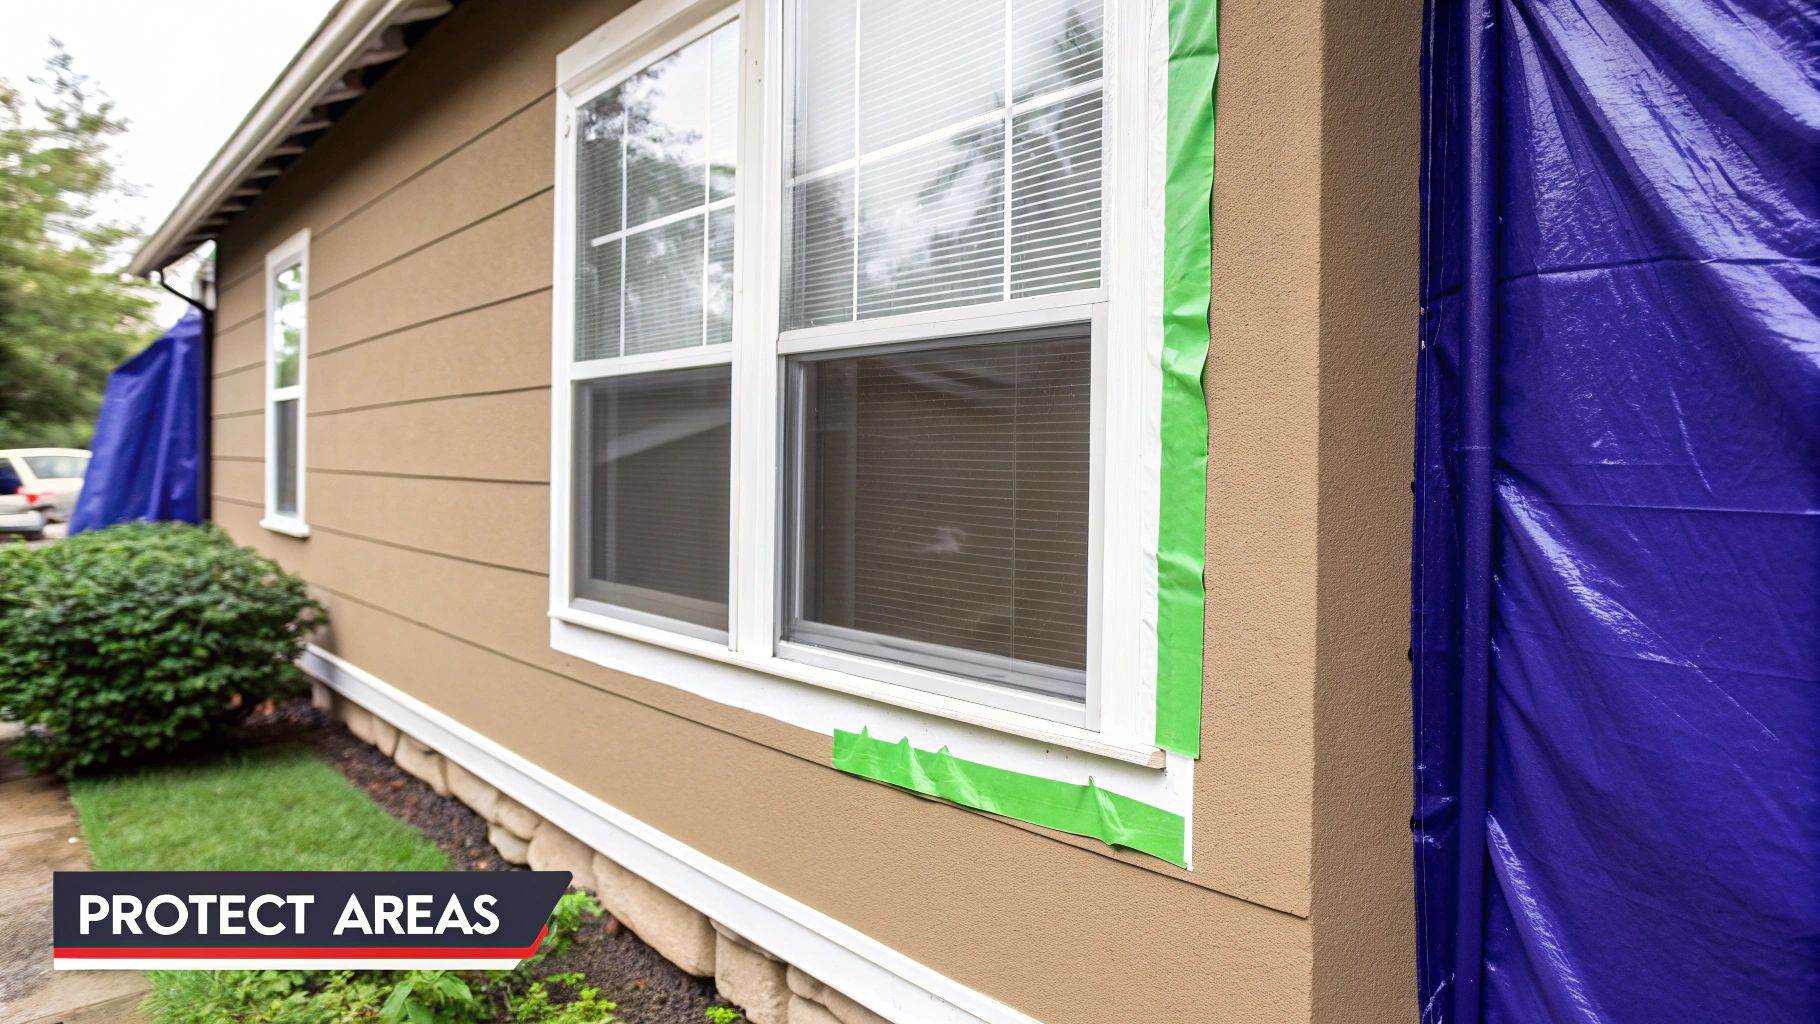
In commercial and industrial settings, from a business exterior in Atascadero to complex machinery in a Paso Robles facility, failing to protect non-target areas can lead to significant financial and operational setbacks. Whether it's shielding windows, electrical components, or adjacent equipment, a comprehensive masking strategy is a non-negotiable step in any professional paint spraying project. It defines the boundary between a job well done and a job that requires expensive remediation.
Actionable Masking Tips
To prevent overspray contamination and achieve sharp, professional edges, adopt a systematic masking process. This is one of the most crucial paint spraying tips for maintaining project integrity and client satisfaction.
Here are key steps for flawless protection on your next project:
Select the Right Tape: Use a high-quality painter's tape with an adhesive level appropriate for the substrate. For delicate surfaces like finished wood or wallpaper, use a low-tack tape. For exterior projects in areas like San Luis Obispo or Morro Bay where sun and moisture are factors, choose a tape with UV resistance.
Ensure a Perfect Seal: Apply tape firmly along the edges, using a putty knife or a 5-in-1 tool to press it down. This creates a tight seal that prevents paint from bleeding underneath, ensuring razor-sharp lines.
Use Plastic Sheeting and Drop Cloths: Cover large areas like windows, floors, and equipment with plastic sheeting, overlapping seams by at least 12 inches and securing them with tape. Use durable canvas or plastic-backed drop cloths to protect flooring from drips and spills.
Protect Fixtures and Hardware: Don't just spray over them. Take the time to meticulously mask light fixtures, sprinkler heads, doorknobs, and sensitive instrumentation. For complex shapes, a combination of tape and masking liquid can provide complete coverage.
Time Your Tape Removal: Remove tape shortly after the paint is dry to the touch. Waiting too long can cause the tape's adhesive to bond too strongly, potentially pulling off the new coating or leaving behind a sticky residue. Pull the tape away from the painted edge at a 45-degree angle for the cleanest line.
8. Understanding Paint Types and Substrate Compatibility
Selecting the right paint is more than a color choice; it's a critical technical decision that determines the coating's success or failure. Different substrates like metal, concrete, and wood have unique chemical and physical properties that demand specific paint formulations. Using an incompatible product is a direct path to peeling, blistering, and poor adhesion, wasting both time and resources.
For professional applications, from protecting structural steel in Paso Robles to coating concrete floors in a San Luis Obispo warehouse, matching the coating to the substrate and its environment is paramount. Understanding the differences between acrylics, epoxies, and polyurethanes allows you to create a coating system that provides the required durability, chemical resistance, and weather protection. This knowledge is one of the most vital paint spraying tips for ensuring a long-lasting, high-performance finish.
Actionable Selection Tips
To guarantee coating integrity, you must meticulously match the paint system to the project's specific demands. Always start by consulting the paint manufacturer’s technical data sheet (TDS) for substrate recommendations and application parameters.
Here are key steps for choosing the correct coating:
Consult Technical Data Sheets: Before purchasing, always review the manufacturer's TDS. This document provides critical information on compatible substrates, required primers, surface preparation, and environmental application limits.
Match Primer to Substrate and Topcoat: A primer's job is to bond to the substrate and create a receptive surface for the topcoat. For example, use a rust-inhibitive primer on steel before applying a urethane topcoat.
Evaluate Environmental Exposure: Select a topcoat designed for the specific environment. A polyurethane topcoat is ideal for outdoor equipment in coastal areas like Morro Bay due to its superior UV and weather resistance, while a chemical-resistant epoxy is better for an industrial floor.
Verify Equipment Compatibility: High-solid coatings like epoxies often require specific spray equipment with larger tip sizes and higher pressure capabilities. Ensure your sprayer can handle the viscosity and composition of the selected material.
Perform Adhesion Tests: For critical or unfamiliar applications, conduct a small-scale adhesion test (per ASTM D3359) on a prepared test area. This simple step can prevent widespread coating failure and costly rework.
8-Point Paint Spraying Tips Comparison
Item | Implementation Complexity 🔄 | Resource Requirements ⚡ | Expected Outcomes ⭐📊 | Ideal Use Cases 💡 | Key Advantages ⭐ |
|---|---|---|---|---|---|
Proper Surface Preparation and Cleaning | High 🔄🔄🔄 — labor- and time-intensive | High ⚡⚡ — pressure washers, sanders, disposal | Significantly improved adhesion and durability; fewer coating failures | Industrial equipment, bridges, commercial exteriors, machinery restoration | Prevents peeling/blistering; extends coating life; professional finish |
Maintaining Optimal Spray Distance and Angle | Moderate 🔄🔄 — skill/practice required | Low ⚡ — minimal tools, operator training | Uniform coverage, fewer runs/drips, reduced waste | Commercial exteriors, industrial machinery, automotive refinishing | Consistent finish, improved efficiency, less overspray |
Proper Equipment Setup and Pressure Adjustment | High 🔄🔄🔄 — technical calibration needed | Moderate ⚡⚡ — gauges, tips, possible tech support | Proper atomization, consistent pattern, reduced clogs and waste | Contractors, industrial plants, equipment rentals | Maximizes performance and equipment life; better material transfer |
Using Quality Paint, Proper Thinning, and Multiple Thin Coats | High 🔄🔄🔄 — measuring, mixing, multiple passes | High ⚡⚡⚡ — premium paints, thinners, viscosity tools | Superior appearance and durability; longer service life (2–3×) | Industrial coatings, bridges, premium automotive and fleet work | Better adhesion, UV/weather resistance, consistent DFT |
Controlling Environmental Conditions During Application | Moderate 🔄🔄 — monitoring and mitigation | Moderate ⚡⚡ — tents, heaters, ventilation | Reduced defects (dust, sags), predictable drying and cure | Outdoor projects, temporary booths, climate-sensitive jobs | Fewer reworks, consistent curing, better adhesion |
Regular Equipment Maintenance and Cleaning | Moderate 🔄🔄 — routine but time-consuming | Moderate ⚡⚡ — solvents, replacement parts, logs | Reliable performance; fewer breakdowns; extended equipment life (5–10+ yrs) | High-use contractors, rental yards, industrial production | Lowers downtime and repair costs; consistent spray quality |
Masking and Protecting Non-Target Areas | Low–Moderate 🔄🔄 — setup adds prep time | Low–Moderate ⚡⚡ — tape, sheeting, barriers | Prevents overspray damage; reduces cleanup and touch-ups | Commercial exteriors, fleet refinishing, interiors | Clean lines, protected assets, faster post-project cleanup |
Understanding Paint Types and Substrate Compatibility | High 🔄🔄🔄 — technical product selection | Moderate–High ⚡⚡⚡ — specialized coatings, testing | Correct match prevents failures; meets durability/spec goals | Bridges, concrete structures, industrial metal equipment | Minimizes adhesion failures; compliance with specs and warranty |
Your Local Partner for Peak Equipment Performance
Mastering the art of professional spray painting is a journey, not a destination. Throughout this guide, we've explored a comprehensive array of paint spraying tips designed to elevate your projects from good to exceptional. From the foundational importance of meticulous surface preparation to the nuanced control of your spray pattern, each step is a critical component of a flawless finish. We've covered the technical details of dialing in your equipment, the science behind paint viscosity and substrate compatibility, and the environmental factors that can make or break a job.
The core lesson is this: consistency is king. Consistent pressure, consistent distance, consistent speed, and consistent maintenance are the pillars that support professional-grade results. By transforming these principles from abstract concepts into ingrained habits, you not only improve the aesthetic quality of your work but also enhance its long-term durability, boost your operational efficiency, and build a stronger reputation for reliability and excellence.
From Theory to Flawless Execution
The true value of these advanced paint spraying tips is realized when your equipment functions precisely as intended, every single time. A sputtering gun, fluctuating pressure, or a clogged tip can derail even the most skilled applicator. This is where the bridge between technique and technology becomes paramount. Your ability to execute a perfect 50% overlap or maintain an ideal wet film thickness depends directly on the mechanical integrity of your sprayer.
Think of your equipment not as a mere tool, but as a direct extension of your skill. Just as a master craftsman sharpens their chisels, a professional painter must ensure their machinery is in peak condition. Regular maintenance and expert servicing are not overhead costs; they are investments in quality, efficiency, and profitability. When your sprayer delivers a predictable, atomized fan pattern without fail, you can focus entirely on your application technique, confident that the machine will perform its role perfectly. This reliability minimizes rework, saves material, and ultimately allows you to complete more jobs to a higher standard.
Your Central Coast Equipment Experts
For commercial painters, industrial facilities managers, and contractors across the Central Coast, maintaining this level of equipment readiness is our specialty. We understand the demanding environments you work in and the high stakes of project deadlines. Even the most diligent in-house cleaning can't prevent the eventual wear and tear on pumps, packings, and motors. Having a trusted, local expert for maintenance and repair is essential for minimizing downtime.
At Contractor's Maintenance Service, we are more than just a repair shop; we are a dedicated partner in your success. Serving the communities of San Luis Obispo and the surrounding areas—including Paso Robles, Atascadero, Santa Maria, Arroyo Grande, Grover Beach, Pismo Beach, and Nipomo—we provide authorized warranty service, expert diagnostics, and a comprehensive inventory of genuine parts for industry-leading brands like Graco and Wagner/Titan. Whether you need an emergency on-site repair to get a critical project back on track or a scheduled fleet overhaul to prepare for the busy season, our team has the experience to deliver fast, effective, and practical solutions. By entrusting your equipment to us, you ensure that every time you pull the trigger, your sprayer is ready to help you put these essential paint spraying tips into practice, delivering the flawless results your clients demand.
Don't let equipment failure undermine your expertise. Keep your sprayers in peak condition with professional, factory-authorized support from Contractor's Maintenance Service. Visit us online at Contractor's Maintenance Service to learn more about our repair services, parts inventory, and how we can help you maximize your operational uptime.


Comments