How to Test Pressure Relief Valves A Practical Guide
- Feb 6
- 16 min read
Testing a pressure relief valve (PRV) isn't just about ticking a box on a maintenance checklist. It's about ensuring that critical failsafe actually works when you need it most. You're either testing it in-place (in-situ) to see how it behaves under real-world conditions or pulling it for a bench test to verify its pop and reseat pressures against the specs on its nameplate.
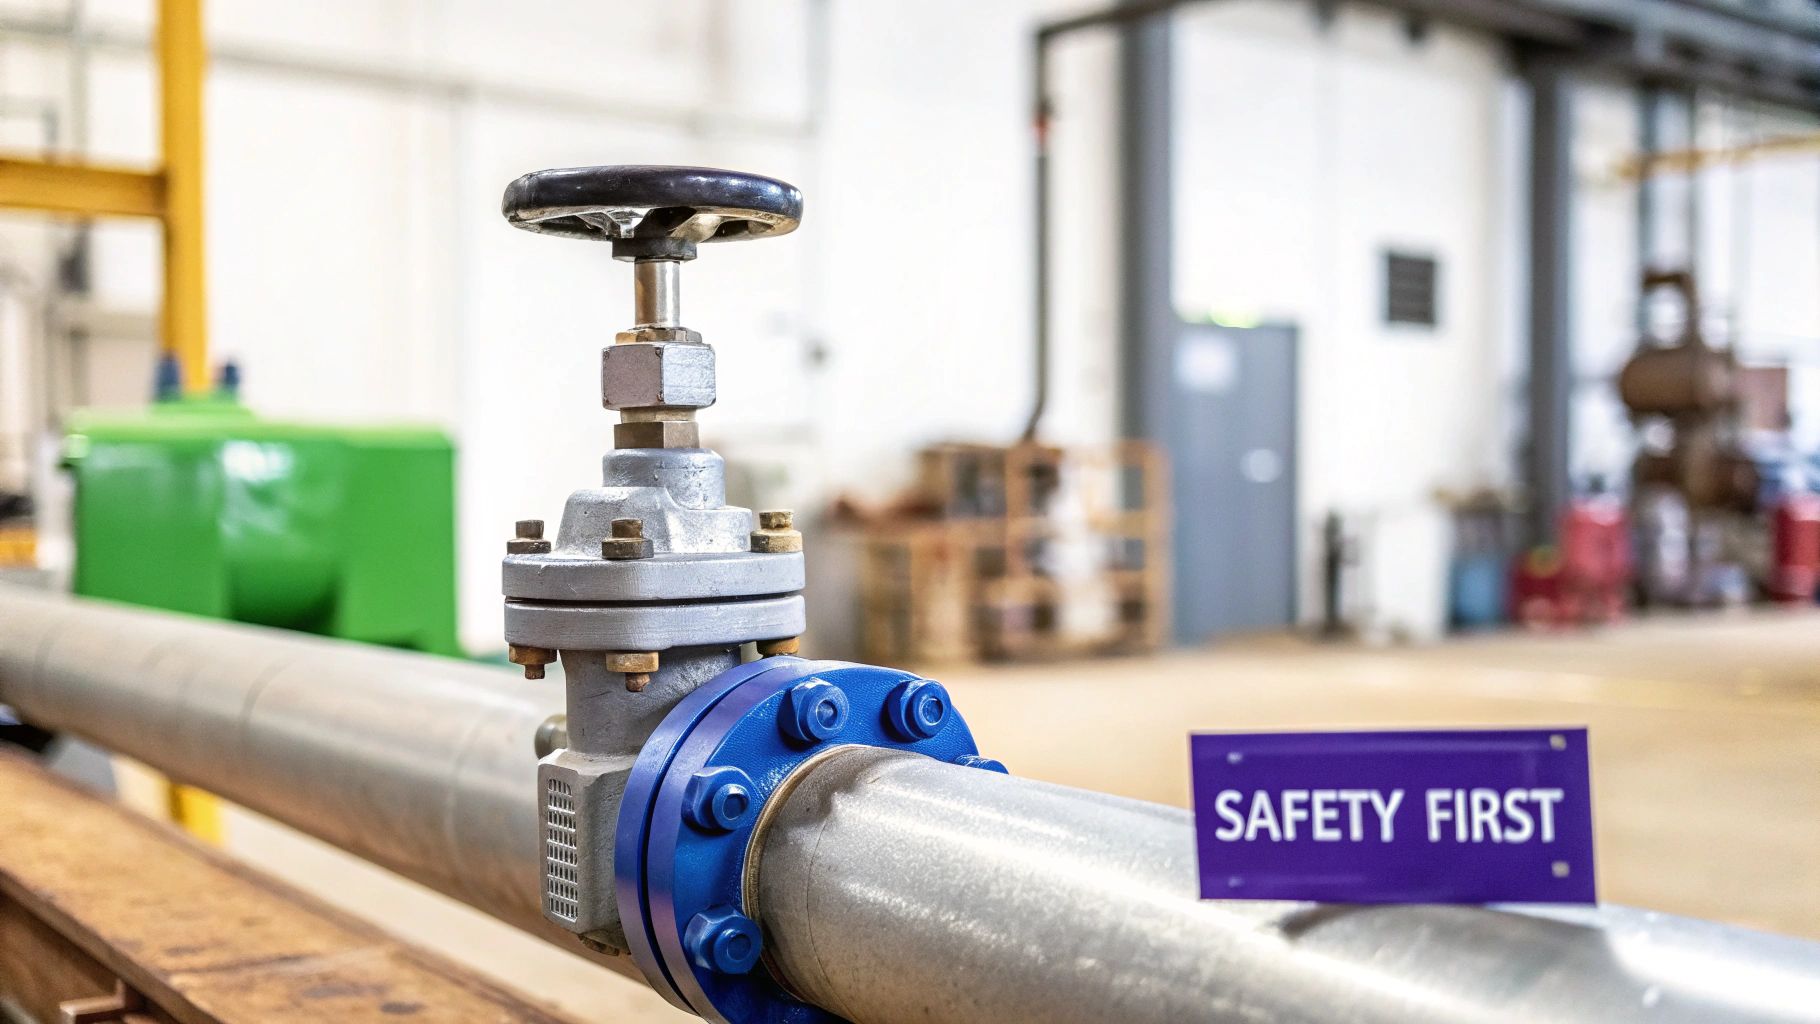
No matter which method you choose, safety is always job one. That means isolating the system and gearing up with the right PPE before you even think about touching the valve. The whole point is to catch a failure before it happens, preventing a catastrophic overpressure event that could wreck equipment and endanger lives.
Why Accurate PRV Testing Is So Important
Imagine you're on a high-stakes job, and your Graco sprayer suddenly gives out. The culprit? A pressure relief valve that decided to stick. For professionals working in San Luis Obispo and across the Central Coast, this isn't a hypothetical—it's a real-world headache that shows why PRV testing is so much more than a compliance task. It's fundamental to operational safety, equipment health, and keeping your projects on track.
This guide goes beyond the basic checklists to dig into the real consequences of a PRV failure. Putting off this maintenance can trigger a chain reaction of problems that hits your bottom line and your crew's safety hard. Before we get into the nuts and bolts of testing, it's worth taking a moment to understand what a pressure relief valve is and why it matters for your entire system's integrity.
The Real Costs of a Failed Valve
When a PRV fails to open, things get serious fast. It’s not just about one component failing; it’s about the entire system that valve was supposed to protect. The potential fallout is massive:
Significant Equipment Damage: An overpressure event can destroy pumps, rupture tanks, and blow out pipelines. We're talking expensive, project-stopping repairs.
Costly Operational Downtime: A single valve failure can bring your entire operation to a standstill. For contractors in Paso Robles or Arroyo Grande, that means lost hours, missed deadlines, and potential contract penalties.
Serious Safety Risks: An uncontrolled release of high-pressure fluids or gases is a direct threat to your team, turning a manageable worksite into a hazardous one in an instant.
Think of a solid testing program as a strategic investment. Regular, accurate checks boost your equipment uptime, reduce long-term maintenance costs, and create a safer work environment for everyone.
The Hidden Risk of New Installations
Here’s a common mistake I see all the time: assuming a new or freshly serviced valve is good to go. The data tells a very different story. This brings us to a concept called 'Probability of Initial Failure' (PIF)—the risk that a valve won't work correctly right out of the box.
A detailed statistical analysis across three major operating companies revealed a pretty sobering fact: there's a 1% to 1.6% probability that a new or reinstalled valve will fail on its very first demand.
Let that sink in. For every 100 new PRVs you install, one or two could be duds from the start, leaving you exposed to an immediate overpressure event. This is exactly why testing isn't just for old equipment. It's a critical verification step for every single valve you put into service. Assuming a new valve is a safe valve is a dangerous gamble.
In-Situ vs. Bench Testing: Choosing Your Method
Before you start, you need to decide on the right approach. Both in-situ and bench testing have their place, and the best choice depends on your specific situation—from system criticality to shutdown schedules.
This quick table breaks down the key differences to help you decide which path to take.
Testing Method | Best For | Key Advantage | Potential Drawback |
|---|---|---|---|
In-Situ Testing | Systems where downtime is highly disruptive or impossible. | Tests the valve under actual operating conditions, providing a true performance picture. | May not detect all failure modes (e.g., internal corrosion); requires specialized equipment. |
Bench Testing | Scheduled plant shutdowns or when a valve is being replaced or re-certified. | Allows for a thorough internal inspection, repair, and precise calibration. | Requires removing the valve from service, causing system downtime. |
Ultimately, in-situ testing gives you real-world data without shutting down, while bench testing offers a complete overhaul. Many comprehensive maintenance programs use a combination of both.
Your Local Partner in Equipment Reliability
For businesses in San Luis Obispo, Paso Robles, Atascadero, Arroyo Grande, Pismo Beach, Morro Bay, and all over the Central Coast, keeping equipment in peak condition isn't just good practice—it's essential for survival. At Contractor's Maintenance Service, we've seen firsthand how proactive maintenance prevents the kind of breakdowns that cost a fortune.
A disciplined approach to PRV testing is the cornerstone of any effective preventative maintenance plan. When you understand why you're running the test, the how becomes more than just a routine chore. It becomes a critical safety function that protects your people, your equipment, and your reputation. The following sections will walk you through the practical steps of testing a PRV, giving you the knowledge to do it safely and correctly every time.
Gathering Your Tools and Safety Gear
Before you even think about putting a wrench on a valve, let’s talk about getting prepped. A successful and safe test always starts with having the right gear on hand. Trying to test a pressure relief valve without the proper equipment isn't just inefficient—it's a serious safety hazard. Think of this as your pre-flight checklist, whether you're doing a quick check on-site or a full bench test.
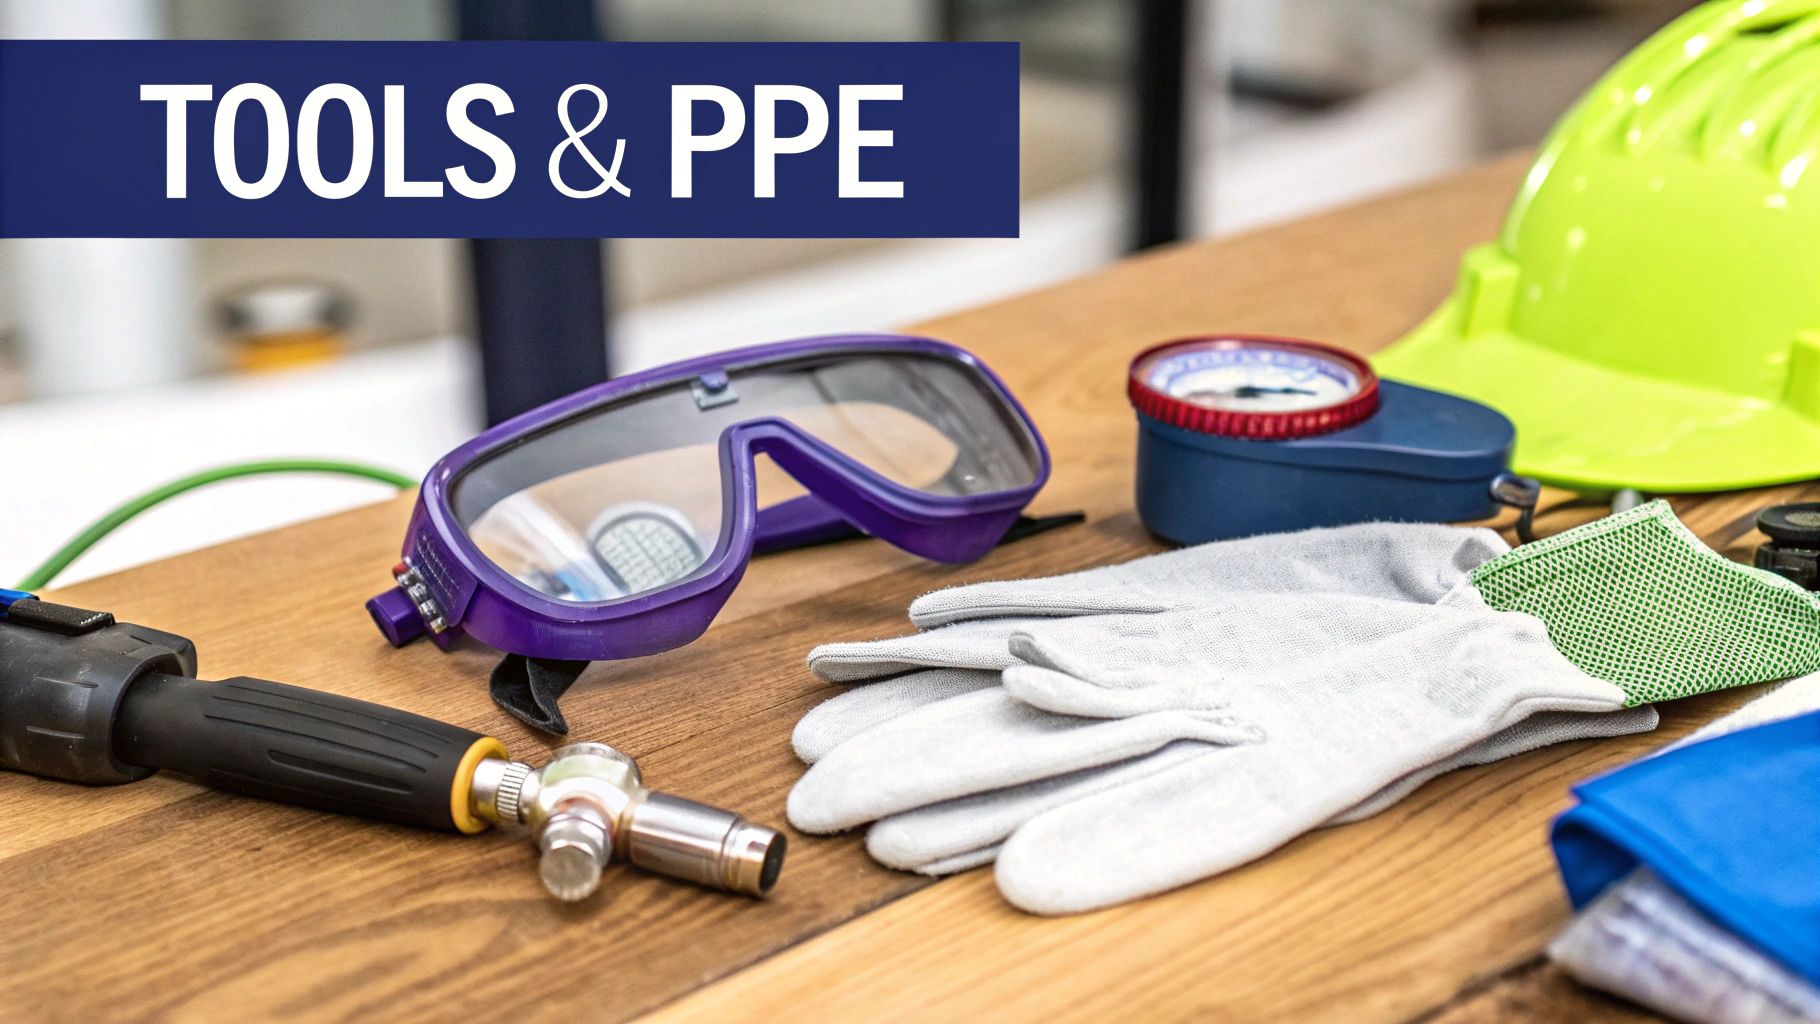
First things first: your personal protective equipment (PPE). The specifics will depend on what's in the system—be it compressed air, steam, or something more hazardous—but some items are non-negotiable.
Safety Glasses or Goggles: Your eyes are irreplaceable. Protect them from any unexpected spray or flying debris.
Heavy-Duty Gloves: These protect your hands from hot surfaces and sharp edges while giving you a solid grip.
Hearing Protection: PRVs can be incredibly loud when they pop, especially high-pressure gas or steam valves. Don't skip this.
Steel-Toed Boots: This is standard-issue for any industrial or construction site for a reason.
This is just the baseline. Always check your facility's safety protocols for any additional PPE requirements.
Specialized Testing Equipment
Once you're geared up, it's time to get your tools in order. The kit you need for an in-situ test is quite different from what you'll need for a bench test.
For an in-situ test, your primary tool will be a set pressure verification device (SPVD), often called a lift-assist device. This clever tool lets you apply a very precise, controlled force to the valve stem. It helps you pinpoint the exact pressure at which the valve starts to open, all without taking the system offline.
For a traditional bench test, the list gets a bit longer:
A sturdy test bench or rig is essential to mount the valve securely.
You'll need a calibrated, high-pressure source, like a hydraulic hand pump or a nitrogen bottle with a good regulator.
Don't forget the high-pressure hoses and the correct fittings for the valve's inlet.
And most importantly, a recently calibrated pressure gauge with a range appropriate for the valve’s set pressure is a must-have.
Pro Tip: Your test gauge's full-scale pressure rating should be roughly double the valve's set pressure. Using a 1,000 PSI gauge to test a 100 PSI valve just won't give you the accuracy you need. Precision is everything. For a deeper dive into gauge selection, check out our essential guide to air compressor pressure gauges.
Critical Pre-Test Documentation and Procedures
Having the right tools is only half the battle. Before you start, you absolutely must have two things in hand: the valve's manufacturer manual and your facility's Lockout/Tagout (LOTO) procedures. The manual gives you the vital specs, like the acceptable blowdown range and seat tightness criteria.
LOTO procedures are non-negotiable for any bench test. This safety protocol ensures the system is completely isolated, de-pressurized, and can't be accidentally started up while you're working. Skipping this step is one of the most dangerous mistakes a technician can make.
For our local clients in San Luis Obispo and the surrounding areas like Paso Robles, Atascadero, and Arroyo Grande, we know finding the right specialized tools can be a headache. At Contractor's Maintenance Service, we're here to help. Whether you're in Pismo Beach or Morro Bay, we can provide the parts and expert advice to ensure you're properly and safely equipped for the job.
How to Run an In-Situ PRV Test
In-situ, or in-service, testing is a total game-changer for any facility where you can't afford to shut down a line. This is how you test a pressure relief valve while it's still installed and the system is humming along. For any contractor working in San Luis Obispo or nearby areas, mastering in-situ testing is a huge advantage—it saves your clients time and money without ever compromising on an accurate test.
We've moved way past the old days of guesswork and rough estimates. Modern testing gear gives you precise, trustworthy data on the valve's set pressure right where it sits.
The Idea Behind In-Situ Testing
At its core, in-situ testing is all about giving the system pressure a little help. We use a specialized piece of gear called a Set Pressure Verification Device (SPVD), which clamps right onto the valve's spindle. This device applies a very precise, controlled lifting force.
Instead of over-pressurizing an entire system, you combine the plant's normal operating pressure with the external force from the SPVD. A sensor on the device detects the exact moment the valve's disc starts to lift, which gives you the set pressure with incredible accuracy. It completely takes the guesswork out of the equation.
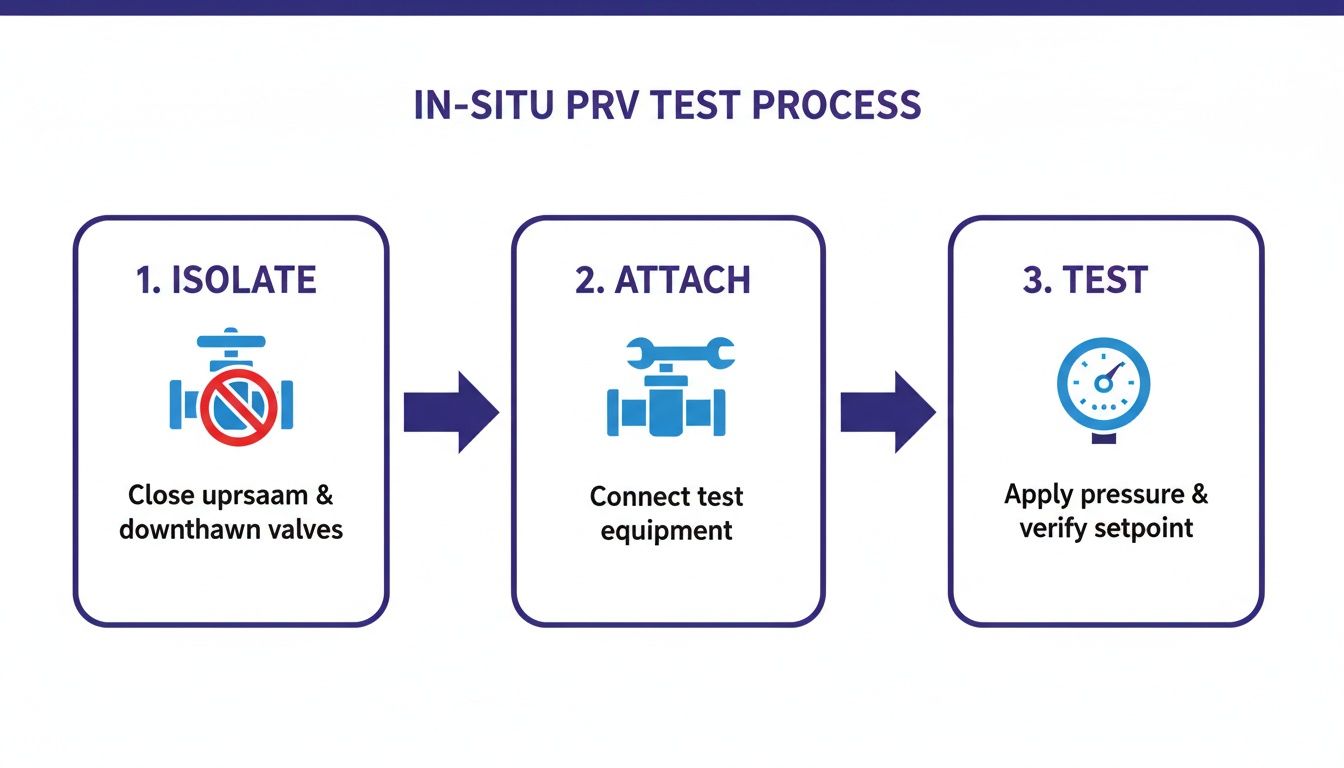
Setting Up for a Clean Test
A good setup is everything for an accurate in-situ test. And like any job, it starts with a solid safety check. Even though the system stays live, you need to clear the area around the valve and make sure everyone on-site knows a test is happening.
Next, you'll get the SPVD ready—a common one you'll see is the AccuTEST system. The setup involves a few key steps:
Mount the Actuator: First, you secure the hydraulic or mechanical actuator over the PRV’s bonnet. This mount needs to be rock-solid to ensure all the force is applied straight down the valve stem.
Attach the Load Cell: This little device connects the actuator to the valve spindle. It’s what actually measures the external force being applied.
Connect the Pressure Transducer: This sensor gives you a real-time reading of the actual system pressure.
Add the Acoustic Sensor: This is a small but critical piece. You place it on the valve body, where it "listens" for the unique ultrasonic sound of the valve disc just starting to lift. This is your confirmation of the opening point.
By using all these sensors together, you get multiple data points that confirm the test is spot-on.
Modern SPVDs are ridiculously precise, often hitting tolerances better than ±1%. That's often even more accurate than what you'd get on a standard test bench, especially for valves that have been in service for a while.
A Real-World Test Scenario
Let's walk through a common job. Imagine you're at a plant in Paso Robles and need to test a critical PRV on a big industrial air compressor. Shutting it down isn't an option—it would halt the entire production line. This is the perfect spot for an in-situ test.
First, you'd clamp the SPVD's mounting rig to the valve. The system is running at its normal 120 PSI. You hook up the load cell and the other sensors. A quick look at the PRV’s nameplate tells you the set pressure is 150 PSI.
Now, you use the SPVD’s hydraulic pump to slowly and smoothly apply an external force. The software is tracking both the system pressure and the force you're adding in real-time. As you dial up the force, the combined pressure pushing on the valve disc climbs.
The whole time, the acoustic sensor is listening. The instant the total pressure hits 148.5 PSI, the sensor picks up that faint "hiss" of the disc lifting. The software immediately locks that in as the "as-found" set pressure. Since 148.5 PSI is well within the acceptable tolerance (say, ±3% for this service), the valve passes.
The entire test might take less than 30 minutes, and the plant's operations never skipped a beat. You record the results, put a new test tag on the valve, and move on, confident that the equipment is safe.
For contractors working in busy industrial areas like Atascadero, Arroyo Grande, Pismo Beach, and Morro Bay, knowing how to test a pressure relief valve in-service is what separates the pros. It shows you have the technical skill to get the job done right while minimizing the impact on your client's business.
Conducting a Traditional Bench Test
While in-situ testing is often the go-to for its speed, there are plenty of situations where a traditional bench test isn't just an option—it's a necessity. Think about it: you'd never put a brand-new valve into service without verifying it first. The same goes for re-certifying a valve after repairs or tackling inspections during a scheduled plant shutdown when the equipment is already cold and offline.
A bench test gives you what you can't get in the field: a perfectly controlled environment. You get to see exactly how the valve behaves. This isn't just about finding the opening pressure; it lets you observe the crucial reseat pressure, too, giving you a full, clear picture of the valve's condition.
Safely Removing and Mounting the Valve
First things first: safety. Before a single bolt is turned, your facility's Lockout/Tagout (LOTO) procedures must be followed to the absolute letter. That system section has to be completely isolated, de-pressurized, and verified at zero energy. Only then is it safe to unbolt the PRV and remove it from the line.
Once the valve is free, get it over to your testing area and mount it securely on the test bench. A wobbly or improper mount is a recipe for bad readings or, even worse, a dangerous, uncontrolled pressure release. Make sure the valve's inlet is properly connected to the test rig using the right high-pressure hoses and fittings.
Applying Pressure and Recording the Pop
With the valve locked in, it's time to connect your pressure source, which is usually a hydraulic hand pump or a regulated nitrogen bottle. The most important tool in this whole setup is your calibrated test gauge. The accuracy of your entire test hinges on that one piece of equipment.
Start applying pressure, but do it slowly and steadily. You're waiting for the "pop"—that unmistakable moment the valve disc lifts off its seat and fully opens.
Go slow: As you get close to the nameplate set pressure, really ease up on how fast you're increasing the pressure.
Use your eyes and ears: With gas or vapor service valves, you'll often hear a sharp "pop" as the disc lifts. Liquid service valves might be quieter, showing a more gradual but still full opening.
Nail the number: The second that valve pops, record the reading on your gauge. That’s your official "as-found" pop pressure.
Checking Blowdown and Reseat Pressure
A valve that opens on time is great, but that's only half the job. It has to close properly, too, or you're just bleeding product and money once system pressure normalizes. This is where you'll measure the reseat pressure and calculate the blowdown.
After the valve pops, start bleeding the pressure off your test rig—again, slowly. Keep your eyes glued to the gauge and listen for the distinct sound of the disc snapping shut. The pressure on the gauge at that exact instant is your reseat pressure.
Key Takeaway: The difference between the pop pressure and the reseat pressure is the blowdown. It’s typically shown as a percentage of the set pressure and is a dead giveaway of the valve's performance. It absolutely must be within the manufacturer's specified tolerance.
For example, say a valve pops at 100 PSI and reseats at 93 PSI. The blowdown is 7 PSI, or 7%. If the spec sheet says the blowdown should be between 7-10%, this valve is in great shape. If the blowdown is too high, you're wasting media. If it's too low, the valve can start to "chatter," rapidly opening and closing, which will wear it out in no time.
Local Expertise for Central Coast Professionals
For maintenance teams and contractors in Paso Robles, Atascadero, Arroyo Grande, Pismo Beach, and Morro Bay, having the right testing gear on hand is non-negotiable. At Contractor's Maintenance Service, we stock the high-quality gauges, fittings, and parts you need to get accurate, repeatable bench tests done right. Whether you’re working on a small compressor or a massive industrial system, we’ve got the tools and the know-how to help you do the job safely, to code, and with results you can trust.
Making Sense of Test Results and Documentation
Once you’ve tested a pressure relief valve, the job is only half done. Getting a number off your gauge is just the first step—the real work is in understanding what it means and, just as crucially, documenting everything properly. This is what turns a simple test into a permanent, valuable record that protects your equipment and keeps you compliant.
Interpreting the numbers is pretty straightforward. For most industrial jobs, we’re following ASME codes, which usually set the tolerance for the ‘as-found’ set pressure at ±3% of the nameplate value. This gives you a clear pass/fail benchmark.
Understanding Pass vs. Fail Criteria
Let’s walk through a real-world example. Imagine you're on a job in San Luis Obispo and you’re testing a valve with a nameplate set pressure of 200 PSI. That ±3% rule means your acceptable pop pressure is anywhere between 194 PSI and 206 PSI. Simple as that.
Passing Result: Your test shows the valve pops right at 198 PSI. Perfect. It’s well within the tolerance, so you’ll document it, tag the valve as passed, and move on to the next one.
Failing Result: The valve doesn't budge until the pressure hits 210 PSI. That’s a clear failure. It’s holding on too long, creating a serious overpressure risk. This valve needs to be tagged out of service immediately for repair or replacement.
This isn’t just a guideline; it's a critical safety threshold. A valve that fails this test is no longer doing its job and can't be trusted to protect the system.
A test is only as good as the record you keep of it. Without a detailed report, you have no proof of compliance, no historical data for tracking valve performance, and no defense in a safety audit. Every test, pass or fail, needs its own paper trail.
The Anatomy of a Proper Test Report
Meticulous record-keeping is what separates the pros from the amateurs. Whether you're a contractor working in Paso Robles or managing a facility in Atascadero, your documentation has to be bulletproof. A solid test report should capture all the key details so it's actually useful down the line.
If you’re looking to build out your entire maintenance tracking system, our guide on creating your equipment preventative maintenance checklist provides a great framework for making sure no detail gets missed.
Good documentation is all about capturing the right data. Every test log should have, at a minimum, the fields shown below. This template gives you a clear, consistent way to record what you did, what you found, and what you did about it.
Essential PRV Test Log Fields
Pay close attention to the ‘as-found’ and ‘as-left’ columns. The 'as-found' is your initial test result—it tells you how the valve was performing in the field. If you make an adjustment or repair, the 'as-left' pressure is the verified result after your work is done.
This data is gold for compliance audits and predictive maintenance. Over time, you can start to spot trends, like certain valves consistently drifting high or low, and get ahead of problems before they happen.
For us professionals working across the Central Coast—from Arroyo Grande and Pismo Beach to Morro Bay—keeping records this clean isn't just about compliance. It’s about a commitment to safety and quality. At Contractor's Maintenance Service, we live by these standards, ensuring every job we do is documented, verifiable, and done right.
Your Local PRV Partner in San Luis Obispo
Knowing how to test a pressure relief valve is one thing, but having the right parts and support when you're in the middle of a job is a whole different ballgame. For contractors and facilities in San Luis Obispo, having a reliable local partner can make all the difference between a smooth operation and a costly delay. That’s where we come in.
We've been serving professionals across Paso Robles, Atascadero, Arroyo Grande, Pismo Beach, and Morro Bay for years, and we know exactly what you're up against. Whether you need a high-quality replacement valve for a Graco system or the specific test equipment to get an accurate reading, we’ve got you covered.
Our local counter is stocked with the parts you need to get the job done right, and our team is always ready to offer professional repair services when you're in a pinch. If you're looking for professional assistance, understanding how to find a qualified plumber can ensure your PRV testing is handled by experienced professionals.
You can count on us for all your PRV testing and maintenance needs. To see everything we can do for you, check out our comprehensive maintenance services in San Luis Obispo. We’re here to help keep your equipment safe, compliant, and running smoothly.
Your Top PRV Testing Questions Answered
Even after running through the procedures, you're bound to have a few questions. It’s only natural. Maintenance managers and contractors often run into the same practical issues out in the field, and we hear a lot of the same questions from our clients in San Luis Obispo and the surrounding areas.
Let's clear up some of the most common ones.
How Often Should I Test My Pressure Relief Valves?
There’s no single, universal answer here—it really depends on the service conditions, the manufacturer's recommendations, and standards from bodies like ASME or API.
For critical systems or those in corrosive environments, annual testing is a solid best practice. You can't afford to take chances in those situations. For cleaner, less demanding services, you might be able to stretch that interval to 3-5 years.
The golden rule? Always check the specific regulations for your industry. Build a testing schedule that’s not just safe but also fully compliant. A proactive plan is always your best defense against failure.
Can I Adjust a PRV Myself If It Fails a Test?
Adjusting a pressure relief valve is a job that should always be left to a qualified technician. The process involves tweaking the spring's compression, which is what controls the set pressure. Get it wrong, and the valve might open too soon and waste product. Worse, it could open too late, putting your entire system—and your team—at serious risk.
After any adjustment, the valve must be re-tested to verify the new set pressure is dead-on. It should then be sealed to prevent anyone from tampering with it. For our local pros in Paso Robles or Atascadero, we always recommend bringing a failed valve to an authorized service center for professional calibration. Don't risk it.
What’s the Difference Between Set Pressure and Pop Pressure?
People tend to use these terms interchangeably, but they describe two very different actions. Getting the distinction right is key to interpreting your test results correctly.
Set Pressure is the point where the valve first starts to open, or "simmer." This is what you’ll typically measure during a precise in-situ test with a lift-assist device.
Pop Pressure is the pressure at which the valve disc rapidly lifts, or fully "pops" open. This is what you’ll see during a traditional bench test.
For valves in gas and vapor service, the pop pressure is often a bit higher than the set pressure. Both numbers are critical for confirming the valve is working the way it was designed to. If you have any other questions or need service in Arroyo Grande, Pismo Beach, or Morro Bay, our team is here to help.
When you need reliable parts, expert advice, or professional repairs for your equipment, turn to Contractor's Maintenance Service. We provide the essential support to keep your operations running safely and efficiently. Visit us online to explore our full range of products and services at https://www.contractorsmaintenanceservice.com.