


A Contractor's Guide to Paint Gun Tip Sizes for Flawless Finishes
- Jan 21
- 17 min read
Staring at the numbers on a paint gun tip can feel like you're trying to crack a secret code. But it's actually pretty simple. Those three digits, like on a classic 517 tip, tell you everything you need to know about the spray pattern's width and how much paint will come out.
Getting this right is the first step to laying down a perfect, professional finish every single time.
How to Instantly Read Paint Gun Tip Sizes
Think of a paint gun tip like the nozzle on your garden hose. You can switch between a wide, gentle fan for watering the lawn or a tight, powerful stream for blasting dirt off the driveway. The numbers on your spray tip give you that exact same control over your paint.
This directly impacts your speed on the job, your material costs, and the final quality of your work. For any professional painter, whether you're spraying a big commercial building in San Luis Obispo or detailed trim on a home in Paso Robles, Arroyo Grande, Atascadero, or the surrounding areas, mastering this is non-negotiable.
Decoding the Three-Digit Code
The system is surprisingly straightforward once you see how it works. Let's use the go-to 517 tip as our example to break it down.
The First Digit (Fan Width): Take that first number—in this case, a "5"—and just multiply it by two. That gives you the approximate width of your spray fan in inches when you're holding the gun about a foot from the surface. So, a 517 tip creates a 10-inch fan. A 417 would give you an 8-inch fan, and a 217 shrinks down to a tight 4-inch fan. Simple as that.
The Last Two Digits (Orifice Size): The last two numbers—the "17"—tell you the size of the tip's opening, or orifice, in thousandths of an inch. A 517 tip has an orifice that's .017 inches wide. This number is all about flow. A 515 has a smaller .015-inch opening for thinner materials, while a 519 has a larger .019-inch opening that lets you push thicker coatings through.
Key Takeaway: The first digit controls the width of your spray. The last two digits control the volume of paint you're putting down. Matching both to your paint and your project is what separates the pros from the amateurs.
This quick reference table makes it even easier to see how the numbers work together.
Decoding Common Spray Tip Numbers at a Glance
Tip Code Example | First Digit (Fan Width) | Last Two Digits (Orifice Size) | Resulting Spray Pattern |
|---|---|---|---|
517 | 5 (x2) = 10" fan | 17 = .017" orifice | A 10-inch fan with a medium orifice for general use. |
415 | 4 (x2) = 8" fan | 15 = .015" orifice | An 8-inch fan with a smaller orifice for less flow. |
621 | 6 (x2) = 12" fan | 21 = .021" orifice | A wide 12-inch fan with a large orifice for thick paint. |
211 | 2 (x2) = 4" fan | 11 = .011" orifice | A tight 4-inch fan with a tiny orifice for fine finish work. |
As you can see, a tiny change in the numbers completely alters how the tip performs on the wall.
A standard 517 tip, with its 10-inch fan and .017-inch orifice, delivers a flow rate of about 0.31 gallons per minute (GPM), which is why it's such a versatile workhorse for so many contractors. For a closer look at how different sprayers handle these tips, check out the specs on a popular gun like the Genuine Titan RX-80 airless spray gun. You can also find more great insights on picking the right gear over at Dunn-Edwards.
Translating Orifice Size into Job Site Speed
Knowing the numbers on a tip is one thing. Understanding how they directly impact your wallet—that's where the real pros separate themselves. The size of the orifice, those last two numbers on the tip, is what controls how much paint you’re putting down. We measure this in Gallons Per Minute (GPM), and it's a number that every serious painter should live and breathe.
A bigger hole means a higher GPM, which means you cover more ground, faster. For a professional, switching to a larger, more appropriate tip isn't just a small tweak. It's a strategic decision that directly boosts how much work you can get done in a day, which ultimately pads your bottom line.
This diagram breaks down exactly how a standard 517 tip works. The first digit handles the fan width, and the last two control the orifice size.
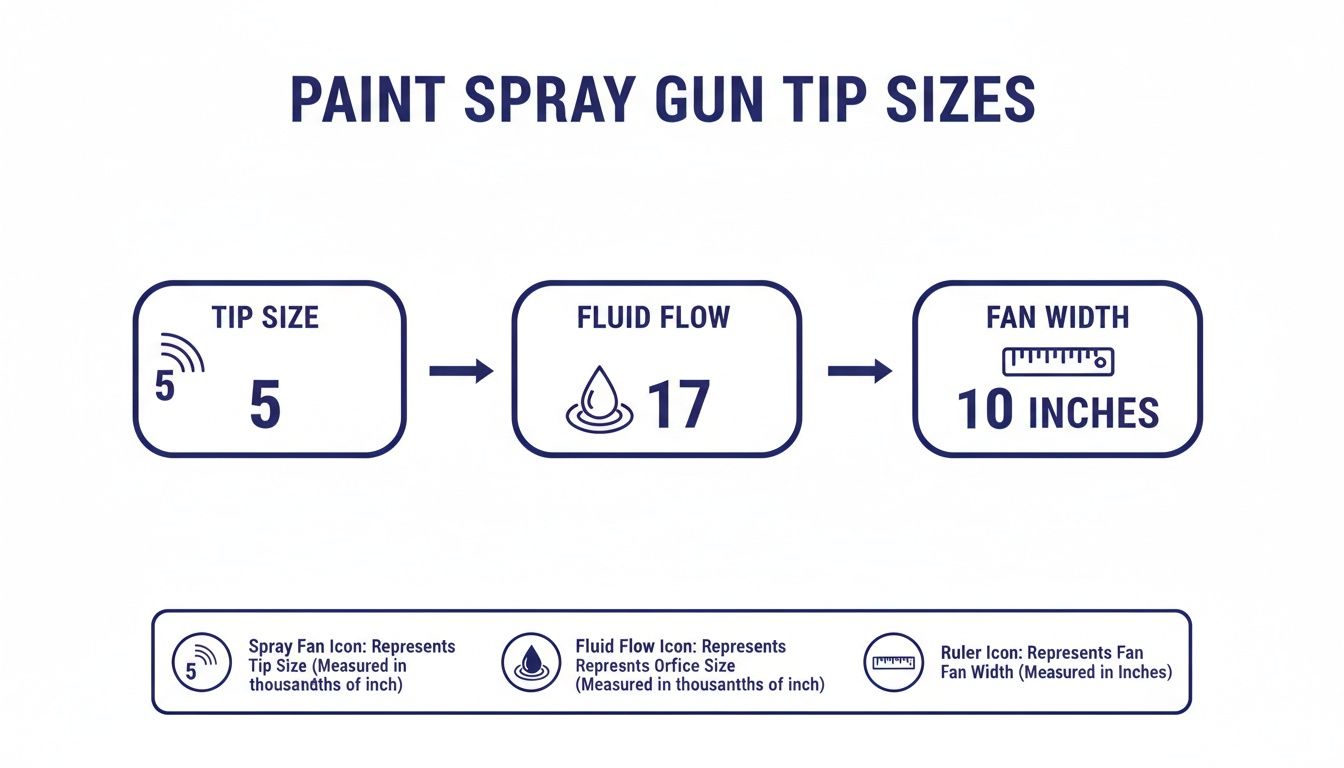
As you can see, the "5" tells you the fan will be 10 inches wide (you just double the first number). The "17" means the orifice is .017" in diameter, which dictates how much paint flows through it.
Paint Gun Tip Size to Flow Rate Conversion Chart
This chart is your cheat sheet for connecting orifice size to the material flow rate. Use it to quickly estimate your speed and match the right tip to the right material.
Orifice Size (.0XX) | Flow Rate (GPM) | Best For (Material Type) | Common Tip Code Examples |
|---|---|---|---|
.009" - .011" | 0.08 - 0.12 | Stains, Lacquers, Clear Coats | 211, 311, 411 |
.013" - .015" | 0.16 - 0.24 | Enamels, Interior Latex (Walls) | 413, 515 |
.017" - .019" | 0.31 - 0.40 | Thicker Latex, Primers, Elastomerics | 517, 619 |
.021" - .025" | 0.47 - 0.71 | Very Thick Latex, Block Fillers | 521, 525 |
.027" - .035" | 0.84 - 1.48 | Texture Coatings, Drywall Mud | 527, 631, 635 |
Remember, these GPM values are estimates. Your actual flow rate will vary depending on your sprayer's pressure setting and the thickness of your material.
Connecting Flow Rate to Your Bottom Line
Let's make this real. Imagine you just landed a job spraying the interior of a new 5,000 sq ft commercial warehouse in San Luis Obispo. Every minute you're on that site costs you money. Let's see how one small choice—your tip—affects your entire day.
Scenario A: You grab a 515 Tip (.015" Orifice) This tip gives you a flow rate of about 0.24 GPM. It’s a solid, reliable choice, but for a wide-open space like this, it’s going to feel slow.
Scenario B: You step up to a 519 Tip (.019" Orifice) With this slightly larger tip, your flow rate jumps to roughly 0.40 GPM.
That’s a 66% increase in how much paint you’re laying down. On a big job, that difference is enormous. A task that might have taken you 10 hours with the smaller tip could now be done in just over 6 hours. You just saved nearly half a day of labor, which means you can pack up and head to the next job in Atascadero or Arroyo Grande that much sooner.
Profitability Insight: Increasing your GPM by choosing the right orifice size is one of the easiest ways to slash labor hours. Less time on site means lower labor costs and better margins on every single project.
But hold on. You can't just slap on the biggest tip you can find. Speed has to be balanced with control, and that’s where the thickness of your paint comes into the picture.
How Viscosity Dictates Your Tip Choice
Viscosity is just a fancy word for how thick a liquid is. Honey has a high viscosity; water has a low one. When it comes to spraying, the viscosity of your coating is the single most important factor in picking the right orifice size.
Think of it like this: trying to drink a thick milkshake through a tiny coffee stirrer is a losing battle. You need a wide straw. The same goes for paint. A thick block filler (your milkshake) needs a wide opening to flow. Forcing it through a tiny hole will either fail completely or put a ton of strain on your sprayer's pump.
Thin Materials (Low Viscosity): Stuff like stains, lacquers, and varnishes are watery and flow easily. They need a smaller orifice (think .009" - .013") to atomize properly without creating a runny, wasteful mess.
Thick Materials (High Viscosity): Heavy latex paints, primers, block fillers, and elastomeric coatings are much thicker. They require a much larger orifice (anywhere from .017" - .035") to let enough material through without constantly clogging up.
For painters on the Central Coast, from the damp marine layer in Morro Bay to the dry heat of Paso Robles, temperature plays a big role, too. Paint gets thicker when it's cold and thins out when it's hot. That means you might need to adjust your tip size throughout the day to keep spraying perfectly. Nailing this match prevents clogs, saves you headaches, and ensures you lay down a flawless coat every time.
Choosing the Right Tip for Any Paint or Surface
Stepping onto a job site, whether it's a new build in San Luis Obispo or a historic remodel in Arroyo Grande, means making dozens of small decisions that lead to a big result. One of the most important is picking the right paint gun tip. This choice is your secret weapon for balancing speed, getting that flawless finish, and keeping material costs in check.
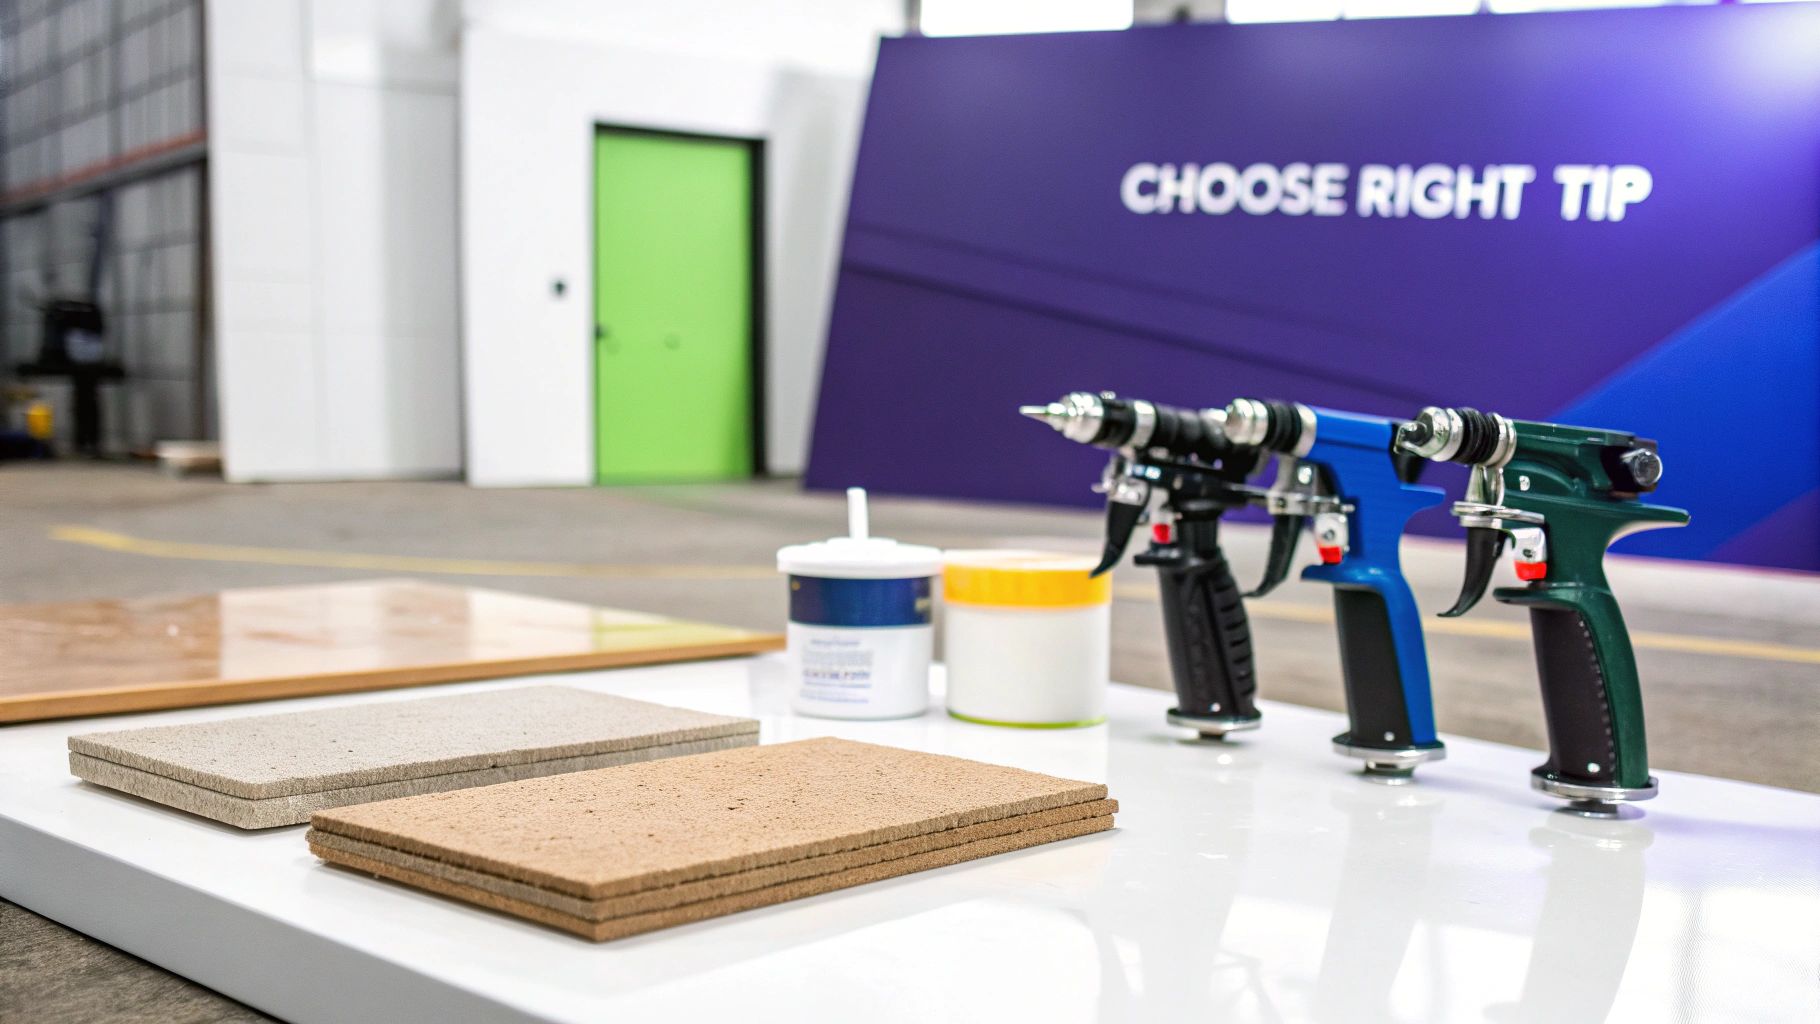
Think of it like this: you wouldn't use a sledgehammer to hang a picture frame, right? In the same way, you shouldn’t use a massive tip to spray delicate trim. The thickness of the paint, the surface you're spraying, and the finish you're aiming for all point you toward the right tip.
Matching the Tip to Interior Latex Paints
For interior walls and ceilings, the game is usually about speed and even coverage. Standard acrylic latex paints are your everyday, medium-thick materials, and they spray beautifully with the right setup. This is where the workhorse tips really shine.
A tip with an orifice between .015” and .017” is the sweet spot for most interior latex. This size gives you great atomization and a flow rate you can actually control, preventing runs while still letting you move at a good pace.
For Wide-Open Walls: A 517 tip is a contractor's best friend. That 10-inch fan covers huge areas efficiently, making quick work of big, empty rooms.
For Tighter Spaces: In smaller rooms or around lots of windows and doors, switching to a 415 gives you way more control. The narrower 8-inch fan cuts down on overspray, which saves you a ton of time on masking and cleanup.
Pro Tip: When you're working on a high-end job that demands an ultra-smooth finish, grab a fine-finish tip like a 312 or 414. These specialized tips break up the paint better at lower pressures, leaving a glass-like finish that’s perfect for those premium residential projects.
Selecting Tips for Exterior Latex and Primers
Exterior jobs, from siding in Atascadero to stucco homes in Paso Robles, are all about durability and making sure the paint sticks. Exterior latex and primers are almost always thicker than interior paints because they have to stand up to sun, rain, and everything else. That extra thickness means you need a bigger hole for the material to flow properly.
For most exterior latex work, you’ll want to jump up to an orifice size in the .017” to .021” range.
Siding and Broad Surfaces: A 519 or 619 tip lets you lay down a heavy, even coat that seals and protects. The wider fan and higher flow are exactly what you need for covering large elevations fast.
Porous or Textured Surfaces: When you’re spraying rough stucco or porous block, a bigger tip isn't optional—it's essential. You might even need a 521 or 525 to push thick block fillers and elastomeric coatings, making sure you fill every little crack for a uniform, weatherproof finish.
Tips for Stains and Sealers
Stains and sealers are the complete opposite of thick exterior paints. These materials are thin and watery, and they’ll run everywhere if you use a tip made for paint. With these, it's all about control and fine atomization.
For stains, lacquers, and clear sealers, a small orifice is a must. Stick with tips in the .009” to .013” range.
Fences and Decks: A 311 or 411 tip gives you a soft, controllable spray that’s perfect for applying stains. The narrow fan offers great precision for hitting individual boards and railings without making a mess.
Fine Woodwork: For clear coats on doors or built-ins, a 210 fine-finish tip will deliver a factory-quality look with almost no overspray.
Handling Oil-Based Enamels and Trim Paint
When you're spraying trim, doors, and cabinets, the finish is everything. Oil-based and waterborne enamels are designed to level out perfectly, but you have to apply them right to avoid drips and sags. Here, precision beats speed every time.
For these finer jobs, a tip with an orifice between .011” and .015” is your best bet.
Doors and Trim: A 313 or 413 strikes a great balance between coverage and control. It lets you lay down a wet, even coat that will smooth itself out beautifully.
Cabinets and Furniture: For that ultimate smooth finish, an HVLP sprayer is usually the top choice. But if you're using an airless, a fine-finish, low-pressure (FFLP) tip like a 310 or 312 is the next best thing. These tips work at lower pressures, turning the paint into a fine mist that settles perfectly on the surface.
No matter the project, from Morro Bay to anywhere in the San Luis Obispo area, having a local partner makes a huge difference. At Contractor's Maintenance Service, we stock a full range of genuine tips for any application and have the expertise to help you match the perfect tip to any coating or surface.
How Sprayer Pressure Impacts Tip Performance
Nailing the perfect paint gun tip size is only half the battle. If you don't pair it with the right sprayer pressure, you're setting yourself up for a frustrating day. Think of your tip and pressure settings as a team—when they work together, you get a flawless finish. When they don’t, even the best tip will underperform, sabotaging your work and wasting good paint.
This relationship all comes down to one key concept: atomization. That’s the fancy term for breaking down paint into a fine, consistent mist. The right pressure creates perfect atomization, which gives you an even coat, great adhesion, and a professional look on every job, whether it's a big commercial space in San Luis Obispo or detailed trim work in Atascadero.
What Happens When Your Pressure Is Wrong
Ever used a showerhead with weak water pressure? The water just kind of dribbles out in streams. Crank it up too high, and it blasts out as an uncontrollable fog. Your paint sprayer works the exact same way. Setting the pressure incorrectly leads to distinct, frustrating problems that cost you time and material.
Pressure Too Low: This is the number one cause of "fingering" or "tails." Instead of a soft, oval-shaped fan, your spray pattern will have heavy bands of paint at the top and bottom with almost nothing in the middle. Your sprayer just isn't generating enough force to fully atomize the paint, leaving you with ugly stripes that you’ll have to back-roll to fix.
Pressure Too High: It's tempting to just crank the pressure to the max, but that creates its own set of headaches. You'll get massive overspray—a cloud of wasted paint that settles on everything you didn't want to paint. It also wears out your tip much faster and puts a ton of unnecessary strain on your sprayer's pump, which can lead to it failing prematurely.
Crucial Insight: The goal isn't to use the highest possible pressure. It's to find the lowest pressure that still gives you a perfect spray pattern. This one simple principle saves paint, extends the life of your tip and sprayer, and delivers a better finish.
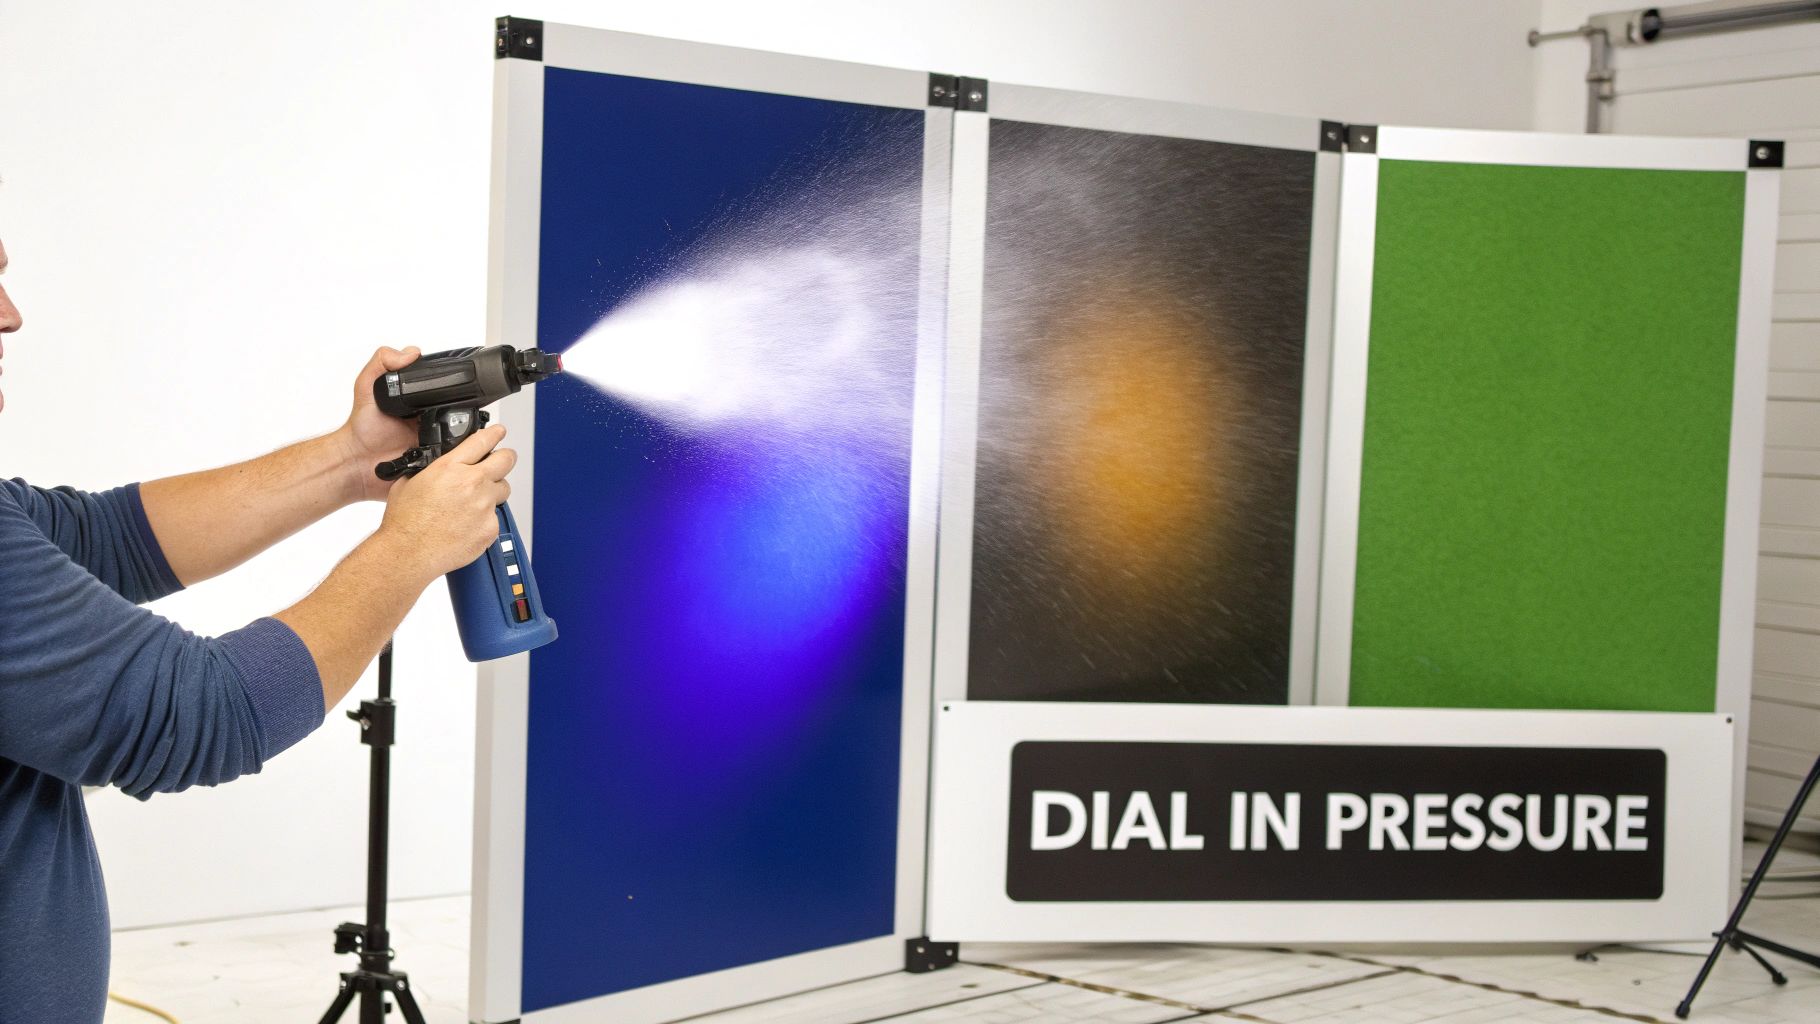
How to Dial in the Perfect Pressure
Finding that pressure sweet spot is a quick and easy process. Don't just set it and forget it. Take a minute to do this every time you start a job or switch to a new material.
Start Low: Turn your sprayer's pressure control all the way down.
Test the Spray: Grab a piece of cardboard or find a hidden spot and spray a test strip. You’ll almost definitely see fingering in the pattern.
Increase Gradually: Slowly turn up the pressure in small bumps, spraying another test strip after each adjustment.
Find the Sweet Spot: Keep increasing the pressure just until the tails disappear and you have a soft, even, fully atomized spray pattern. Stop right there. That’s your perfect working pressure.
This method ensures you’re using just enough energy to get the job done right. For pros running workhorse machines day in and day out—like those who learn more about the Graco Ultra 390 airless paint sprayer—this technique is essential for maximizing the lifespan of your gear and keeping more money in your pocket.
The Role of Speed and Distance
Your tip and pressure are two parts of the trifecta for a perfect finish. The last piece is your own technique: spraying distance and speed. Keeping these consistent is what pulls everything together.
Consistent Distance: Hold the spray gun perpendicular to the surface, about 10-12 inches away at all times. If you get too close, you’ll get runs and drips. Spray from too far away, and the paint particles will start to dry in mid-air, leaving you with a rough, sandy texture and poor adhesion.
Consistent Speed: Move your arm at a steady, even pace. Go too fast, and your coat will be thin and transparent. Move too slowly, and the paint will build up too thick, leading to sags and runs.
By combining the right tip with the lowest effective pressure and a consistent application technique, you create a bulletproof system that delivers flawless results on every project across the Central Coast, from Paso Robles to Arroyo Grande.
Solving Common Problems with Paint Gun Tips
Even the best pros run into equipment issues on the job. When your sprayer starts acting up, every minute of downtime is money out of your pocket. Think of this as your field guide for diagnosing and fixing the most common headaches tied to your paint gun tips, so you can get back to work fast.
Most problems—spitting, constant clogs, or a weird-looking spray pattern—usually point back to just a handful of simple causes. If you know what to look for, you can solve them in minutes, not hours.
Clogs and Spitting
A sudden clog or an intermittent spit is probably the most common frustration out there, but thankfully, it's also one of the easiest to fix. It almost always means a tiny piece of debris is blocking the paint from flowing smoothly through the tip's orifice.
Your first move should always be the Reverse-A-Clean (RAC) feature. Just twist the tip 180 degrees, aim at a piece of cardboard or scrap, and pull the trigger. The pressure will blast the clog out backward. Flip it back around, and you're good to go.
To stop clogs before they start:
Strain Your Paint: Never skip this step. Always strain a new bucket of paint to catch any dried bits, gunk, or debris from the factory.
Check Your Filters: A dirty or damaged filter is useless. Make sure your gun and manifold filters are clean and the right mesh size for your material. A clogged filter will cause problems down the line, so keeping spares like a dependable gun filter unthreaded on hand is a smart move.
Distorted Spray Patterns or Fingering
Is your once-perfect spray fan starting to show heavy lines or "tails" on the edges? That’s called fingering, and it’s your sprayer’s way of telling you something is wrong. An uneven pattern like this means the paint isn't atomizing correctly, which leaves you with a shoddy finish that you’ll have to back-roll.
Here are the usual suspects:
Pressure is Too Low: This is the #1 cause, hands down. Bump up your sprayer's pressure in small steps until the tails vanish and you get a nice, soft, even oval pattern.
Material is Too Thick: Paint has a tendency to thicken up, especially in the cold weather we sometimes get here in San Luis Obispo. You might need to thin your material just a bit, always following the manufacturer's directions.
The Tip is Worn Out: This is a big one. Over time, the abrasive particles in paint act like sandpaper on the tip's orifice, slowly widening the hole and messing up the fan pattern. You can crank up the pressure to compensate, but that's just a temporary fix that wastes paint and puts extra strain on your sprayer. The only real solution is a new tip. A good rule of thumb is to replace your tip after spraying 50-150 gallons of latex.
A worn-out tip can waste up to 20% of your paint through overspray and heavy application. Replacing it is a small investment that pays for itself by saving on material costs and reducing cleanup time.
Beyond getting your tip to perform its best, keeping your team safe is the top priority. To avoid the health hazards that come with atomized paint, it's crucial to follow all essential personal protective equipment (PPE) requirements. A safe job site is a productive one. By learning to spot these common issues quickly, contractors in Atascadero, Arroyo Grande, and across the Central Coast can keep downtime to a minimum and deliver a professional finish every time.
Your Local Sprayer Experts in San Luis Obispo County
Knowing your way around paint gun tip sizes is one thing, but having solid local support is what really keeps a professional painting business in the black. When your equipment breaks down or you need a specific part right now, waiting for a shipment just isn't an option. That’s when having a trusted partner on the Central Coast makes all the difference.
For painting pros working anywhere from the rolling hills of Paso Robles and Atascadero to the coastal towns of Morro Bay and Arroyo Grande, Contractor's Maintenance Service has become the go-to shop. We're proud to be part of the San Luis Obispo community, offering the expert sprayer service and sales that keep your business running smoothly.
Your One-Stop Shop for Sales and Service
We get it—downtime isn't in your vocabulary. Our shop is an authorized warranty and repair center for the biggest names in the business, including Graco and Titan. Whether you need routine maintenance to keep your rig in top shape or an urgent fix to get back on the job, our crew has you covered.
Our promise to local contractors is simple:
Expert Diagnostics: We get right to the heart of the problem, whether it's a pressure issue or a motor failure, so we can fix it right the first time.
Fast Turnarounds: Our main goal is to get your equipment out of our shop and back in your hands as quickly as possible.
Genuine Parts in Stock: We keep a full inventory of genuine replacement tips, filters, packings, and accessories. You’ll find exactly what you need for any job, without the wait.
More Than Just Repairs
We’re not just here to fix what’s broken. We offer the kind of practical, hands-on advice that helps keep your projects on schedule and your business growing. Whether you're trying to pick the right paint gun tip for a tricky coating or troubleshooting a problem on-site, our experienced team provides real-world solutions.
We’re more than just a parts supplier—we’re a partner in your success. Our deep knowledge of spray equipment and the demands of local jobs means you get the right advice and the right gear, every single time.
From a quick tip swap to a complete sprayer overhaul, our team in San Luis Obispo is here to support the hardworking contractors across the county. We're dedicated to providing the reliable service and quality parts that keep your business spraying.
Your Top Questions About Paint Gun Tips, Answered
Even after you’ve got a handle on the numbers and codes, real-world questions always pop up on the job. Here are some quick, no-nonsense answers to the questions we hear most often from pros right here on the Central Coast.
How Often Should I Replace My Sprayer Tip?
This really depends on what you're spraying. If you’re pushing a lot of abrasive material through it, that tip won't last long. A good benchmark for contractors is to swap out your tip after every 50 to 150 gallons of latex paint.
The real test is looking at your spray pattern. When you start seeing "fingering" or heavy tails on the edges and the fan width shrinks, it’s time for a new one. A worn tip atomizes poorly, which means you’re wasting paint and time trying to get an even coat.
Can I Use the Same Tip for Primer and Topcoat?
You can, but I wouldn't recommend it. Primers, especially the high-build or block-filler types we use on new construction in Paso Robles, are way thicker than your finish paint. They need a larger orifice—think .017 to .021—to flow smoothly without constant clogging or putting a strain on your pump.
Your latex topcoat, however, will lay down much nicer with a smaller tip, like a .015 or .017, giving you that fine finish the client wants. When in doubt, always check the paint can or the manufacturer's data sheet for their recommendation.
Expert Tip: Before you hit the wall, always spray a test pattern on a scrap piece of cardboard or drywall. A minute of testing can save you hours of fixing a bad finish.
What Exactly Is a Fine Finish Tip?
A "fine finish" tip is a specialized tip designed for jobs where the final look is everything. It actually has a pre-orifice that atomizes the paint twice, creating an incredibly soft, smooth spray pattern with feathered edges. This means less overspray and a more professional look.
They are the go-to choice for detailed work, such as:
Cabinets
Trim and molding
Doors
Furniture
These tips shine when used with thinner materials like lacquers, stains, and enamels at lower pressures. For contractors working on custom homes from Arroyo Grande to Atascadero, using a fine finish tip is what separates good work from great work.
Does the Brand of the Tip Really Matter?
Absolutely. The brand and quality of your tip make a huge difference. While a cheaper aftermarket tip might fit, genuine tips from manufacturers like Graco or Titan are precision-engineered with higher-grade tungsten carbide. They're designed to work seamlessly with their guards and guns.
Sticking with genuine parts ensures you get a consistent spray pattern, a proper safety seal, and a much longer working life from your tip. It’s a small detail that protects your equipment investment and guarantees the best possible finish for your customers.
When you need straight answers or the right parts to keep your jobs moving, Contractor's Maintenance Service is here for professionals across the Central Coast. We have the tips, filters, and hands-on sprayer knowledge to help your business perform at its best.


Comments